As we all know, Microsoft recently unveiled its new desktop operating system – Windows 11. Compared to Windows 10, Windows 11 has a more refined look, and it introduced some excellent new features.
Apart from the Windows 11 features & design overhaul, Microsoft has also upped the requirements to run the new Windows 11 operating system on PCs. The operating system needs at least 4GB of RAM to run, and your PC is required to meet the minimum TPM requirements to install Windows 11.
Recently, we have received multiple messages from our readers on our Facebook page asking about how to create a Windows 11 bootable USB drive. Therefore, in this article, we have decided to share a step-by-step guide on creating a Windows 11 bootable USB drive.
How to Create Windows 11 Bootable USB Drive
Well, before creating a bootable USB drive, you first need to ensure that your PC meets the minimum system requirements to run Windows 11.
If your PC meets the minimum requirements, you can continue with the steps. Creating a Windows 11 bootable USB drive is pretty easy, provided you already have the ISO files. Follow some of the simple steps given below to create a Windows 11 bootable USB drive.
Format the USB Drive/Pendrive
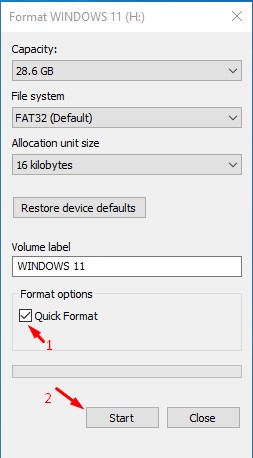
The very first thing that you need to do is to format your USB drive. Then, simply plug the USB Pendrive into your Windows PC and copy all necessary data to any other drive.
Once done, you need to right-click on the USB drive and select the option ‘Format‘. Then, on the Next popup, select ‘Quick Format’ and finally click on the ‘Start‘ button.
Download the Windows 11 ISO file
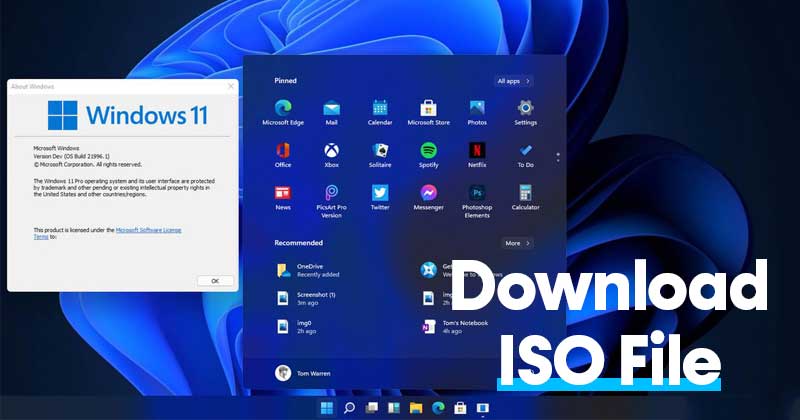
Well, this is the most important part of the guide. Next, you need to download the Windows 11 ISO files. However, the problem here is that Microsoft hasn’t yet shared download links of any ISO files for Windows 11.
So, you can’t directly download the ISO file from Microsoft’s official website. However, you can look around through Twitter, Facebook, or Google for Windows 11 ISO files.
Many users have been sharing the leaked image file of Windows 11 in Facebook groups. You can grab those files. However, please ensure you don’t download some malware or virus on the pretext of Windows 11 ISO.
Download Rufus
If you have managed to get the Windows 11 ISO file, the next step is downloading the Rufus program. Rufus is a Bootable USB creator that lets you create a bootable USB drive. You can use it to create a Windows 11 bootable USB drive.
Compared to all other Bootable USB creators, Rufus is easy to use and lightweight. Here’s how to use Rufus.
Creating a Windows 11 Bootable USB drive
The next step is to create a Windows 11 bootable USB drive. For that, you need to follow some of the simple steps given below.
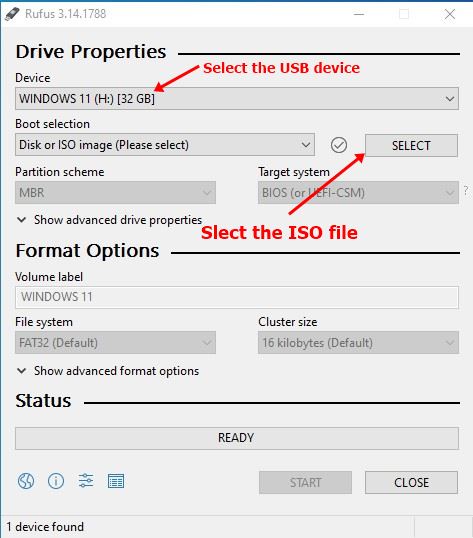
- First of all, install Rufus on your system. Launch the program, and select the USB drive under the Device.
- On the Boot Selection, click on the Select button and locate the ISO file that you have downloaded.
- Under the Partition scheme, select GPT if you are using UEFI or MBR if you’re using BIOS
- Once done, click on the Start button to create a Windows 11 bootable USB drive.
That’s it! You are done. This is how you can create installation media for Windows 11. You can then use the Bootable USB drive to install Windows 11 on any computer.
Apart from Rufus, you can even use other Bootable USB tools to create a bootable USB drive for installing Windows 11.
So, this guide is all about how to create a Windows 11 bootable USB. I hope this article helped you! Please share it with your friends also. If you have any doubts related to this, let us know in the comment box below.


Nice article. Very informative.