Let’s admit; there are times when we face problems accessing the internet. Even when the internet is working fine, sometimes we cannot connect to a particular webpage. This happens mainly due to DNS problems.
What is DNS?
Domain name system or DNS is a process that matches the domain names to their IP Address. When you enter a URL in the address bar, the DNS servers look at the IP Address of that domain. Once matched, it comments on the web server of the visiting website.
Sometimes the DNS tends to misbehave, especially the ones assigned by the ISPs. Unstable or outdated DNS cache often triggers different types of DNS-related errors. The all-new PS5 also connects with the internet and fetches websites via DNS.
So, if there’s a DNS problem, you might experience specific problems while using PS5. You might experience issues like multiplayer game lags, unable to update your account information, unknown DNS errors, and more. An outdated DNS server might also lead to slow internet speed in PS5.
Also Read: PS5 Tips & Tricks: 10 Hidden Features You May Not Know About
Which is the Best DNS server?
Even if your internet service provider provides you with a default DNS server, it’s always best to use a Public DNS server. Public DNS servers like Google DNS offers better security and speed.
There are almost hundreds of free DNS servers available out there. However, out of all those, Cloudflare, OpenDNS, Google DNS seems to be the right choice. For a complete list of the best free Public DNS servers, check out the article – 10 Best Free & Public DNS Servers
Steps to Change PS5 DNS settings
Changing DNS settings in PS5 is an easy process. You need to follow some simple steps. However, before changing the DNS settings, we recommend you check our article -. We have mentioned some of the best & reliable Public DNS servers in that guide. Depending on your choice, you can use any of them on your PS5.
Step 1. First of all, turn on your PS5 and log in. On the home screen, select the ‘Settings‘ icon located in the top-right corner.
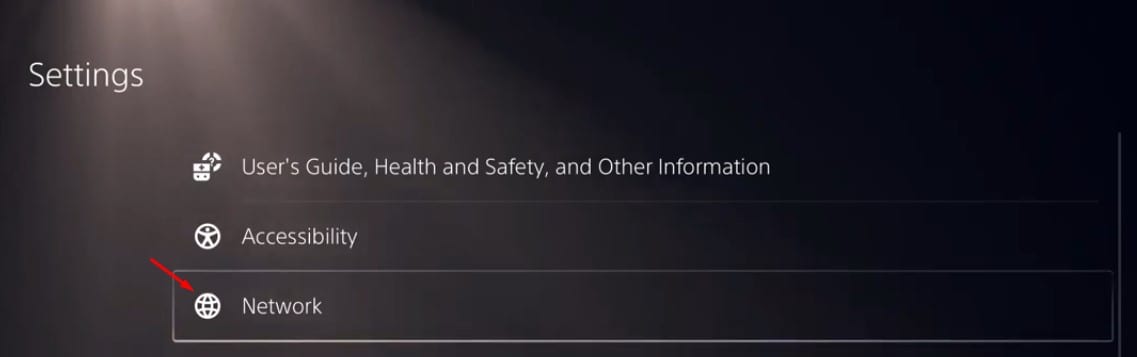
Step 2. On the Settings page, scroll down and select the ‘Network’ option.
Step 3. On the left pane, select ‘Settings’. On the right pane, select ‘Set Up Internet Connection.’

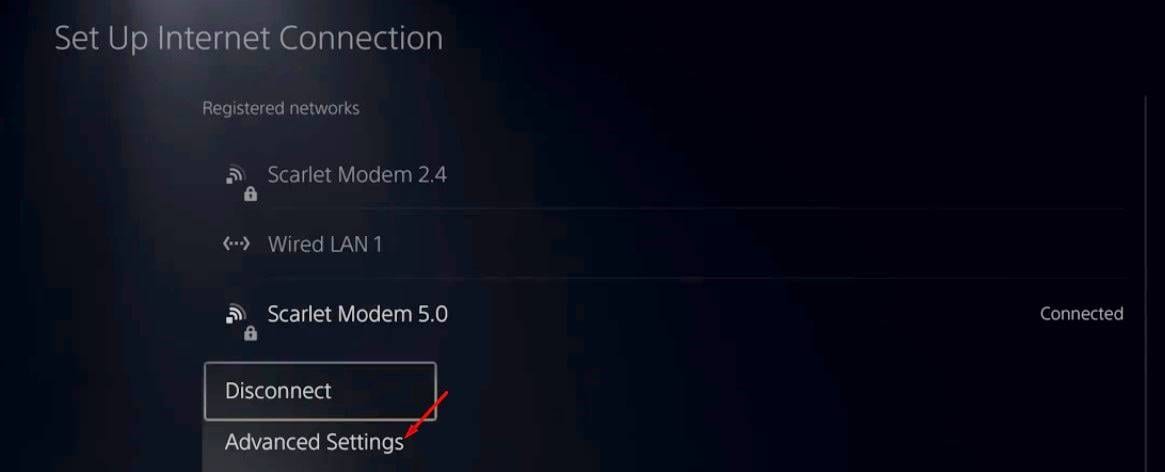
Step 4. Select the WiFi network you are using and choose the ‘Advanced Settings’ option.
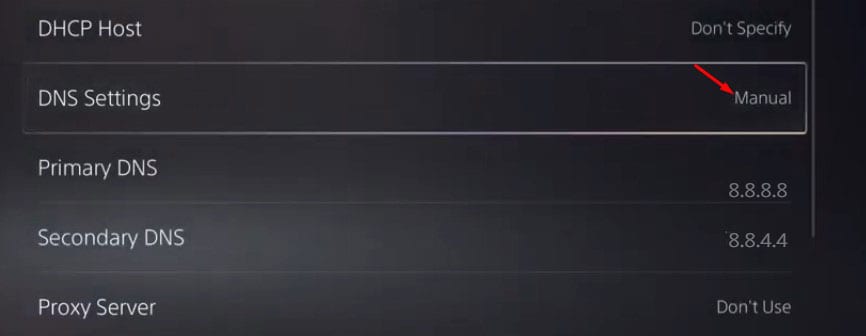
Step 5. Now on the DNS settings, select ‘Manual.’
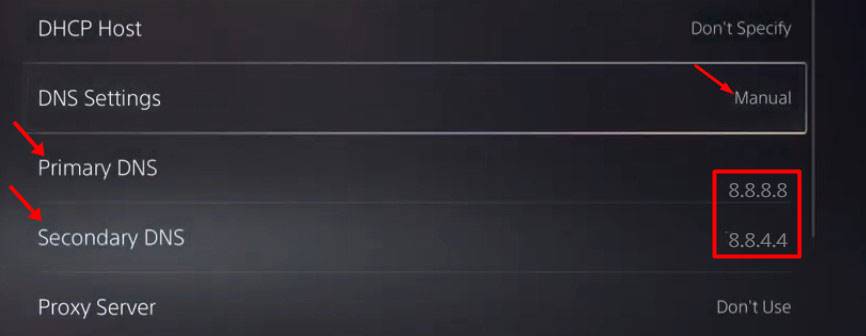
Step 6. On the Primary and Secondary DNS option, enter the DNS of your choice and press Ok.
That’s it! You are done. This is how you can change PS5 DNS settings.
So, this article is all about how to change PS5 DNS settings. I hope this article helped you! Please share it with your friends also. If you have any doubts related to this, let us know in the comment box below.


