On Windows 11, when you highlight text in a specific application or dialog box, the text color appears white, whereas the background color is blue. This is the default color scheme for text selection on Windows 10 & Windows 11 computers.
While the default color scheme for highlighted text looks good and makes it easier to read, you can change it as you wish. Being a highly customizable desktop operating system, Windows 11 allows you to change the color of the highlighted text.
However, to change the color of selected or highlighted text, you must do some hard work. You first need to get the RGB color value and add it to the Registry Editor.
Also read: How to Force Delete Undeletable Files in Windows 11
Steps to Change Color of Highlighted Text & Background in Windows 11
Hence, if you want to change the color of highlighted or selected text in Windows 11, you are reading the right guide. Below, we have shared a step-by-step guide on changing the color of the highlighted text in Windows 11.
1) Get the RGB Color Value
Before modifying the highlighted text color, you first need to grab the RBG Color value. You can grab the RGB Color value from Chrome by installing a color picker extension or using the Paint app.
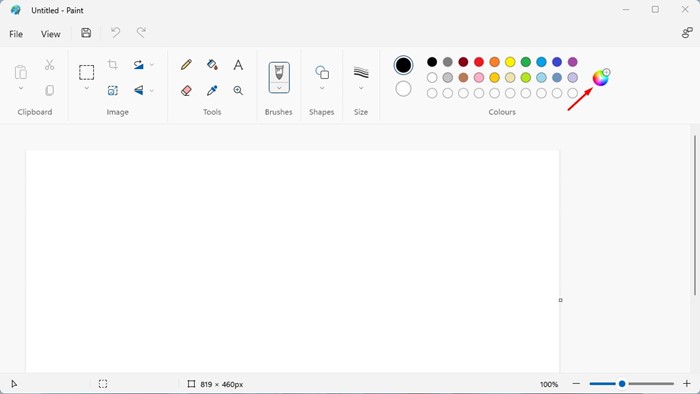
Getting RGB Color values from the Microsoft Paint app is pretty straightforward. You need to open the Pain app and click the color picker button.
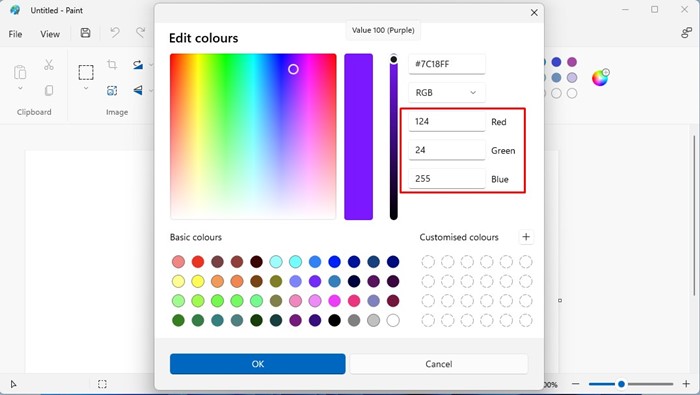
Now select the color that you want to set on the Color Picker. On the right pane, you will get the RGB Color value; copy and paste it into a Notepad.
2) Change the Background Color of Highlighted Text in Windows 11
To change the background color of the highlighted text in Windows 11, you must use the Registry Editor. Follow some of the simple steps we have shared below.
1. First, click on the Windows 11 search and type Registry Editor. Next, open the Registry Editor app from the list of options.

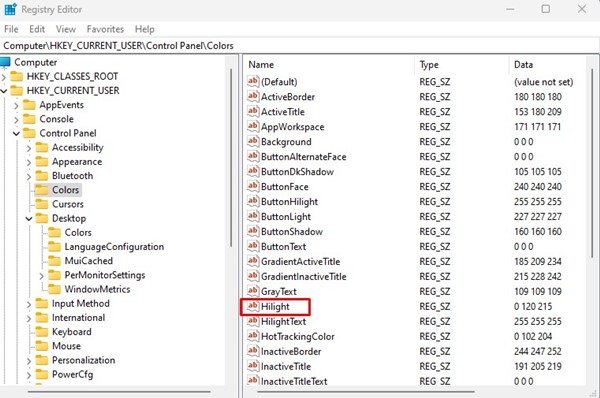
2. On the Registry Editor, navigate to the following path:
HKEY_CURRENT_USER\Control Panel\Colors
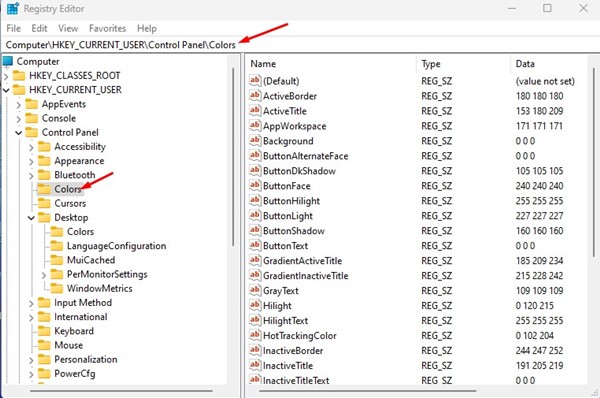
3. On the right pane, find and double click on the Hilight REG_SZ key.
4. On the Edit String prompt, enter the RGB Color value and click on the Ok button.
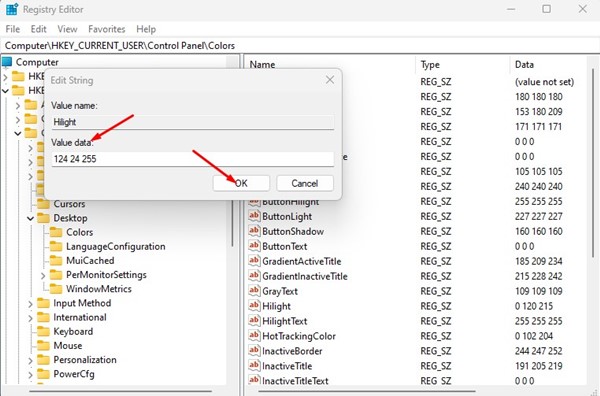
Important: The default RGB value of Highlighted Text Background is 0 120 215. If you ever wish to revert the changes, enter the default RGB value in Step 4.
That’s it! This is how you can change the background color of Highlighted text on Windows 11.
3) How to Change the Color of Highlighted Text in Windows 11
Just like the background color, you can also change the color of the highlighted text. For that, follow some of the simple steps shared below.
1. First, click on the Windows 11 search and type Registry Editor. Next, open the Registry Editor app from the list of options.
2. On the Registry Editor, navigate to the following path:
HKEY_CURRENT_USER\Control Panel\Colors
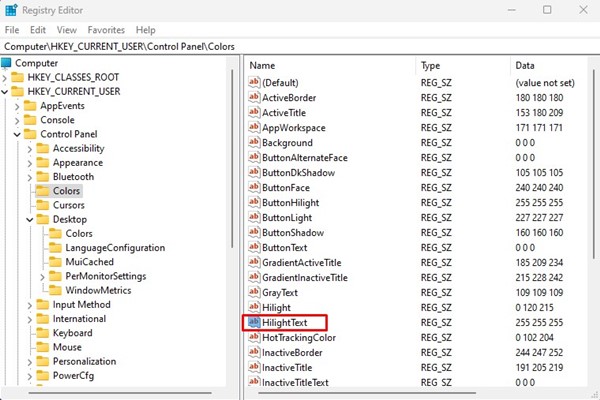
3. On the right pane, find and double click on the HilightText REG_SZ key.
4. On the Edit String prompt for HilightText, enter the RGB color code on the Value Data field. Once done, click on the Ok button.
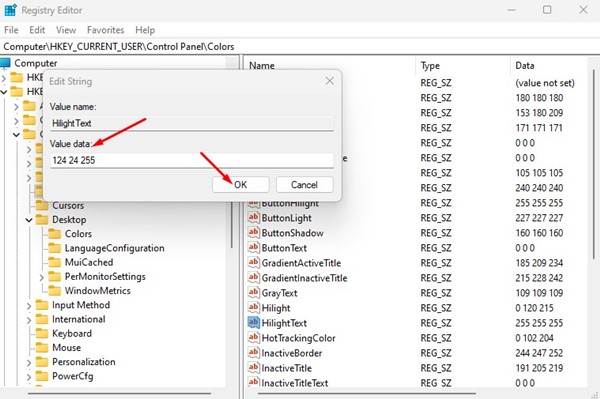
Important: The default RGB value of Highlighted Text is 255 255 255. If you ever wish to revert the changes, enter the default RGB value in Step 4.
That’s it! This is how you can change the color of the highlighted text on Windows 11 computer. You can also change the highlighted text color to fit with your theme. You can experiment with different colors until you find the one best suits your needs.
Also read: How to Check DirectX Version on Windows 11
So, that’s all about changing the color of highlighted text and text background in Windows 11. You can change the color of highlighted text & background to improve the readability. If you need more help, let us know in the comments below.


