Create a bootable clone of your Windows 10 Drive that can easily be restored and accessed anywhere, providing great portability to your data stored in that drive. Follow the tutorial below to proceed.
Cloning a hard drive permits you to duplicate every one of the information on one circle to another. It is generally utilized among desktop PC and Laptop clients when they need to redesign old little hard plates to another bigger one or Solid State Drive (SSD) or make a circle reinforcement to maintain a strategic distance from information misfortune brought about by infection, equipment disappointment, or different reasons.
A bootable clone is precise that can be utilized as a PC startup plate. Cloning is an imperative piece of your reinforcement arrangement and is likewise valuable when you need to redesign your applications, framework programming, or hard drive limit.
Also Read: Best Windows 10 Tips, Tricks, and Hacks
How to Create a Bootable Clone of your Windows 10 Drive
The method is simple and easy, and you need to follow some of the simple steps we discussed below.
Also Read: How to Use the Virtual Touchpad in Windows 10
Make Clonezilla Live Disk:
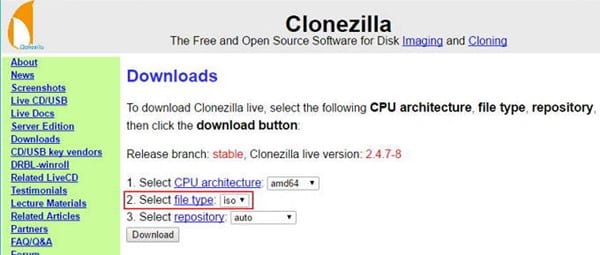
- Download Clonezilla. Get the form called “stable” with a series of numbers.
- In the following screen, change the record sort from “.zip” to “.iso.” Unless you know you require a 32-bit form of the product, you can leave CPU engineering as “amd64.” Leave the vault set to “auto.” Then, click “Download.”
- Embed a clear CD or DVD into your plate drive.

- Explore the downloaded ISO document in Windows Explorer. Right-tap on the document and pick “Smolder circle picture” from the setting menu.
- Affirm the right plate drive is chosen, and snap “Burn” to blaze a bootable form of the ISO to circle.
Boot into Clonezilla Live
- Ensure both your source and goal hard disks are associated with your PC.

- Reboot your PC.
- After you hear the single beep to show that POST was finished effectively, you will see your BIOS sprinkle screen. Now, press the F12 or DEL key (contingent upon your BIOS) to pick a boot circle. If you’re unsure what to press, search for an on-screen choice that says “Boot Menu.”

- Select your DVD drive from the resulting menu.
Initialize Clonezilla Live
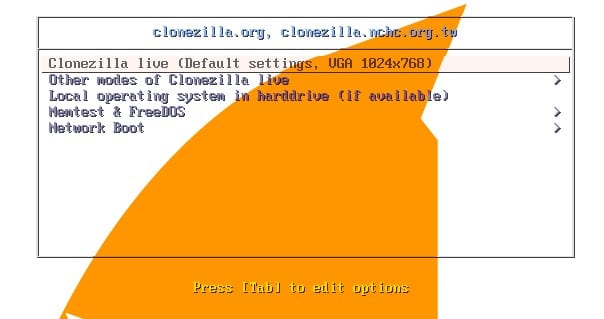
- Once Clonezilla Live begins, you’ll see a sprinkle screen. Leave the default and press “Enter” on your console.
- You’ll see some white content pass by, showing that Clonezilla is booting. At the point when it’s set, pick the fitting dialect.
- Leave the default determination (“Don’t touch keymap”), and press Enter on your console to choose.
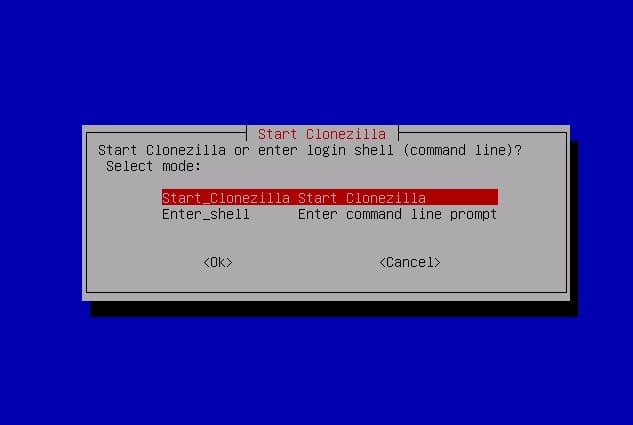
- Some more white content will pass by. When you observe a blue and dim screen, press Enter to pick “Start Clonezilla.”

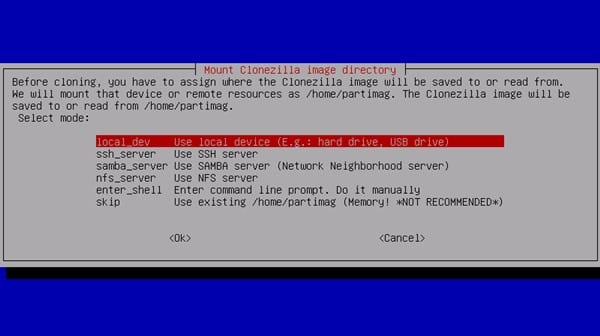
Set Up Disk Cloning
Since we’ve instated everything, we’re prepared to clone our circles.
- On the following screen, utilize the down bolt on your console to choose “device-device.” This permits you to clone, starting with one physical hard circle and then onto the next physical hard plate.
- Press the Enter key to pick “Beginner Mode, ” the default.
- On the following screen, leave the default determination of “disk_to_local_disk” and press Enter. This setting permits you to clone one physically-associated plate to another physically-associated circle. Alternate alternatives permit you to clone to organize associated plates or work with segments.

- Select the source plate and press Enter.
- Select the goal disk and press Enter. Once more, you may see all the more hard drives here.
- Leave the default alternative to skip checking or repairing the source document framework and press Enter.
- Press Enter again to start the cloning procedure.
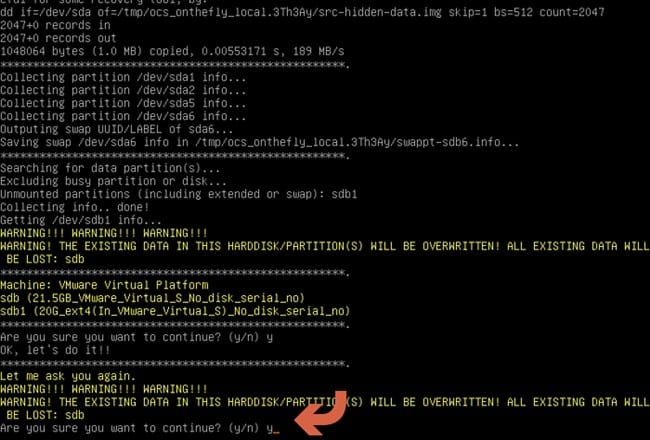
Run Cloning Process
- Clonezilla will request that you affirm that you must clone the plates, eradicating the goal circle. Ensure everything looks amend before writing “y” and squeezing Enter.
- Clonezilla truly needs you, no doubt. Affirm your decisions once more, then sort “y” and press Enter.
- You’ll see Clonezilla make the segment table in the goal circle.
- Whenever invited, sort “y” and press Enter to affirm that you need to clone the bootloader to the goal drive. The bootloader is the thing that permits the PC, to begin with, a circle; without the bootloader, the drive won’t be bootable.

- At long last, the cloning procedure starts! Watch out for the advance bars to perceive to what extent it will take.
-
- Whenever done, Clonezilla will run some self-keep eye on the cloned drive. Press Enter to proceed when provoked.
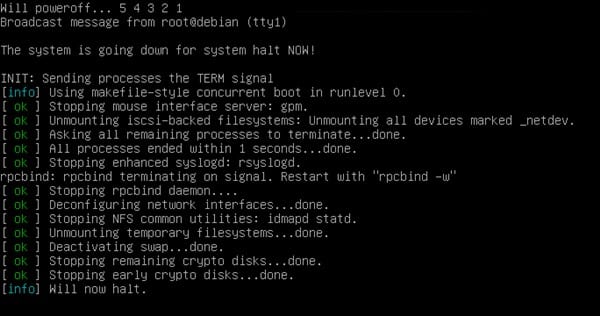
- In the following menu, press Enter to close down the machine.
- Following a five-second commencement, Clonezilla will stop itself, and the machine ought to kill. If your PC doesn’t close itself down, you can physically turn it off after you see the line that says [info] Will now end. You’re finished!

So above discussion is all about creating a bootable clone of your Windows 10 Drive. After the cloning procedure is finished, restart your PC and select your recently closed circle as your boot drive.