Sometimes DNS tends to misbehave, especially the ones assigned by ISPs. Unstable DNS servers often trigger errors such as DNS lookup failed, DNS server not responding, etc. There are hundreds of Public DNS servers available for free, and they offer better protection and speed. Here’s how you can add a custom DNS server on your phone.
Add Custom DNS Server On Android
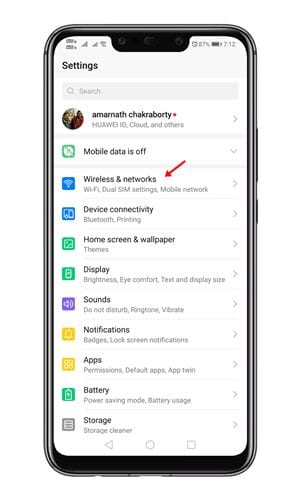
- Open the Settings app.
2. Tap Wireless & Networks.
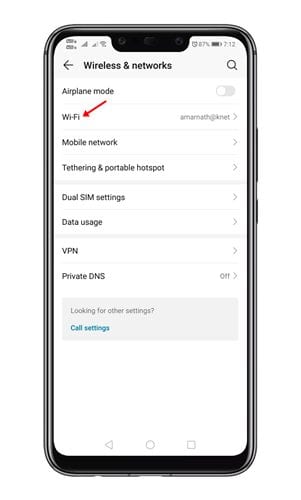
3. Tap WiFi.
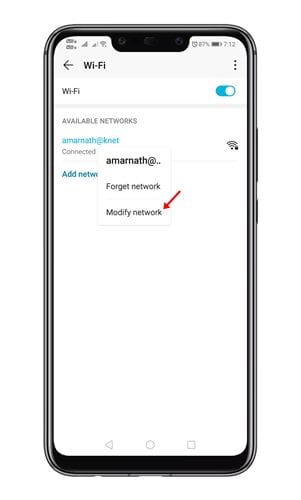
4. Long-press the connected network and select Modify Network.
5. Enable Show Advanced options.
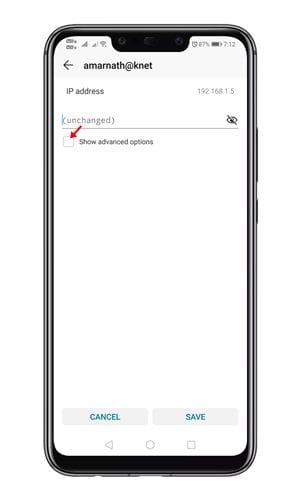
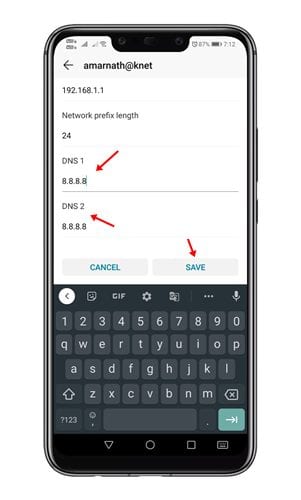
6. Scroll down to find the ‘DNS 1’ and ‘DNS 2’ fields. Enter the custom DNS server in both fields and tap Save.
Which is the best DNS Server for Better Speed?
Public DNS Servers are usually better than the ones assigned by your ISP. If you want to speed up web browsing and get enhanced security features, you should start using a public DNS server.
We have already shared a list of the best free public DNS servers; check it out to find the DNS servers that suit your needs.
Other Ways to Add a Custom DNS Server on Android?
If you don’t want to do all the manual work, you can use DNS Changer Apps to change the DNS. Most of these apps are free to download and use.
The DNS Changer app doesn’t need configuration; just launch it and select the best DNS server. The app will automatically change the DNS Server.
These are some simple steps to add a custom DNS server on Android. Also, if you find this guide helpful, don’t forget to share it with your friends.


