On Windows 11, you don’t need to install any third-party file encryption tool to encrypt your files & folders stored on a drive. You can use BitLocker, the built-in security feature, to encrypt your entire drive.
BitLocker is a great security feature as it prevents unauthorized access to your files and documents stored on your drive. On Windows 11, Microsoft upped the requirements for BitLocker, but you can still use it to encrypt your drive by bypassing the Trusted Platform Module (TOM) requirement.
If you already use BitLocker to encrypt your drive, you should also know how to disable it. While disabling BitLocker is not recommended if you care for your privacy & security; still, sometimes, you may need to disable the security feature for a few reasons.
Also Read: How to Remove Sound from Videos in Windows 11
How to Disable BitLocker Drive Encryption on Windows 11
Disabling BitLocker is pretty easy, especially on Windows 11 operating system. Below, we have shared a step-by-step guide to disable BitLocker drive encryption in the latest Windows 11 operating system. Let’s check out.
Important: We have used Windows 11 to demonstrate the process; you can also follow the same steps to disable BitLocker on Windows 10 operating system.
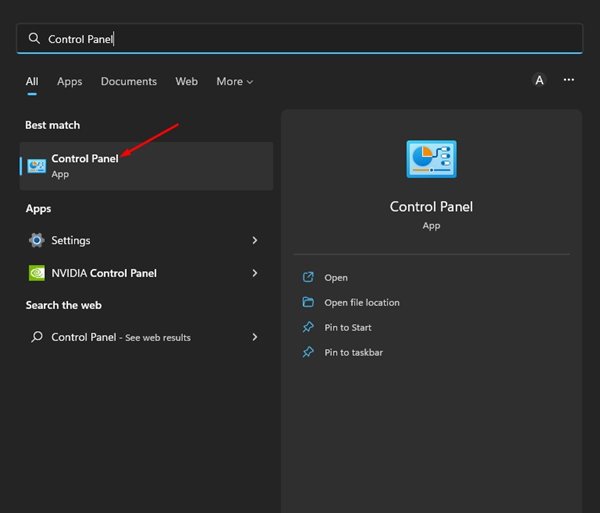
1. First, click on the Windows 11 search and type in Control Panel. Next, open the Control Panel app from the list of matching results.
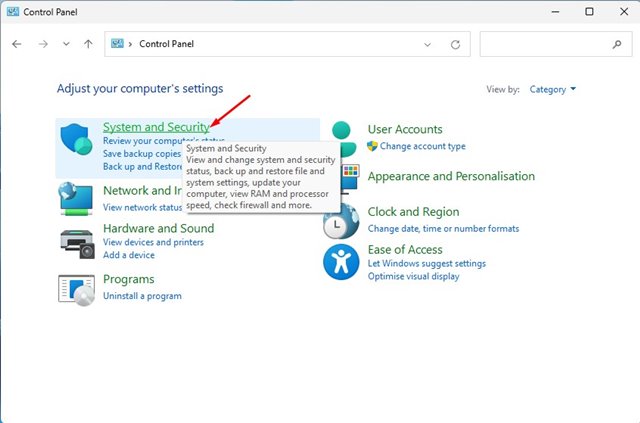
2. On the Control Panel, switch to the Category View. Next, click the System and Security option below in the screenshot.
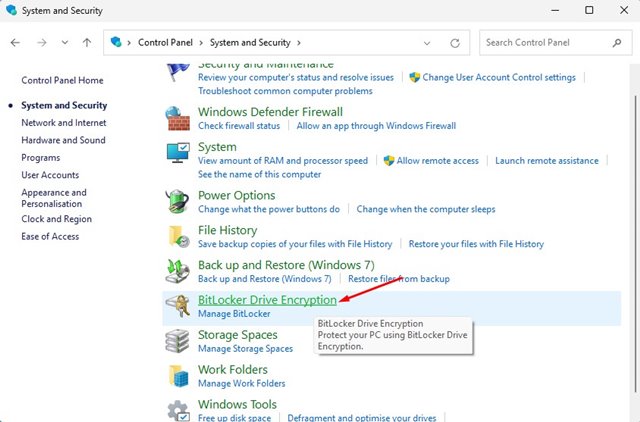
3. On the System and Security page, scroll down and click on the BitLocker Drive Encryption.
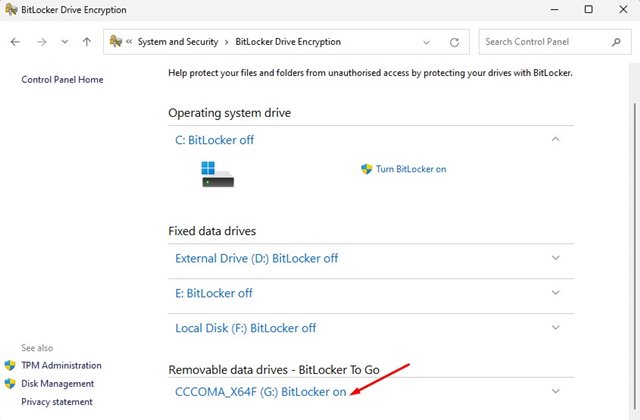
4. Next, scroll down and find the drive where BitLocker encryption is turned on.
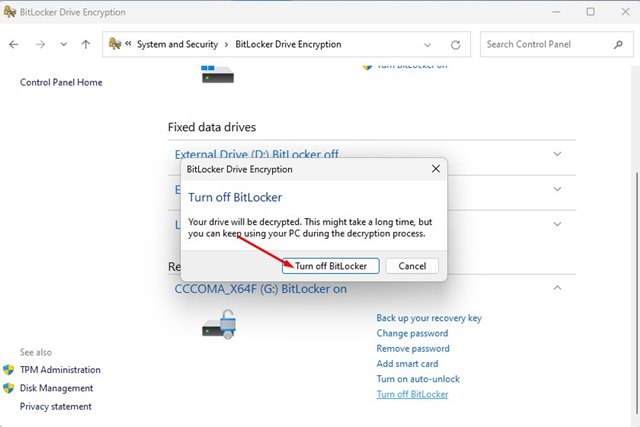
5. Click the Turn Off BitLocker link next to the encrypted drive. The encrypted drive could be your operating system, fixed data, or removable drive.
6. On the Confirmation prompt, click the Turn Off Bitlocker button again.
That’s it! This is how you can disable BitLocker drive encryption and BitLocker To Go on your Windows 11 computer.
Disable Bitlocker Encryption using PowerShell
Windows PowerShell utility can also be used to turn off BitLocker Drive encryption on Windows 11. Here’s how you can disable BitLocker encryption using the PowerShell utility on Windows.
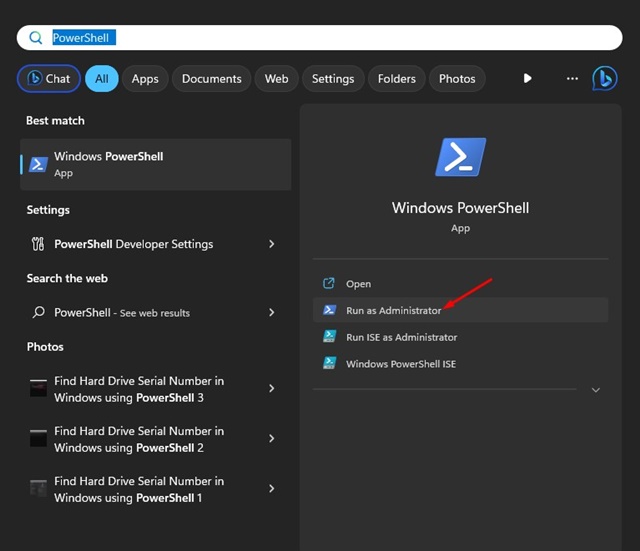
1. Type PowerShell on the Windows Search. Right-click on the PowerShell app and select Run as administrator.
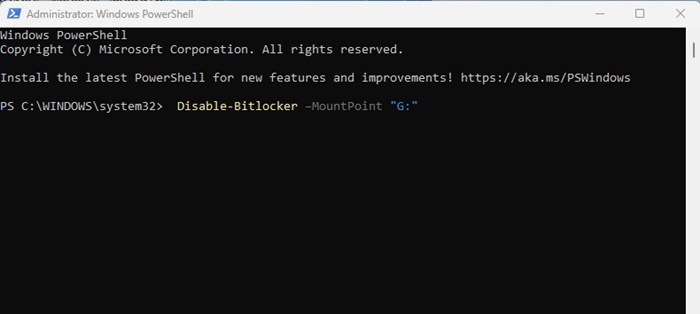
2. When the PowerShell opens, execute the given command:
Disable-Bitlocker –MountPoint "drive letter:"
Important: Replace the drive letter with the actual letter of your Bitlocker encrypted drive.
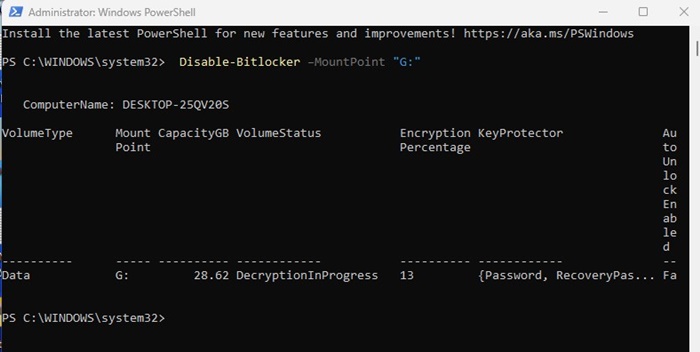
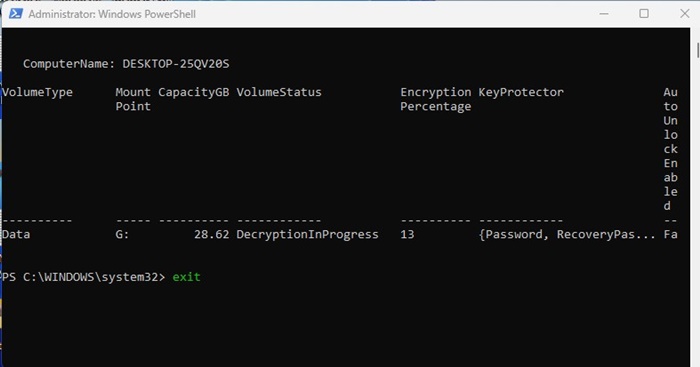
3. Now wait until the Bitlocker utility decrypts the drive. The process will take time.
4. You can type exit on the PowerShell to close it. The drive will continue to decrypt in the background.
That’s it! This is another best method to turn off BitLocker drive encryption on Windows 11 computers.
Other than BitLocker, you can also use other encryption software for Windows to encrypt your drive and keep your data secure. So, that’s how easy it is to disable BitLocker drive encryption on Windows 11. If you aren’t using BitLocker, follow our guide on using BitLocker on Windows 11. If you need more help with BitLocker Drive encryption, let us know in the comments.
