Windows 11 is Microsoft’s new desktop operating system that offers lots of new features and introduces many visual changes. When your Windows 11 boots up, the first thing that you will notice is the Lock Screen.
Many users get confused between the Lock Screen the Sign-in screen. The sign-in screen where you have to enter your password appears just after the Lock Screen. Whereas the Lock screen appears first, it shows the time, date, notifications, and background image.
So, the background image you before you sign in on Windows 11 is the lock screen. Windows 11 does offer you a few ways to customize the lock screen, but what if you don’t want the Lock Screen and want to remove it forever?
Many users feel the lock screen to be worthless, and they don’t want to click through the Lock Screen to get into their system. If you feel the same, you are reading the right guide. In this article, we will share the few best ways to Disable the Lock Screen on Windows 11. Let’s check out.
2 Best Methods to Disable the Lock Screen on Windows 11
Important: We have used Windows 11 Pro to demonstrate the process. The Group Policy method might not be available on every Windows 11 version. You can check your Windows version by navigating to the Settings > System > About.
1) Disable Lock Screen on Windows 11 via Registry
In this method, we will use the Windows Registry to Disable the Lock Screen on Windows 11. Here are some of the simple steps you need to follow.
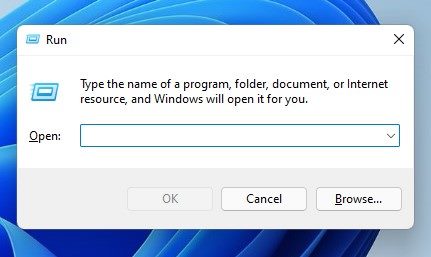
1. First of all, press the Windows Key + R button on your keyboard. This will launch the RUN dialog box.
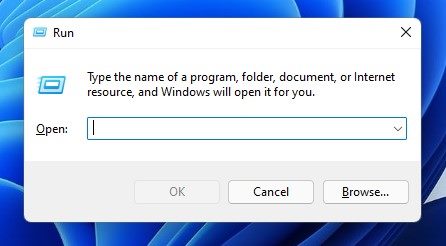
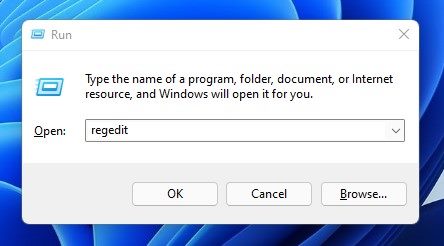
2. On the RUN dialog box, enter Regedit and hit the Enter button.
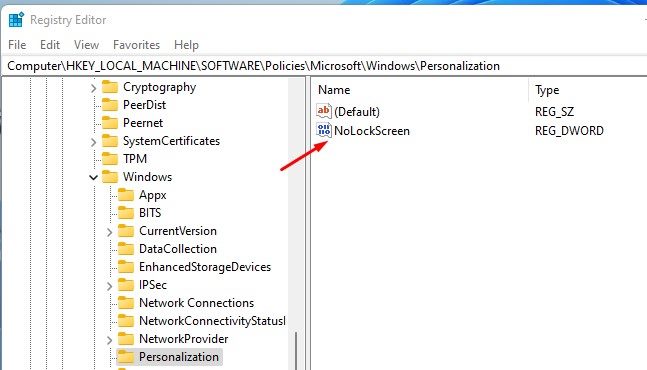
3. This will open the Registry Editor. On the Registry Editor, you need to navigate to the HKEY_LOCAL_MACHINE\SOFTWARE\Policies\Microsoft\Windows
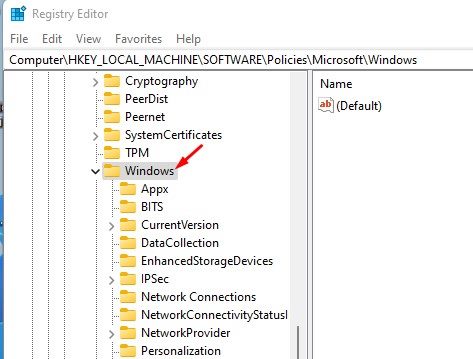
4. Next, right-click on the Windows folder and select New > Key.
5. Name the new key Personalization and hit the Enter button.
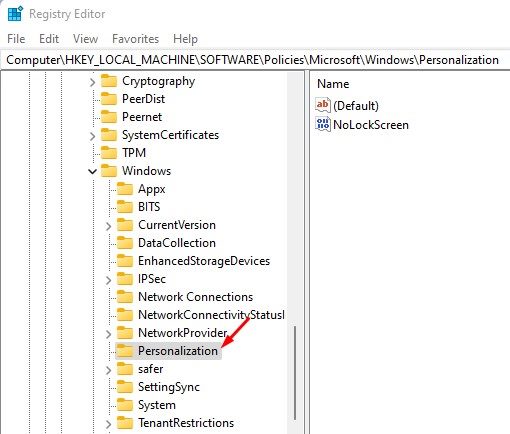
6. Now, right-click on the Personalization key and select New > DWORD (32-bit) Value.
7. Name the new DWORD (32-bit) Value as Nolockscreen and hit the Enter button.
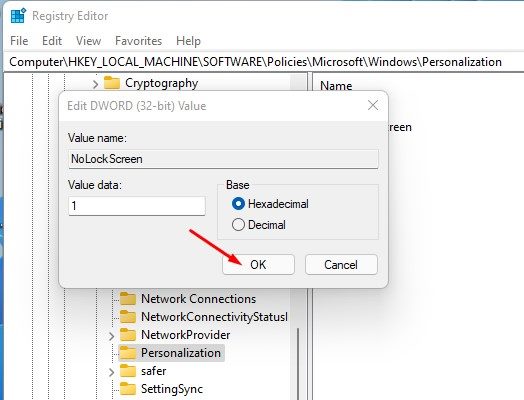
8. Now double click on the Nolockscreen key, and on the Value Data field, enter 1 and click on the Ok button.
That’s it! You are done. This is how you can disable the Lock Screen on Windows 11 via Registry Editor.
2) Disable the Lock Screen on Windows 11 via Local Group Policy Editor
In this method, we will use the Local Group Policy Editor to Disable the Lock Screen on Windows 11. Here are some of the simple steps you need to follow.
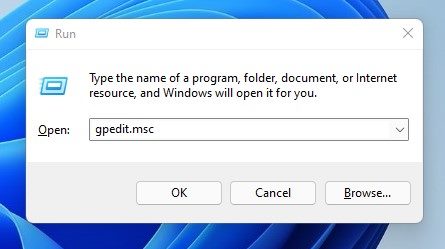
1. First of all, press the Windows Key + R button on your keyboard. This will launch the RUN dialog box.
2. On the RUN dialog box, enter gpedit.msc and hit the Enter button.
3. This will open the Local Group Policy Editor. You need to navigate to the following path:
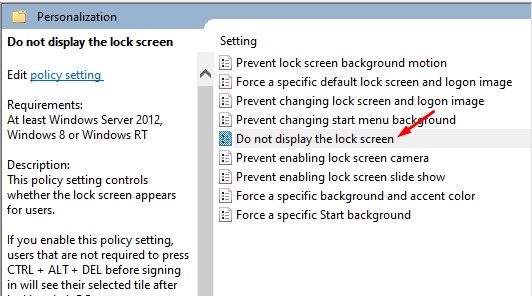
Computer Configuration > Administrative Templates > Control Panel > Personalization

4. On the right pane, find and double click on the Do not display the lock screen policy.
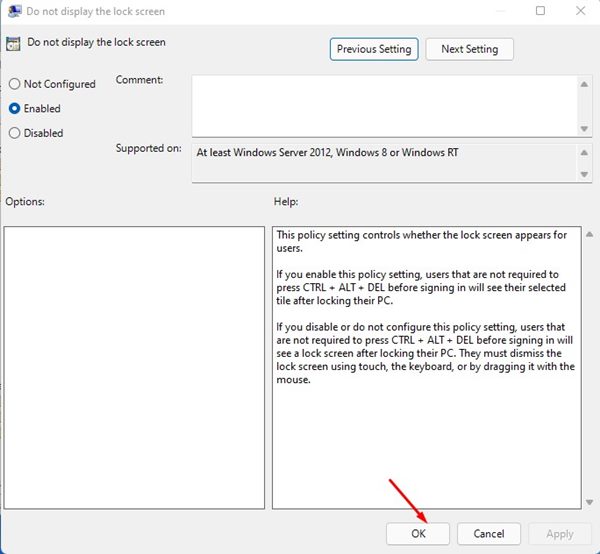
5. On the Do not display the lock screen prompt, select Enabled and click on the Apply button.
That’s it! You are done. After making the above changes, close the Local Group Policy Editor and restart your Windows 11 PC. After the restart, you will see the sign-in screen instead of the Lock screen.
Also Read: How to Customize the Windows 11 Lock Screen
It’s pretty easy to disable the Lock screen on Windows 11. You can follow any of the two methods to disable the lock screen on your PC, and the method works on Windows 10 operating system as well. I hope this article helped you! Please share it with your friends also. If you have any doubts related to this, let us know in the comment box below.


")