You can manually install the Google Play Store on Windows 11, but it requires extensive manual and technical work. So, if you want an easier way to download and install Android apps on Windows 11, you must start using Android emulators.
In this article, we will discuss BlueStacks, one of the best and top-rated Android emulators and highly compatible with Windows 11.
What is BlueStacks?
BlueStacks is a popular Android emulator for Windows and Mac. The Android emulator for Windows 11 can handle all apps and games you run on your Android smartphone.
The Android app emulator for PC creates a virtual version of the Android device that runs on Windows 11. In addition to Android apps, Bluestacks for Windows 11 can easily handle high-end Android games.
The latest version of Bluestacks for PC can run almost 97% of the apps and games available in the Google Play Store on Windows 11. The best part is that the Android emulator is completely free to download and use and ad-free.
Minimum System Requirements for BlueStacks
If you want to download & install BlueStacks on Windows 11, ensure your device meets the following requirements. Here are the minimum requirements for BlueStacks for Windows 11.
- Operating System: Microsoft Windows 10 or Windows 11
- Processor: Intel or AMD Processor
- RAM: At Least 4GB of RAM
- Storage: Minimum 5GB free Disk Space
You must be an administrator on your PC and ensure that your graphics drivers are up-to-date from Microsoft or the chipset vendor. Also, Hyper-V should be enabled on your device.
Download BlueStacks for Windows 11
Now that you are fully aware of BlueStacks for Windows 11, you may want to download it on your device. BlueStacks is free; you don’t need to create an account to download it on your Windows 11 computer.
Visit the official BlueStacks website and download the installation file for your Windows 11 PC. Alternatively, you can download BlueStacks for Windows 11 from the links we shared below.
How to Install BlueStacks for Windows 11
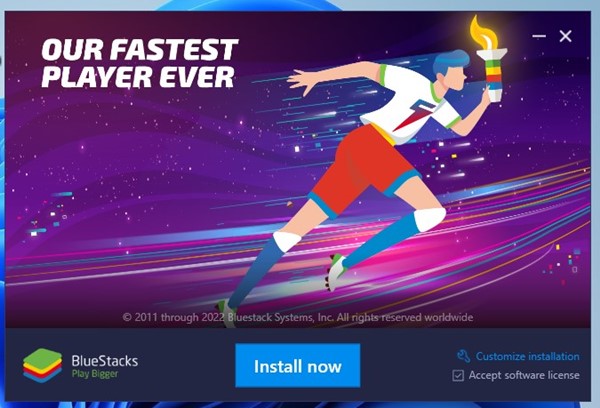
Installing BlueStacks is as easy as downloading it. After downloading BlueStacks for Windows 11, follow these steps.
1. Download the BlueStacks emulator for Windows 11 from the shared link.
2. Once downloaded, run the executable file.
3. Click the Install Now button to install the BlueStacks emulator on Windows 11.
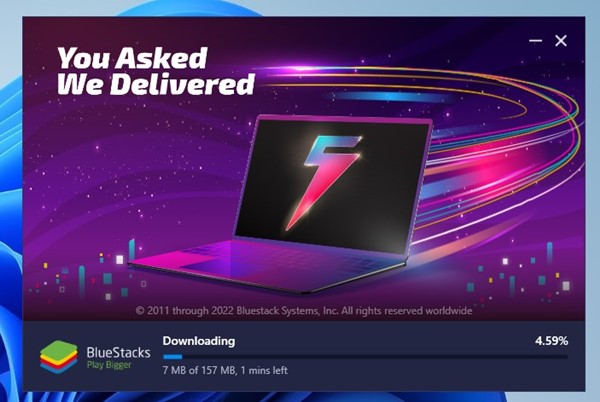
4. Now, BlueStacks will download the files from its server. Wait for a few minutes until the downloads are complete.
5. Once downloaded, BlueStacks will be installed on your device. Now run the Android emulator and enjoy the games on a PC.
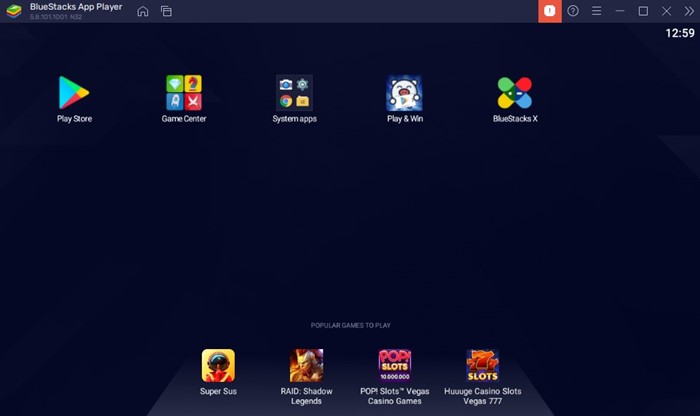
If you want to get the maximum benefits of the BlueStacks emulator, it’s recommended that you sign in to a Google Account. After signing in with a Google Account, you will gain access to the Google Play Store.
The Google Play Store app is on the main screen of the BlueStacks emulator. Double-click on it to search for the apps and games you want to play on the big screen.
Download BlueStacks 5 Offline Installer for Windows 11
The download links we shared above are for online installers. These installers require an active internet connection for downloading and installing BlueStacks files.
However, if you want to download and install BlueStacks on a PC without the internet, you need to use offline installers.
But, before you download BlueStacks Offline Installer on Windows 11, you must take care of these things:
- Launching the offline installer will install BlueStacks 5 Nougat 32-bit.
- To install Nougat 64-bit, Pie 64-bit, or Android 11 for the 64-bit version, you need to use CMD.
Download BlueStacks Offline Installer (64-bit version of Windows)
Download BlueStacks Offline Installer (32-bit version of Windows)
How to Install the Offline Installer?
You can directly run the Offline installer if you wish to install BlueStacks 5 Nougat 32-bit. However, if you want to install the Nougat 64-bit, Pie 64-bit, or Android 11, follow these steps.
1. Download the BlueStacks 5 Offline installer from the links we have shared.
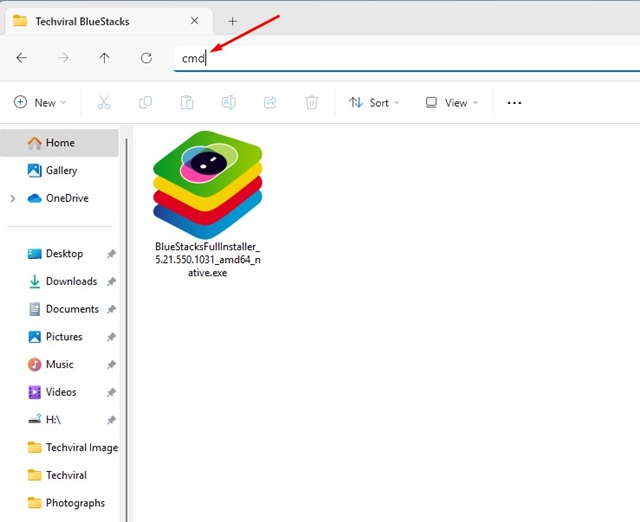
2. Once downloaded, browse to the location where the file is saved.
3. Next, click on the address bar. Type CMD and press Enter.
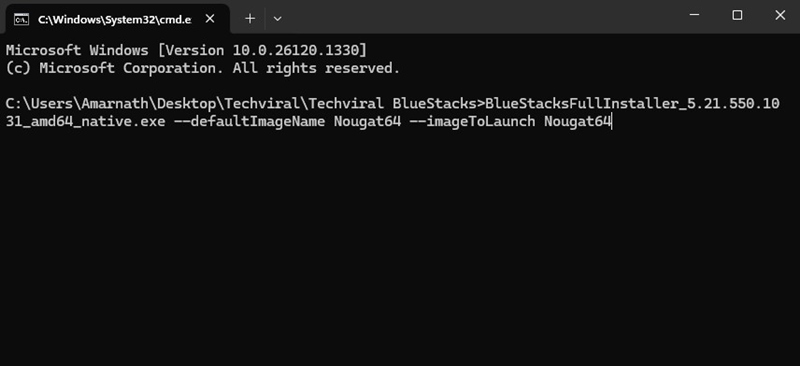
4. On the Command Prompt, execute the command based on the Android version of BlueStacks you want to install
BlueStacks 5 Nougat 64-bit:
BlueStacksFullInstaller_5.21.550.1031_amd64_native.exe --defaultImageName Nougat64 --imageToLaunch Nougat64
BlueStacks 5 Pie 64-bit:
BlueStacksFullInstaller_5.21.550.1031_amd64_native.exe --defaultImageName Pie64 --imageToLaunch Pie64
BlueStacks 5 Android 11:
BlueStacksFullInstaller_5.21.550.1031_amd64_native.exe --defaultImageName Rvc64 --imageToLaunch Rvc64
Before executing the commands, make sure that the file name in the command matches the file name of the offline installers.
This will install the BlueStacks on your Windows 11 PC. Once installed, you can find the emulator from the Windows 11 Start Menu or the desktop screen.
Gaming Features of BlueStacks
BlueStacks is a definite choice for PC gaming. As noted, the emulator has been designed with Android gaming in mind. Hence, you can expect many gaming-related features with this one.
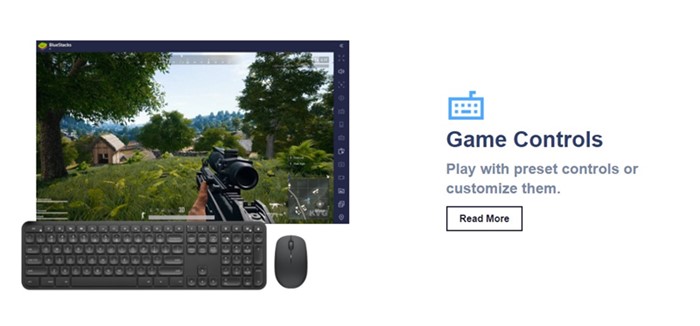
Custom Preset Controls
The Android emulator for Windows 11 lets you play your favorite Android games on your PC. You can play your favorite games with your keyboard, mouse, or gamepad. Not only that, but you can even modify the preset controls as per your requirements.
Shooting Mode
If you love playing action RPG games, you will love the new Shooting Mode. The Shooting Mode allows you to use your keyboard to aim and shoot with the mouse. The feature is designed to improve your aim and reaction time in games.
Multi-Instance
BlueStacks for Windows 11 also supports multi-instance. With this, you can play the same game from different accounts or multiple games simultaneously on the emulator.
Macros
You can create Macros for any game and automate in-game actions. This feature will be useful if you play games like Clash of Clans or other strategy games. Macros allow you to automate tedious tasks and replicate them in real time.
Eco Mode
Eco Mode is an energy-saving mode that optimizes PC usage when you run multiple instances of the same games via the emulator. This feature allows you to multitask without slowing down your Windows 11 PC.
These are some of the selected features of BlueStacks for Windows 11. The emulator has more features you can explore on your Windows 11. So, start using it to explore all the features that the Android emulator provides.
Why is BlueStacks not working in Windows 11?
There could be various reasons why BlueStacks is not working on Windows 11. However, the prominent reason is that Hyper-V is disabled. Hyper-V is important for BlueStacks because it allows your PC to create and run virtual machines.
Windows 11 requires Hyper-V to be enabled for BlueStacks to function properly. If you have a compatible system, you can enable Hardware virtualization in the BIOS and then enable Hyper-V via the Control Panel on Windows 11.
After enabling Hyper-V, you can install BlueStacks on Windows 11 again. If BlueStacks is not working, you need to check compatibility issues and requirements.
Frequently Asked Questions
Which is the best Android emulator for PC?
BlueStacks is the most popular Android emulator for PC and possibly the best one. While you have other options like LDPlayer, BigNox, etc., BlueStacks is superior in terms of features and stability.
Is BlueStacks safe to download & use?
Yes, BlueStacks is a 100% safe Android emulator for PCs. However, make sure to download the emulator from its official website or trusted sources.
Can BlueStacks run all apps & games on PC?
Yes, BlueStacks can possibly run almost all popular Android apps & games on PC. It also gains support for new apps & games at regular intervals.
What is BlueStacks for Windows 11 Offline Installer?
BlueStacks for Windows 11 Offline installer lets you install the emulator on any computer without an internet connection. You need to move the offline installation files and install the emulator on any device without an internet connection.
Also read: Windows 11 Free Download Full Version
That’s how to download the BlueStacks emulator for Windows 11. For more emulators, check our guide. If you need more help downloading BlueStacks for Windows 11, let us know in the comments below.
")
")
")