To improve online privacy and security, the web has been pushing towards encrypting everything. Right now, most of the modern web browsers flag websites using HTTP as ‘Not secure’. This thing is done to make sure that no middle-man can tamper with the web page that you are viewing.
Even most of the tech giants like Google, Microsoft, etc. were now pushing DNS over HTTPS on its applications and web services. For those who don’t know, DNS over HTTPS is a security protocol that forces your system to make a secure, encrypted connection to your DNS servers.
By default, modern web browsers like Google Chrome, Microsoft Edge, etc. have the DNS over HTTPS functionality, but it was disabled. We have already shared an article on how to enable DNS over HTTPS on the Google Chrome browser. Today, we will be discussing how to enable DNS over HTTPS on Microsoft Edge.
How To Enable DNS Over HTTPS in Microsoft Edge Browser
Please keep in mind that the Edge browser won’t use the DNS over HTTPS until and unless you are using a DNS server with DoH support. You can search on Google for DNS servers with DoH support to get the complete list of compatible servers.
To enable DNS over HTTPS on the Microsoft Edge browser, you need to follow some of the simple steps given below.
Step 1. First of all, open the Microsoft Edge browser on your computer.

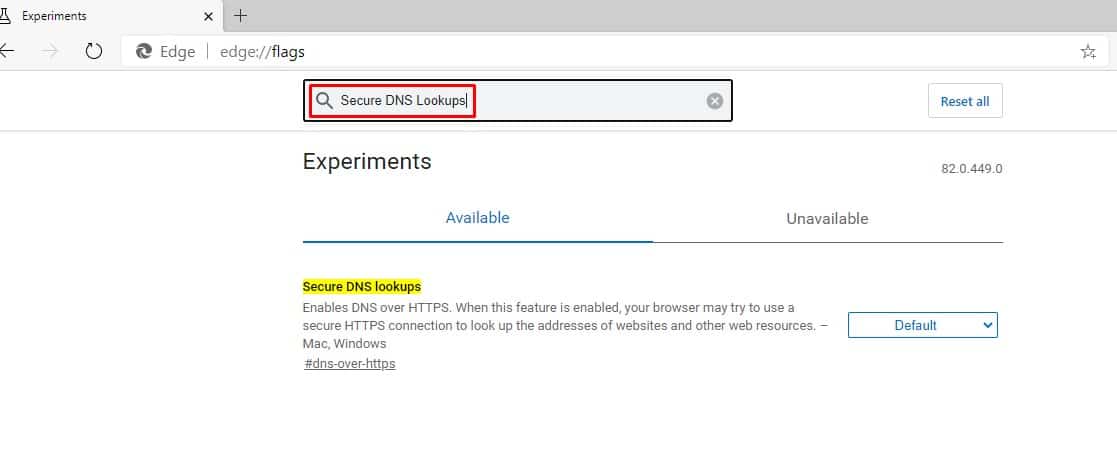
Step 2. Next, you need to open ‘edge://flags‘

Step 3. On the flags pages, you need to search for ‘Secure DNS Lookups‘

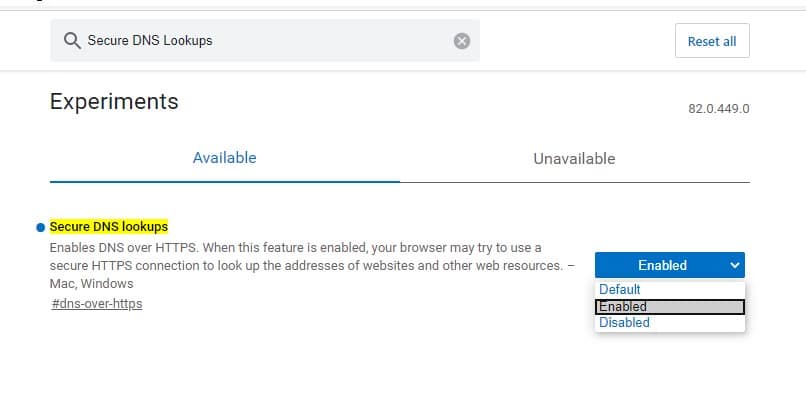
Step 4. Enable the ‘Secure DNS Lookups’ option using the drop-down menu.

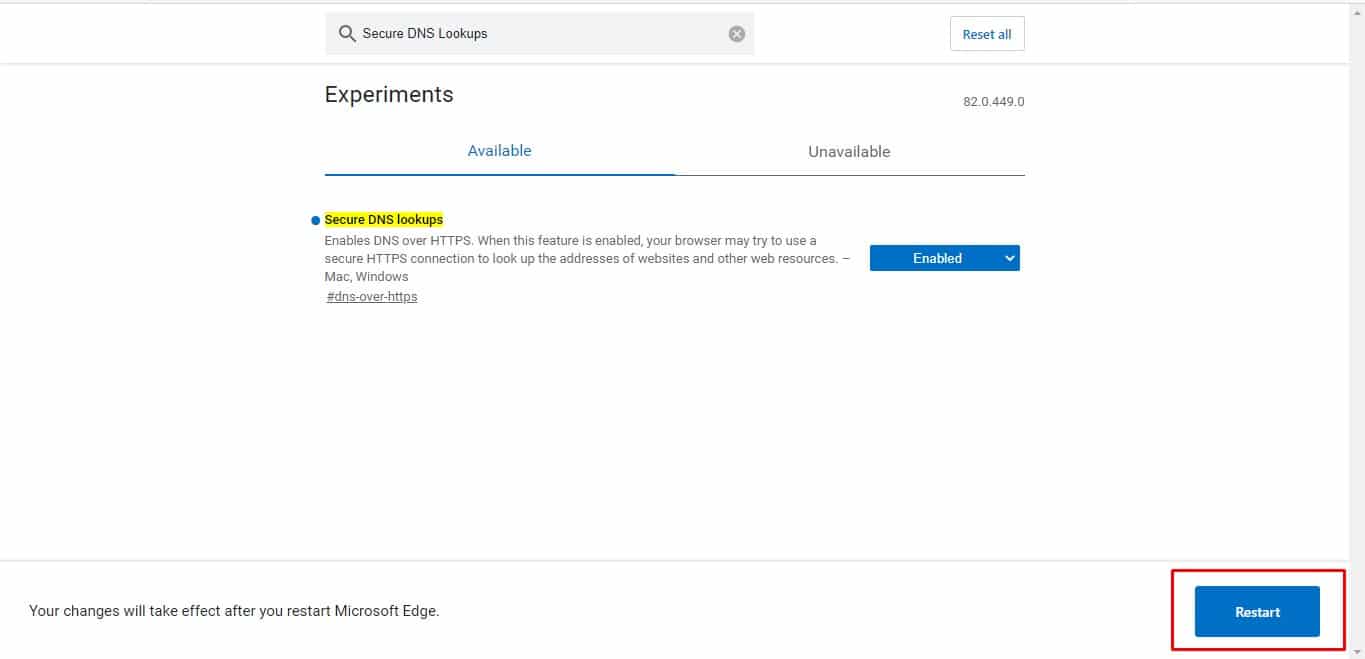
Step 5. Finally, click on the ‘Restart’ button to restart the web browser.

That’s it! You are done. This is how you can enable DNS over HTTPS in the Microsoft Edge browser.
So, this article is all about how to enable DNS over HTTPS in the Microsoft Edge browser. I hope this article helped you! Share it with your friends also.


How is an article written one day ago inaccurate? This option does not exist in the current version of chromium edge.