Have you just purchased a new graphics card for your PC only to find that Windows 11 isn’t detecting it? We can feel your pain, but don’t worry—these types of things can easily be sorted.
Windows 11 may not detect Graphics card problems for various reasons, such as incorrect installation of the GPU, incompatibility issues, a damaged GPU unit, bugs, glitches, or system file corruption.
How to Fix Graphics Card Not Detected on Windows?
If you landed on this webpage, chances are that you don’t know why Windows 11 is not detecting your Graphics card and have no clue what to do next. So, simply follow the methods shared below to fix the Graphics Card Not Detected by Windows issue.
1. Restart your Device

If you’ve just installed a new graphics card, but your Windows OS isn’t detecting it, it may have failed to install the driver.
Windows 11 usually installs the devices and their drivers when you restart your PC. So, before you try the next methods, make sure to restart your Windows PC and see if it helps.
To restart your Windows 11 PC, click the Start button and select the Power menu. On the Power Menu, select Restart.
2. Disconnect Other Devices Connected to your computer
By the devices, we don’t mean Keyboard and Mouse but other devices like gaming controllers, smartphones, or secondary monitors.
The peripherals connected to your device often conflict with the driver installation, leading to a Graphics card not being detected issue.
So, turn off your computer and disconnect all peripherals connected to your device. Once disconnected, start your PC again.
3. Check If your GPU is still not detected
If certain files on your computer are corrupted, the connected GPU unit may not appear on the Device Manager. So, is your GPU really not detected? Follow these steps to confirm it.
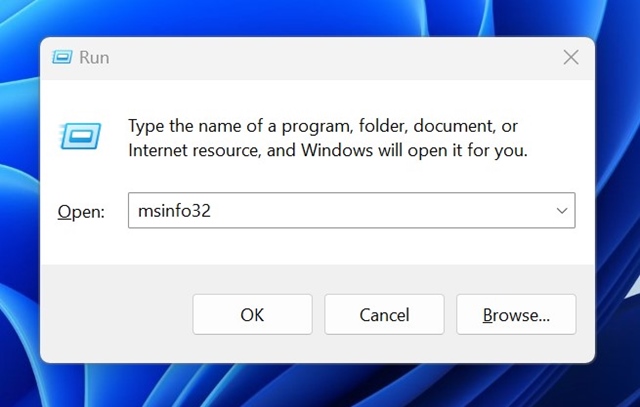
1. Press the Windows Key + R button on your keyboard.
2. This will open the RUN dialog box, type msinfo32, and press Enter.
3. On the System Information dialog box, expand the Components.
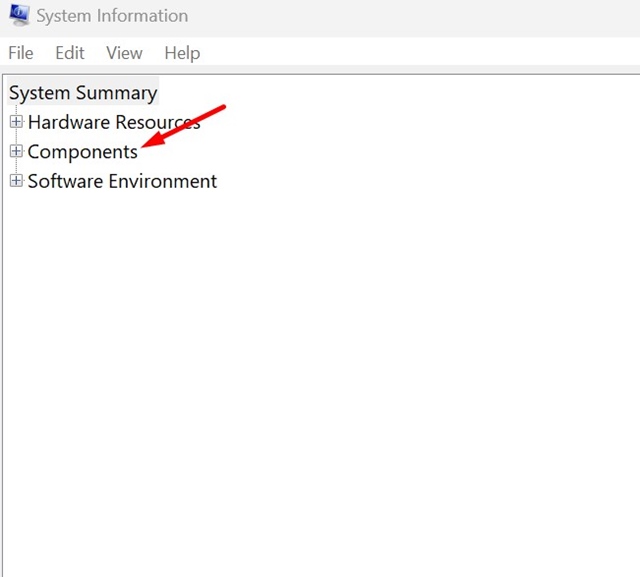
4. Next, select the Display. On the right side, check whether GPU is detected.
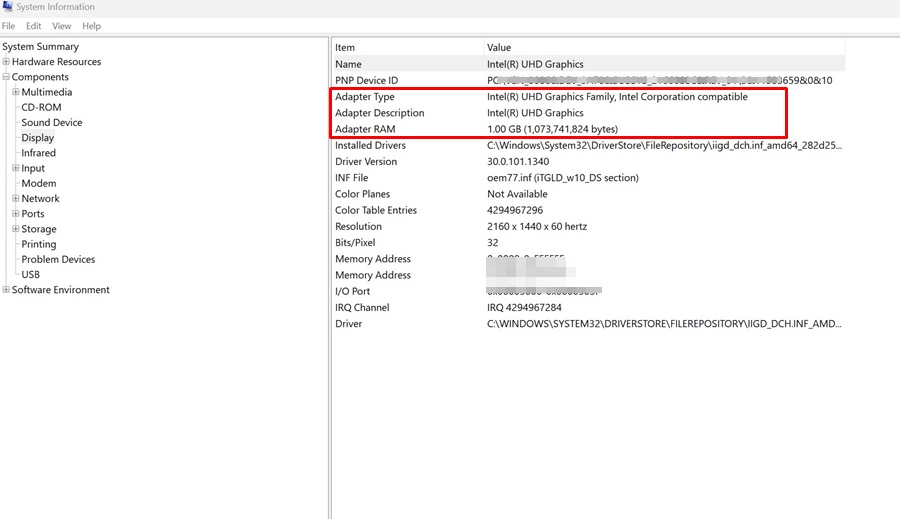
If the System Configuration shows your GPU unit, you won’t have to do anything else. However, if it isn’t, follow the next methods.
4. Enable your Graphics card from the Device Manager
In this method, you must ensure that the Graphics card is enabled on your device. Here’s how you can make sure your graphics card is enabled.
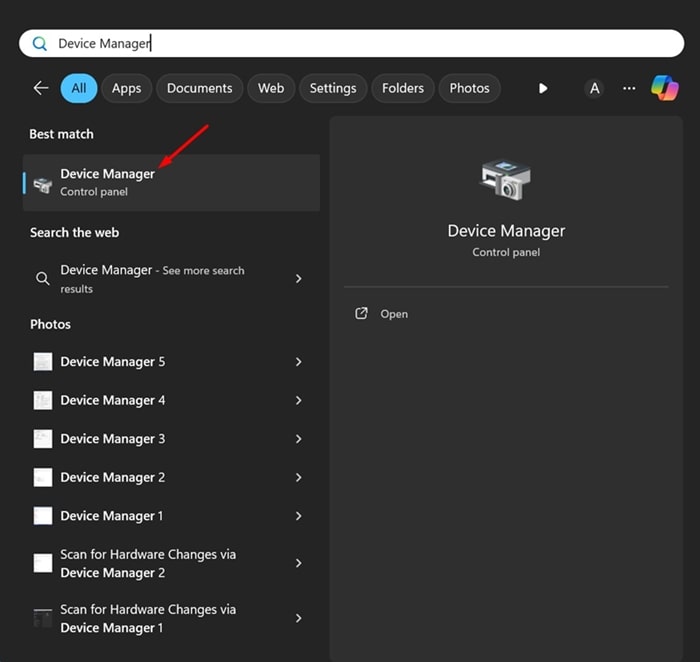
1. Type in Device Manager on the Windows 11 Search. Next, open the Device Manager app from the list of best match results.
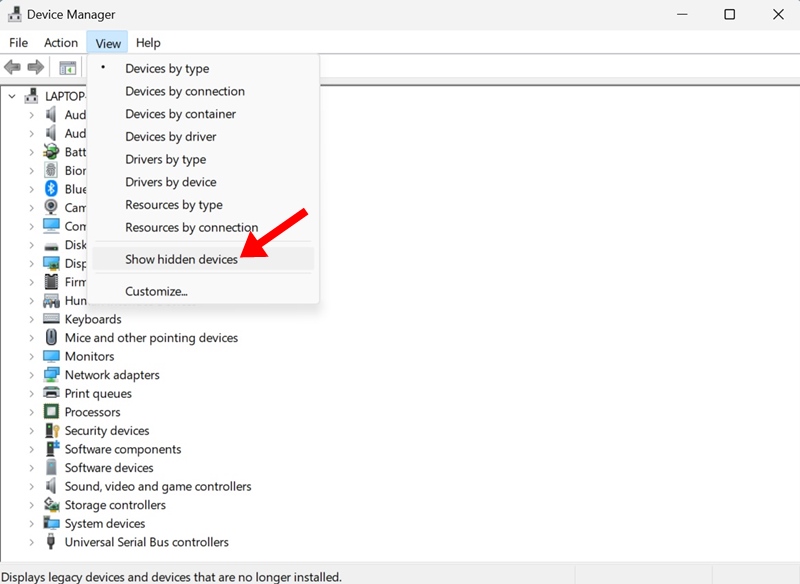
2. When the Device Manager opens, click on View and enable the Show hidden devices.
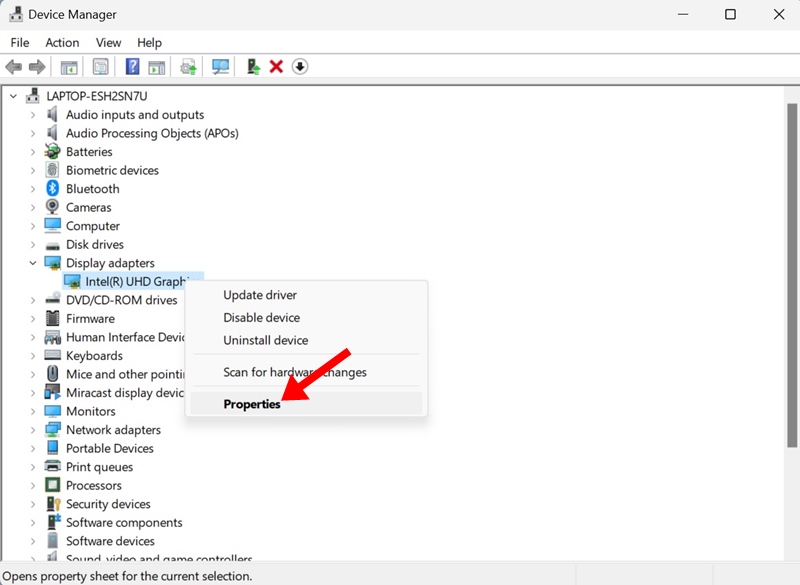
3. Expand the Display adapter and right-click on your graphics card driver and select Properties.
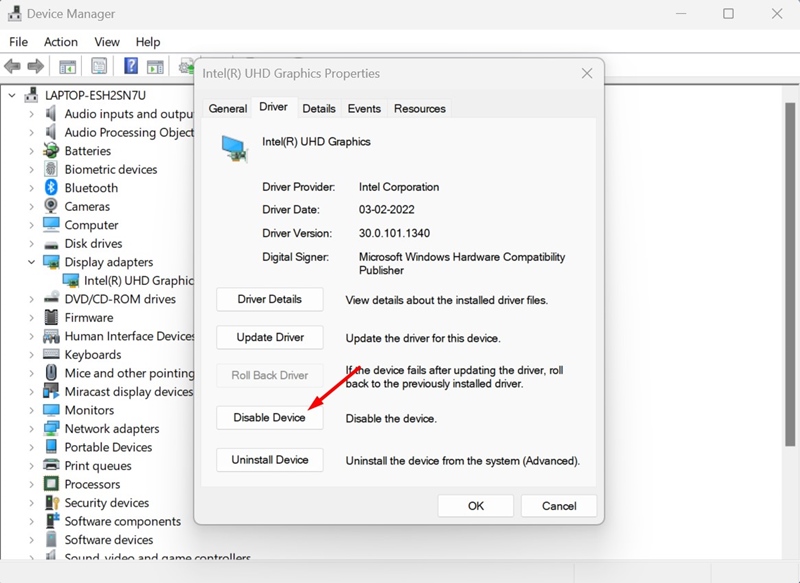
4. On the Graphics card properties, click Enable Device (If available).
5. You can also try clicking on the Disable Device button and then on Enable Device.
That’s it! This is how you can enable a Graphics card from the Device Manager on a Windows 11 computer.
5. Update or Reinstall the Graphics Drivers
If you cannot use the Graphics card on your Windows 11, you can try updating or reinstalling its drivers. Here’s how to do it.
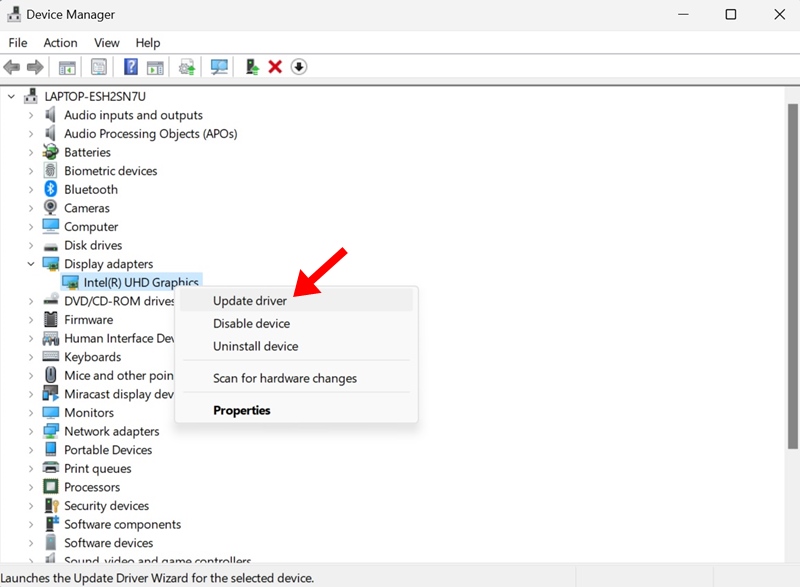
1. Type in Device Manager on the Windows 11 Search. Next, open the Device Manager app from the list of best match results.
2. When the Device Manager opens, expand the Display Adaptors.
3. Right click your connected Graphics card driver and select Update Driver.
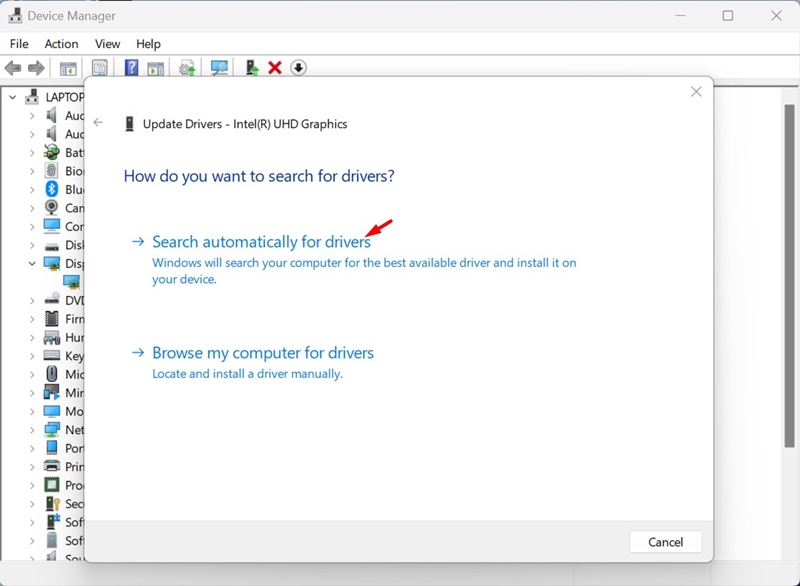
4. On the next screen, select Search Automatically for drivers.
5. If updating didn’t help, right-click on the Graphics card and select Uninstall device.
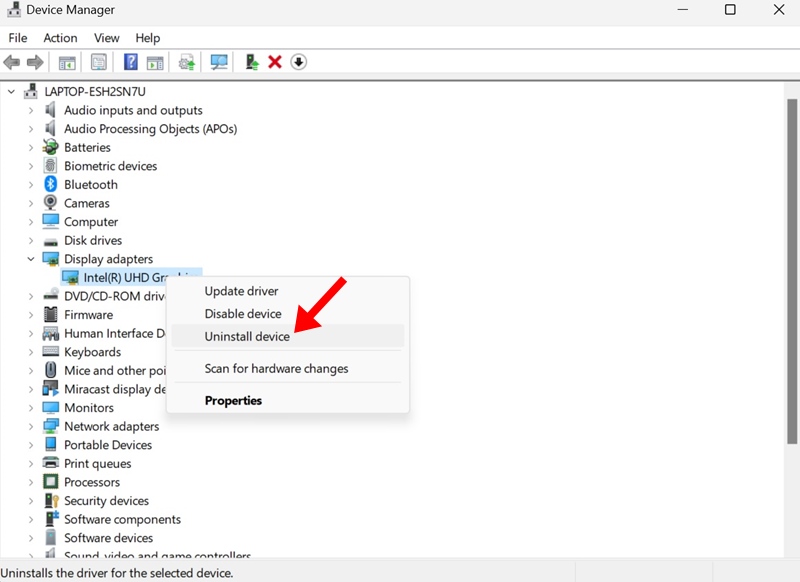
6. After the uninstallation, restart your Windows 11 PC.
That’s it! Windows 11 will automatically install the device during the restart.
6. Reinstall the GPU
Maybe your PC is unable to detect the Graphics card because it isn’t installed correctly. If you’re the one installing the GPU unit, you need to take care of these things.
- Make sure your Graphics Card is connected to the right slot.
- The power connectors to the GPU are securely connected.
- Your PC’s monitor is connected to the GPU’s video output.
- The PCIe slot is free from dust and debris.
If you take care of these few points during the GPU installation, Windows 11 should detect your Graphics card without any issue.
7. Check Your SMPS (Power Supply Unit)
The Power Supply unit should be compatible with the GPU you’ve installed. If it’s incompatible, the power supply unit may fail to deliver the required power that the GPU unit needs.
Sometimes, a faulty PSU is the reason the computer does not detect the GPU. You can rule out these issues by inspecting your Power Supply Unit.
If the connected hardware requires more power, consider upgrading your Power Supply unit. If you suspect a faulty PSU, you can have it checked by a local service center.
8. Check if your GPU unit is faulty
Well, if you have come so far, it’s likely that your PC still isn’t detecting your graphics card.
In this case, you must ensure your graphics card isn’t faulty. Some signs of a graphics card fault are fan noises, PC crashes, graphical errors, frequent BSOD errors, and sudden crashes while gaming.
If you see any of these signs, you likely have a faulty graphics card. You can have your graphics card checked by a local service center.
If your GPU unit is under warranty, you can contact customer service for help with a warranty claim.
9. Revert the Overclocking & Update your BIOS
An outdated BIOS is one leading reason Windows 11 does not detect the graphics card. To update the BIOS, you must head to the motherboard manufacturer’s website and follow the steps.
BIOS update is a complicated method; hence, sticking with the official steps is recommended.
Also, if you recently overclocked or underclocked your GPU unit, you need to undo the changes. Overclocking and underclocking often trigger problems and damage the GPU.
So, these are some working methods to fix the graphics card not detected by Windows. Let us know if you need more help in troubleshooting this problem. Also, if you find this guide helpful, don’t forget to share it with your friends.


