How To Install Custom Themes In Google Chrome
Currently, as a web browser, the tech giant Google’s Chrome browser is the most used web browser in the world, hence, today we will present an awesome tutorial in which we will show you all how to install themes in Google Chrome to change its appearance simply to customize it to our liking.
Both the tech giant Google itself and other developers have created many themes that simply allow us to change the appearance of the tech giant Google’s Chrome browser. As we can find in the Chrome Web Store, the extensions store and themes for the Google browser.
Also Read: How To Fix Not Enough Memory To Open This Page Error On Chrome
So, now without wasting much time, let’s get started and simply explore the whole article in which we have mentioned the whole tutorial to customize and change the appearance of Google Chrome.
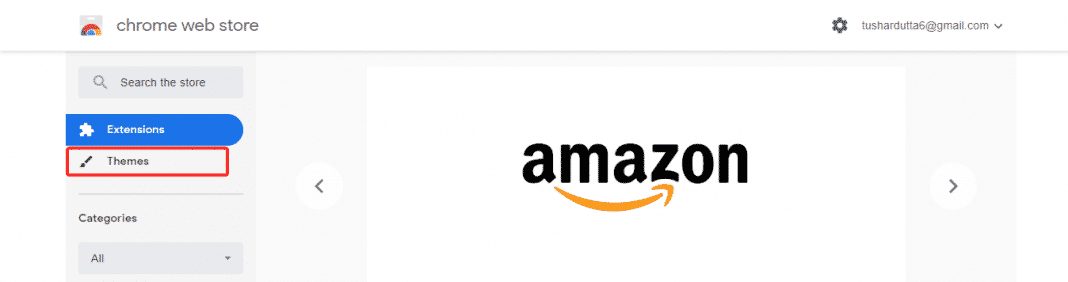
- If you are a user of the Google Chrome web browser then you might have already visited the chrome web store several times simply to install an extension in Chrome. However, to go to the Chrome Web Store, all we have to do is follow this link.
- Once you reach there, the next thing we have to do is click on the Themes option, which is shown in the menu on the left side just below Extensions.
- This will show us some themes for Chrome offered by the tech giant Google itself, however, we can use the search engine that offers the Chrome Web Store to search other types of themes as well.
- This search can be found in the upper part of the left panel, where we also find other filters that we can use when searching for themes to customize our Google Chrome browser.
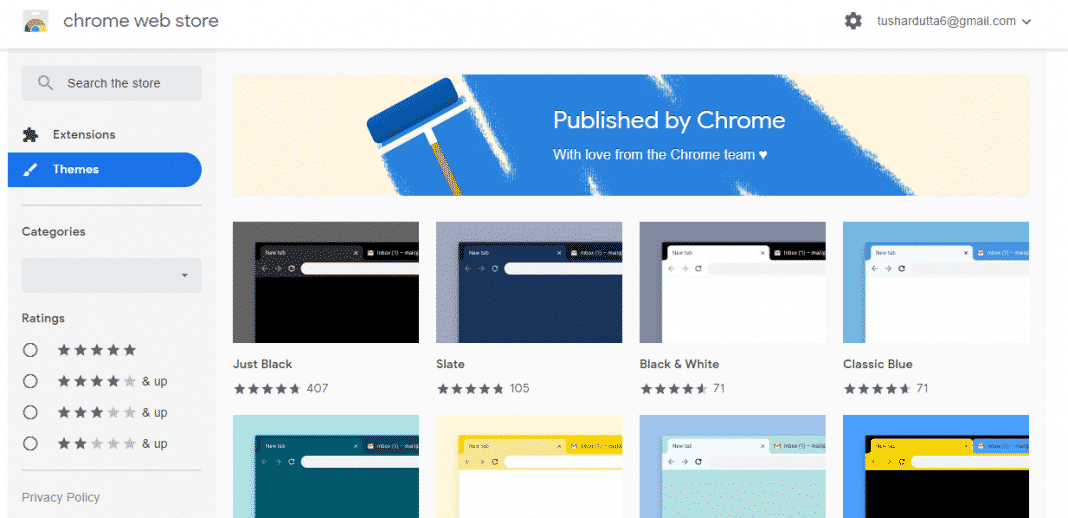
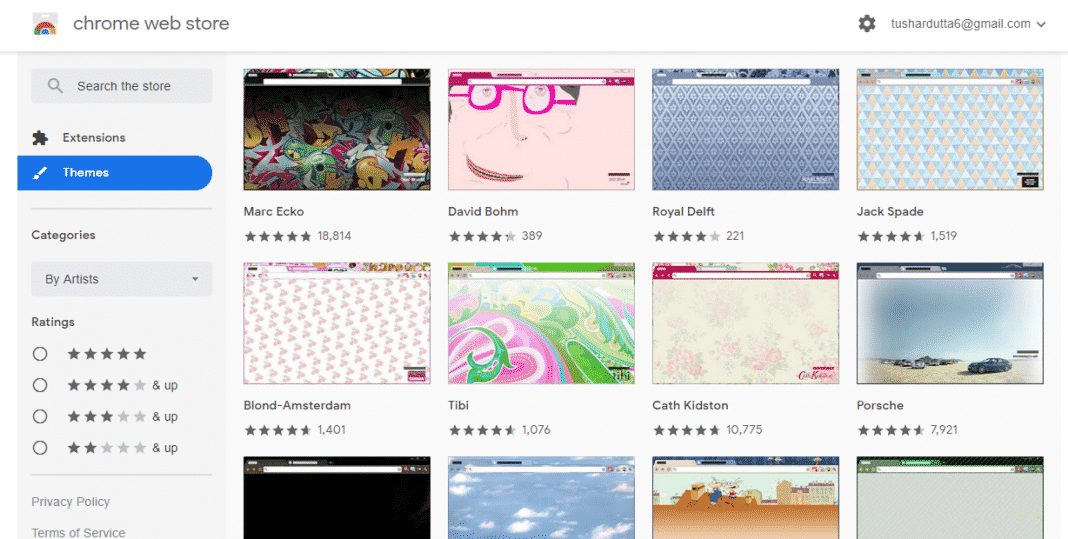
- Here we can also find several categories and user ratings, through which we can simply search for the themes in Chrome of the category that pleases us or simply search among the best rated by users.
- Now, once we find a topic that we like the most, we have to click on it and automatically the system will show the page of the topic that we have selected.
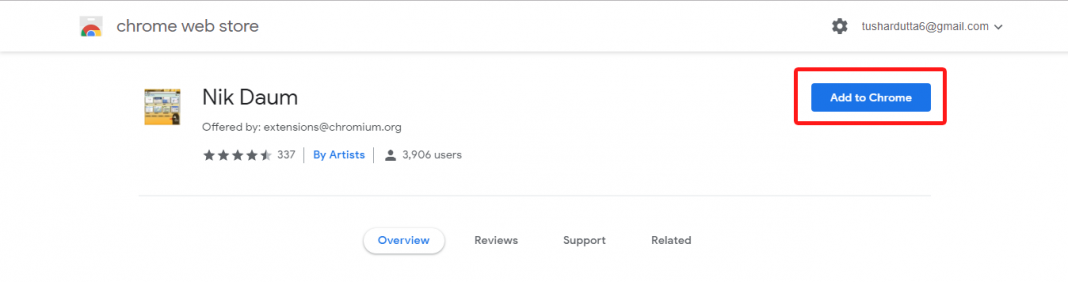
- In it, we will find information about the developer who created the theme, the assessment of users, as well as a general description of the Chrome theme and a few screenshots so we can get the idea of what our browser will look like.

- In addition, we can also find additional information like the developer’s website, the version of the theme, the size it occupies, the developer’s email address and the last date on which the Chrome theme was updated.
- Now to install it and change the appearance of the Chrome browser, all we have to do is click on the Add to Chrome button. This will simply verify that our version of the browser is compatible with the theme or not and if the signal is green then, of course, it will proceed to install it. In a few moments, we will see how the theme of Chrome is applied to our browser and change its appearance automatically without any manual work.
- Now if we like we will not have anything else to do, but if we are not convinced by the new appearance of Chrome, then we can also undo the process and remove or uninstall the themes installed in Chrome.
- To do this, we have to click on the Google Chrome menu button and enter the Settings option.
- Then simply go down to the Appearance section and click on the “Reset to default” button that appears next to the Theme that we currently have installed in Chrome.

- That’s it now you are done.
Also Read: 13 Best Android Email Apps To Keep Yout Inbox Organized
So, what do you think about this? Simply share all your views and thoughts in the comment section below. And if you liked this tutorial then simply do not forget to share this article with your friends and family.


graet article you are doing awesome job