
If you see the ‘Not All of the Updates Were Successfully Uninstalled’ error, the update uninstallation has failed, and you need to find the issue preventing the uninstall.
The error message usually appears when a certain process prevents the update or uninstallation process. It could be malware, problems with the installation files, incorrect update installation, etc. Here’s how you can fix this error.
1. Use PowerShell to Uninstall Windows Update
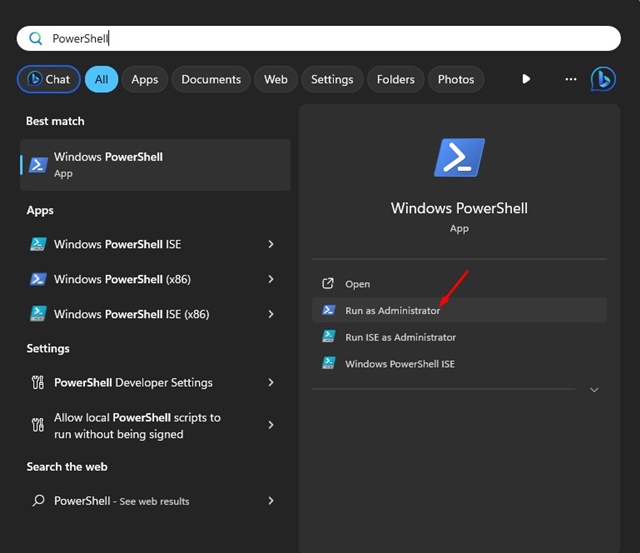
1. Type PowerShell in Windows Search. Right-click on PowerShell & select Run as administrator.
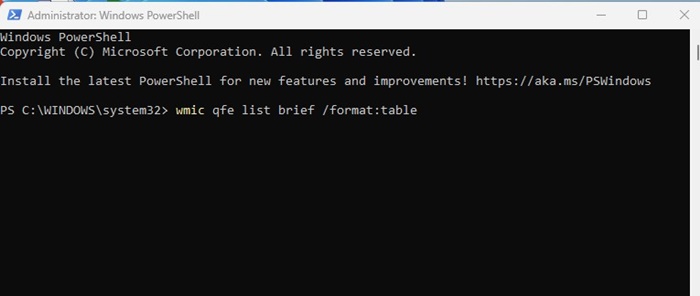
2. Execute this command:
wmic qfe list brief /format:table
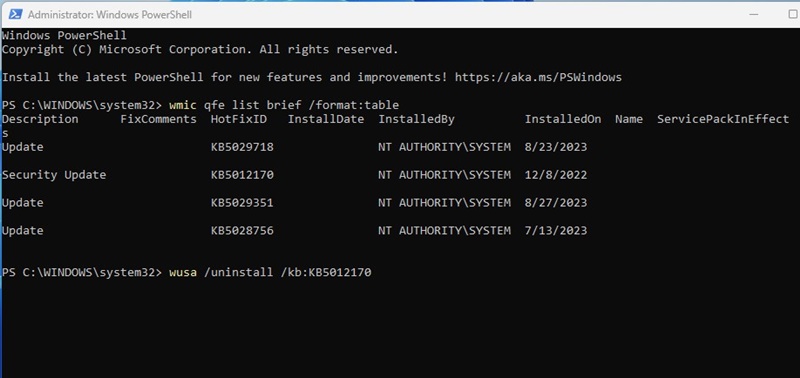
3. Note down the HotFixID (KB number) of the Windows update you want to uninstall.
4. Execute this command. Replace ‘number‘ with the KB number you noted in the previous step.
wusa /uninstall /kb:number
5. A Windows Update Standalone Installer prompt will pop up. Click Yes to continue.
Wait a few minutes for the update to uninstall on your device. After uninstalling, restart your Windows PC.
2. Use the DISM tool to remove the Windows Update
While the DISM tool is mainly used to fix corrupted system files, it can uninstall updates that don’t get uninstalled, even after multiple attempts. Here’s how to use it to remove the Windows Update.
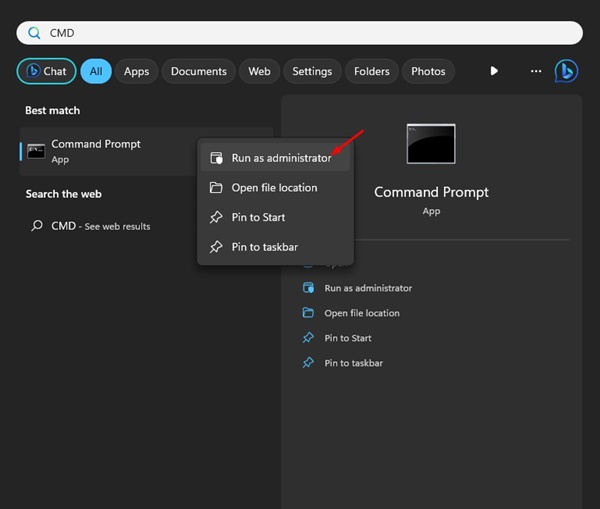
1. Type in Command Prompt on Windows Search. Right-click on it and select Run as administrator.
2. Execute this command:
DISM /Online /Get-Packages | clip
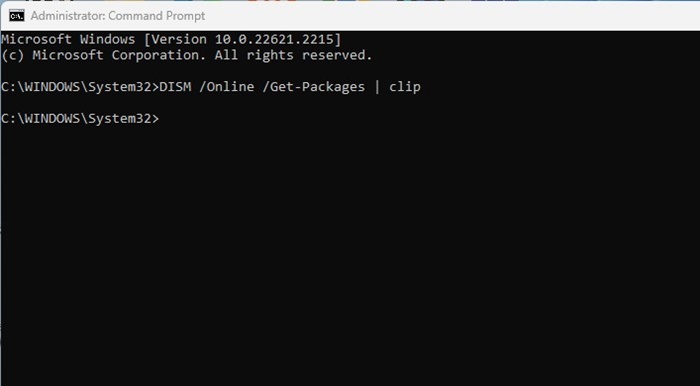
3. Open Notepad and press the CTRL + V button. This will paste the output of the DISM command.
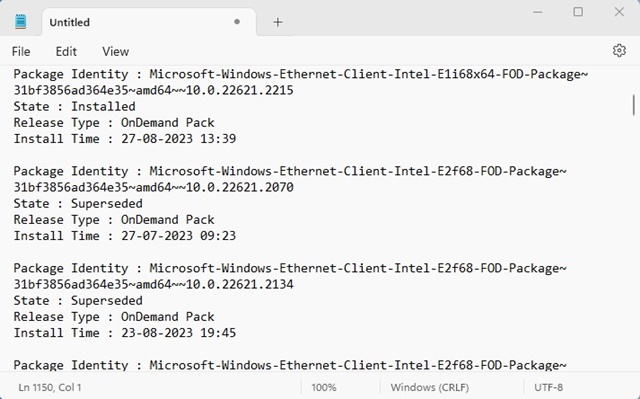
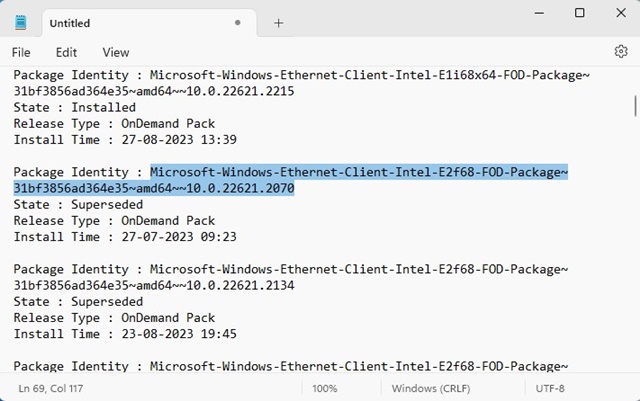
4. Identify the update package you want to uninstall. Copy the value text next to the Package Identity.
5. Return to the Command Prompt and execute this command:
dism /Online /Remove-Package /PackageName:Package_ID
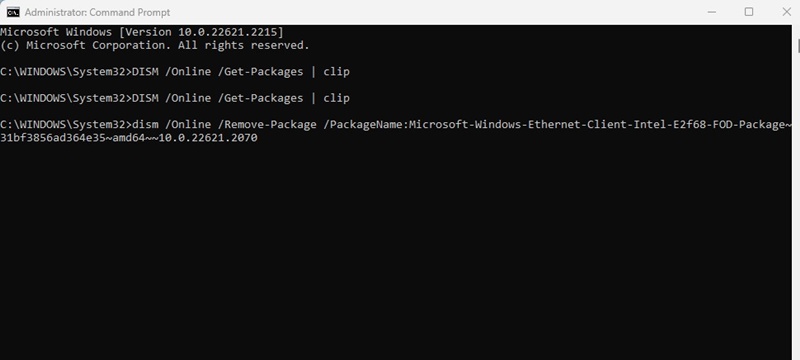
Important: Replace the ‘Package_ID’ with the value you’ve copied in the previous step.
Restart your computer after the process completes.
3. Reset the Windows Update Components
As mentioned above, problems with the Windows Update Components are often the prominent reason Windows fails to uninstall updates. To resolve this issue, you should reset the Windows Update Components.
1. Type PowerShell in Windows Search. Right-click on Windows PowerShell and select Run as administrator.
2. Execute each of the given commands one by one.
net stop wuauserv
net stop cryptSvc
net stop bits
net stop msiserver
ren C:\Windows\SoftwareDistribution SoftwareDistribution.old
ren C:\Windows\System32\catroot2 catroot2.old
net start wuauserv
net start cryptSvc
net start bits
net start msiserver
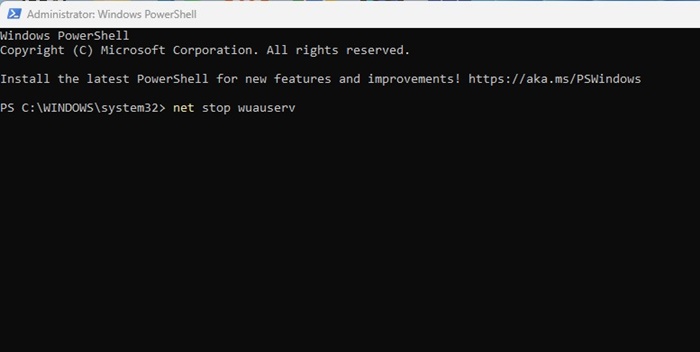
After executing all these commands, restart your Windows computer. This will reset the Windows Update Components.
4. Restart the Windows Update Service
Many Windows 11 users have fixed the error by restarting the Windows Update service.
1. Open the Services app from the Windows Search.
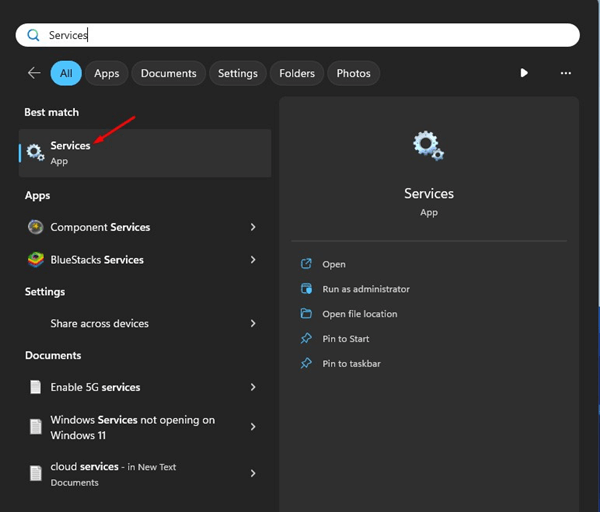
2. Find Windows Update.
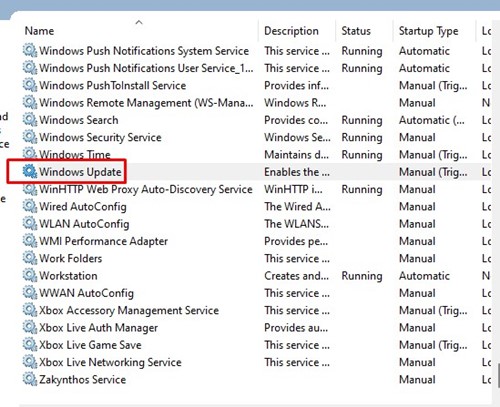
3. Right-click on the Windows Update service and select Restart.
After making the change, restart your Windows 11 PC. Then, go to Settings > Windows Update to check for available updates.
5. Clean Boot Windows
Clean Boot is a Windows feature that forces the operating system to start with only essential programs & processes. Performing a clean boot will disable all third-party apps & processes, disrupting the Windows Update Process from functioning.
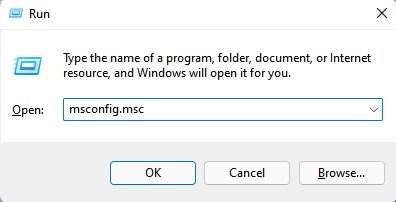
1. Press the Windows Key + R button on your keyboard. In the Run dialog box, type msconfig.msc and press Enter.
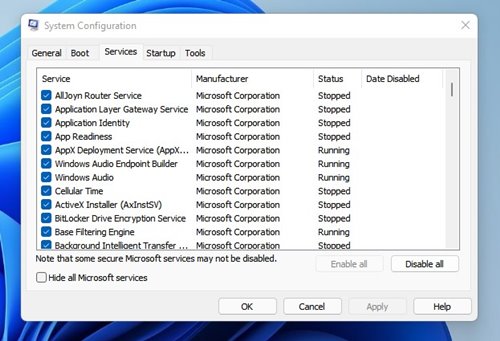
2. Switch to the Services tab.
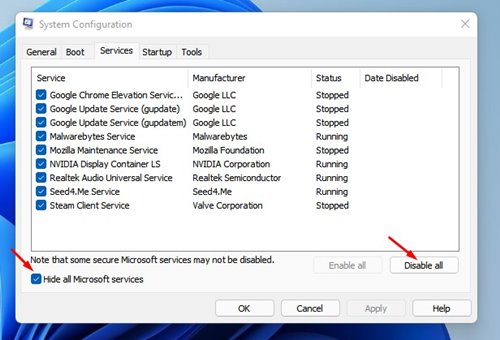
3. Check the Hide all Microsoft Services checkbox and click Disable All.
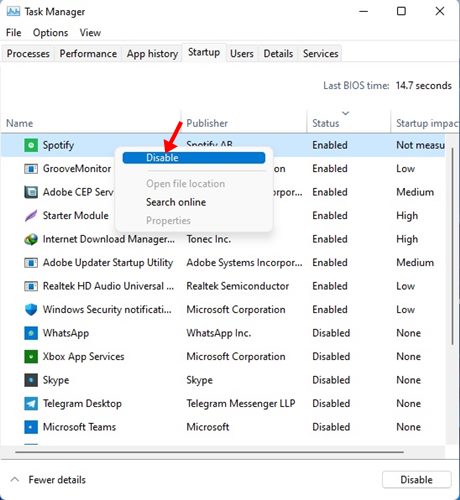
4. Open Task Manager and switch to the Startup Tab. On the Startup tab, right-click all third-party apps and select Disable.
After making the changes, restart your computer. It will boot into a clean state without any third-party apps. You can also try uninstalling the Windows updates.
6. Make Changes to Windows Registry
Here’s how you can change the Windows Registry to resolve the error message.
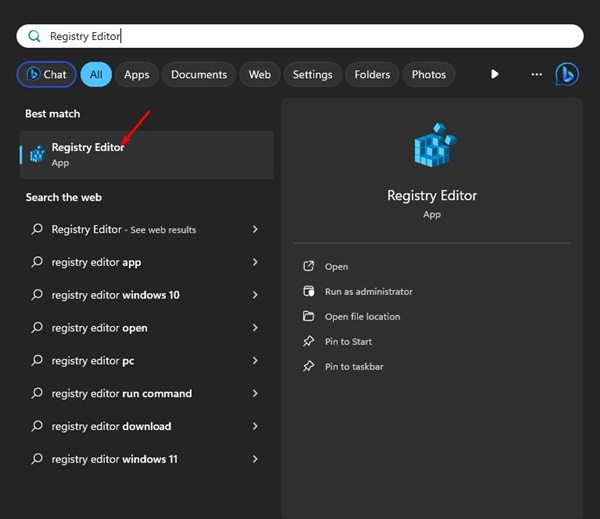
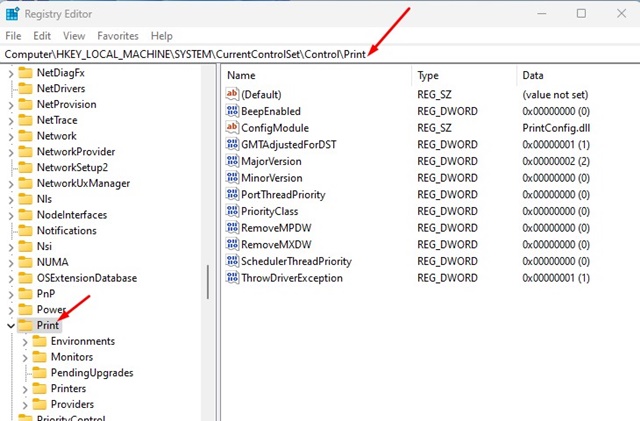
1. Open the Registry Editor app from the Windows Search.
2. Navigate to the following path:
HKEY_LOCAL_MACHINE\System\CurrentControlSet\Control\Print
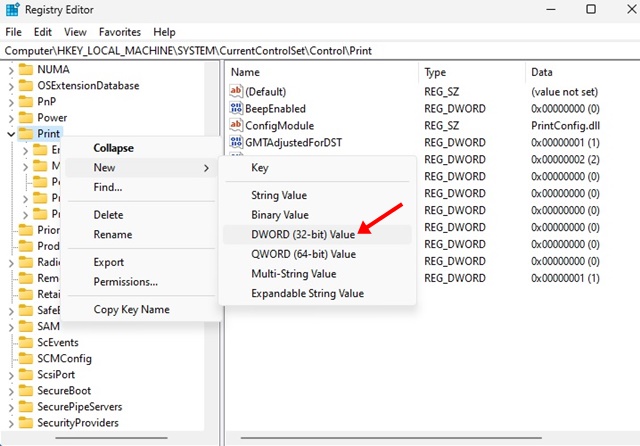
3. Right-click on the Print folder and select New > DWORD (32-bit) Value. Name the new key as RPCAuthnLevelPrivacyEnabled.
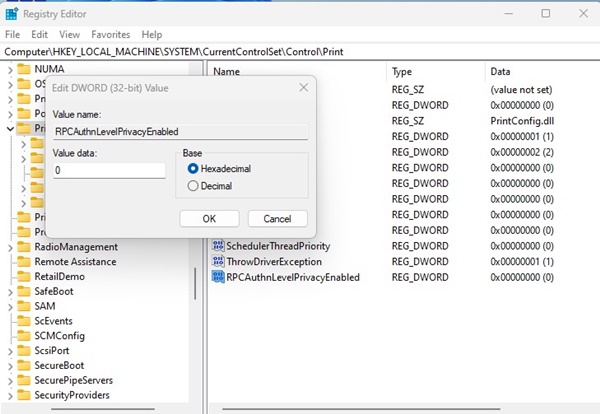
4. Double-click on the RPCAuthnLevelPrivacyEnabled and enter 0 in the Value data field. Once done, click on OK.
7. Run an Antimalware Scan
Running a full scan with Windows Security could help if the problem is linked to malware. Here’s how you can run a full antimalware scan.
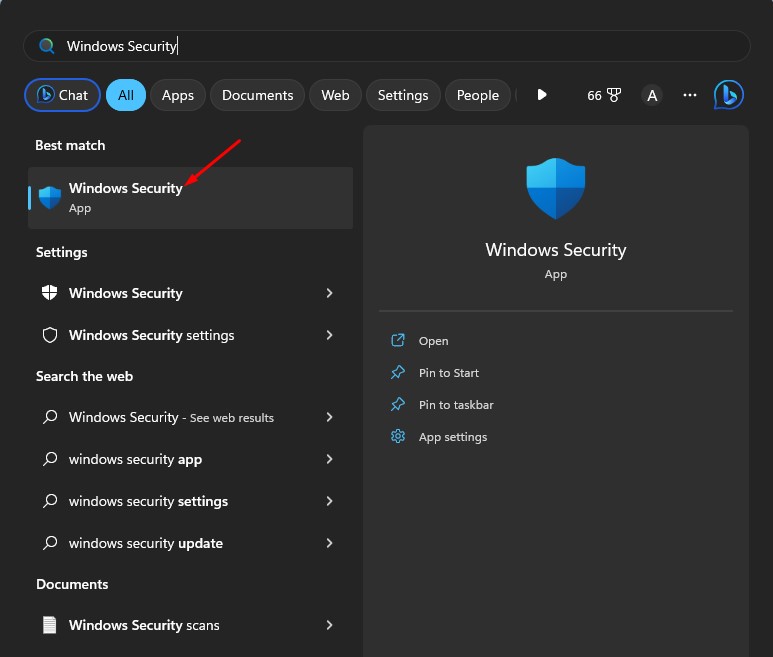
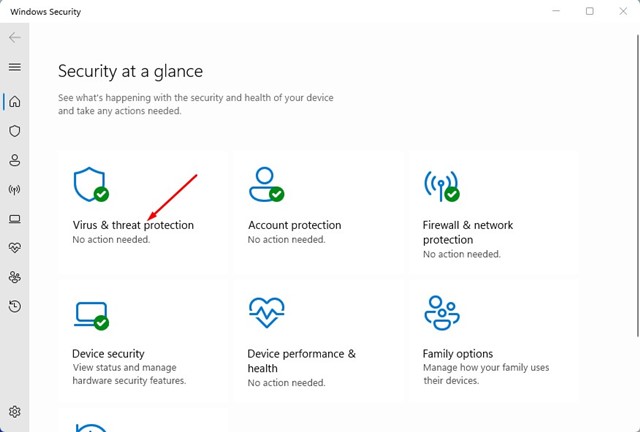
1. Open the Windows Security app from the Windows Search.
2. Select Virus & Threat Protection.
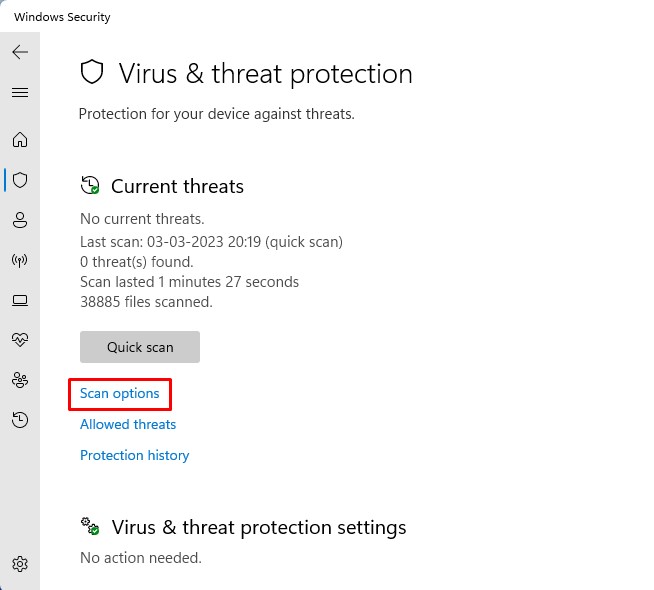
3. Click on the Scan options link.
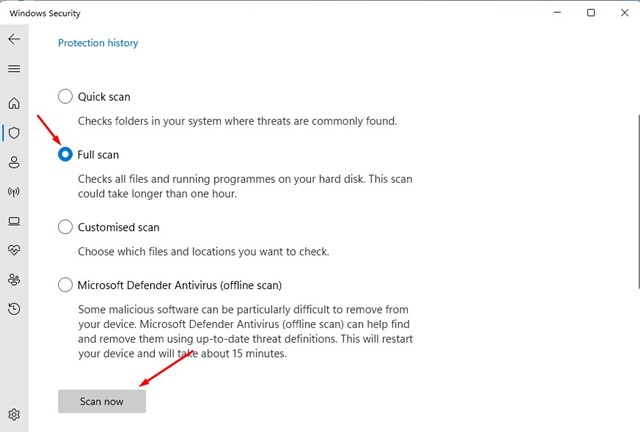
4. Select Full Scan and click on Scan Now.
These are the best & working methods to fix the error on Windows. If you have followed all methods carefully, you can uninstall the updates now.