
If you use a Proxy server to hide your IP address and other users using your PC, you may want to block access to the Proxy settings on your Windows 11. Doing so will prevent someone from accessing or modifying the Proxy settings on your Windows 11. Here’s how you can block access to Proxy settings.
Prevent Users from Changing Proxy Settings (Local Group Policy)
Important: Since we will modify the Local Group Policy editor, we recommend creating a system restore point. If anything goes wrong during the process, you can restore your PC to a previous point in time.
1. Press the Windows Key + R button on your keyboard. Type gpedit.msc and press Enter.

2. This will open the Local Group Policy Editor on your Windows 11 PC.
3. Navigate to this path:
User Configuration > Administrative Templates > Windows Components > Internet Explorer
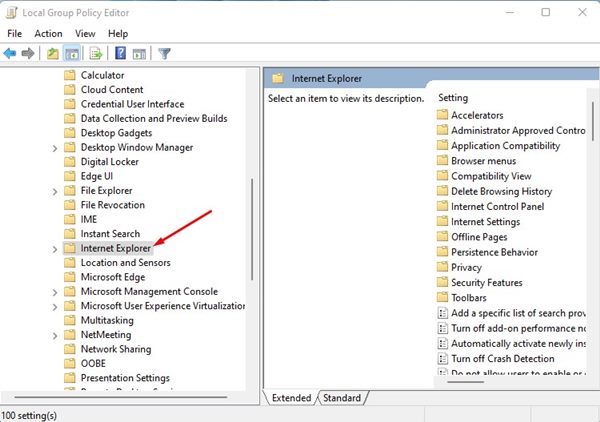
4. Find and double-click on the Prevent Changing Proxy Settings.
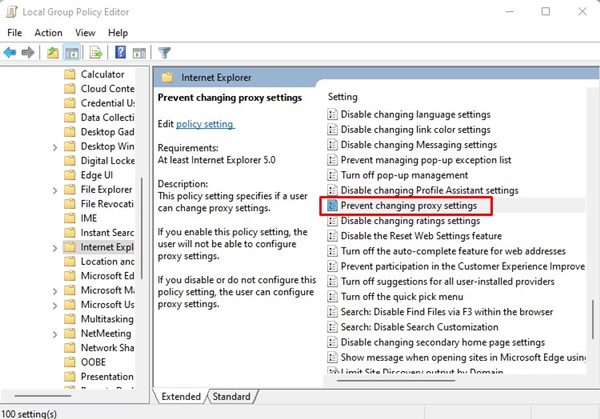
5. Select Enabled and click Apply.
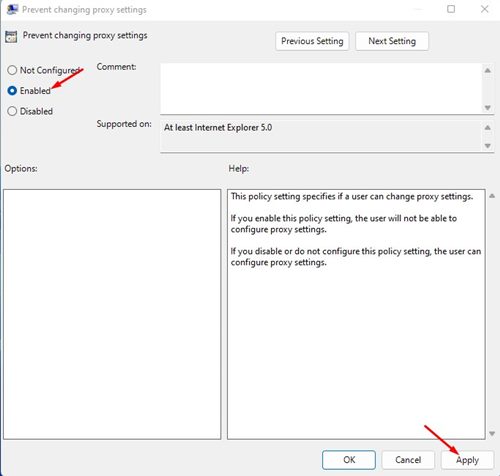
6. After making the changes, restart your Windows 11 PC.
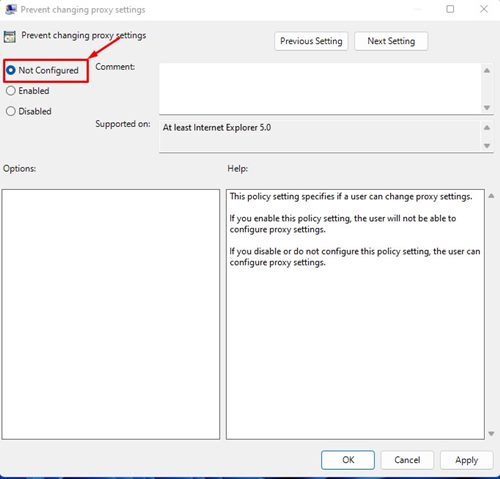
7. If you ever wish to change the proxy settings again, select Not Configured in Step 5.
If you want to protect your privacy online, you need to start using VPN apps for Windows 11.
Prevent Users from Changing Proxy Settings using Registry Editor
You can also prevent users from changing proxy settings on Windows 11 by modifying the Registry File. To do so, you need to change the Windows Registry Editor.
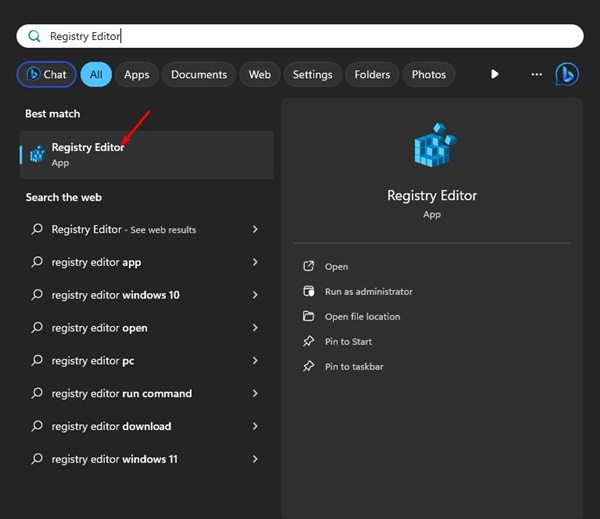
1. Open Registry Editor from the Windows Search.
2. Navigate to this path:
HKEY_CURRENT_USER\Software\Policies\Microsoft
3. Right-click on the Microsoft Key and select New > Key. Name the new Subkey as Internet Explorer.
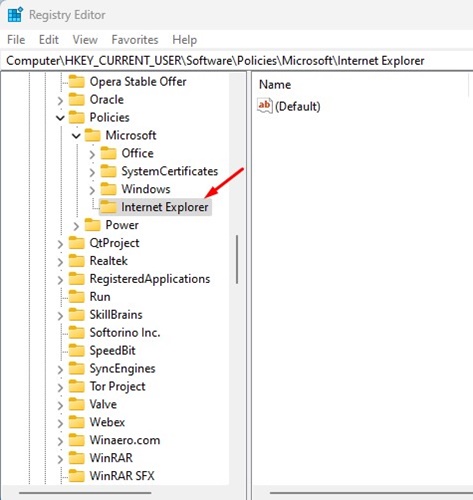
4. Right-click on the Internet Explorer key and create a new subkey named Control Panel.
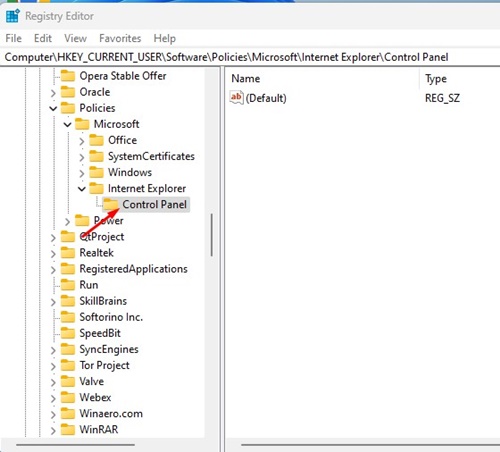
5. With the Control Panel key selected, right-click on the blank area in the right pane and select New > DWORD (32-bit) Value.
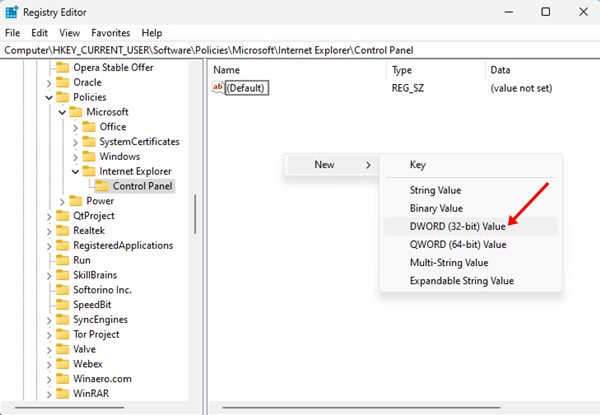
6. Name the new DWORD Value as Proxy. Double-click on the Proxy and set its value data to 1.
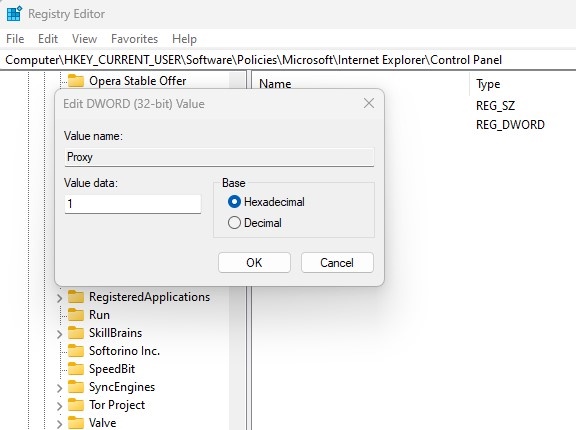
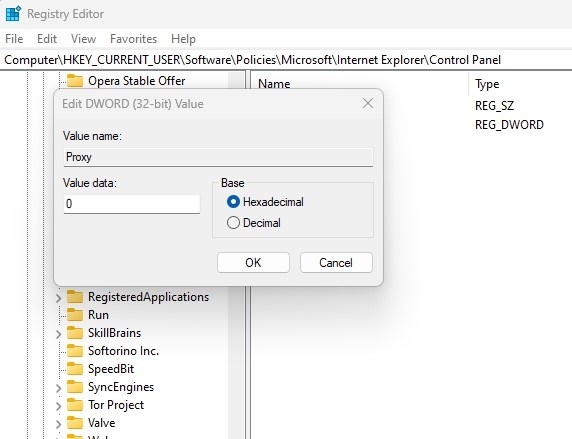
7. If you wish to allow users to change the proxy settings, set 0 on the value data for Proxy DWORD Value on the previous step. Or else, delete the Internet Explorer Key you created in Step 3.
The above steps will restrict users from changing the proxy settings; they won’t remove the existing proxy settings. This means that your computer will continue to use the proxy configuration you set up previously.