Windows 11 is the new desktop operating system from Microsoft. The new operating system ships with many new features and customization options. The first thing that you will notice after installing Windows 11 is the new Start Menu.
Although Windows 11 runs on many systems, it’s still under testing. Microsoft is making constant efforts to improve the functionality of the operating system. In this article, we will talk about a new Start Menu feature.
The latest build of Windows 11 allows you to show more Pinned Tiles on the Start Menu. Starting from Windows 11 Insider Preview Build 22509, users will get a dedicated option in the Settings app to show more pinned tiles in the Start Menu.
Although the option is available in Windows 11 Insider Preview Build 22509, the feature is expected to be rolled out to other builds soon. So, if you are interested in showing more pinned tiles on Windows 11 start menu, you are reading the right guide.
Steps to Show More Pinned Tiles on Windows 11 Start Menu
In this article, we will share a step-by-step guide on how to show more pinned tiles on Windows 11 Start Menu. Let’s check out.
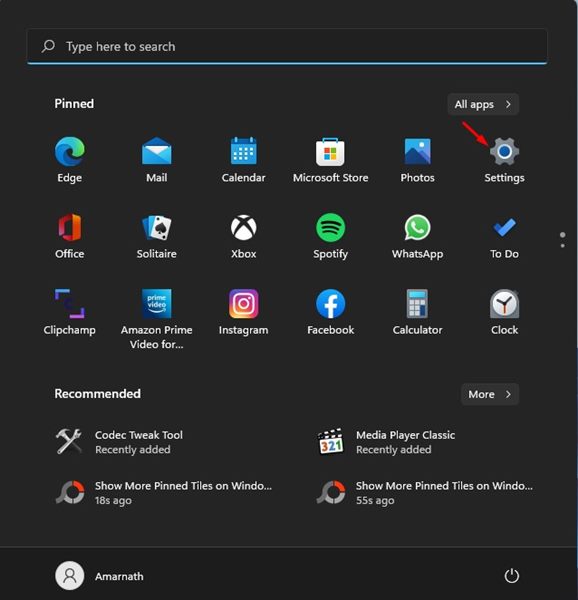
1. First of all, click on the Windows 11 Start button and select Settings.
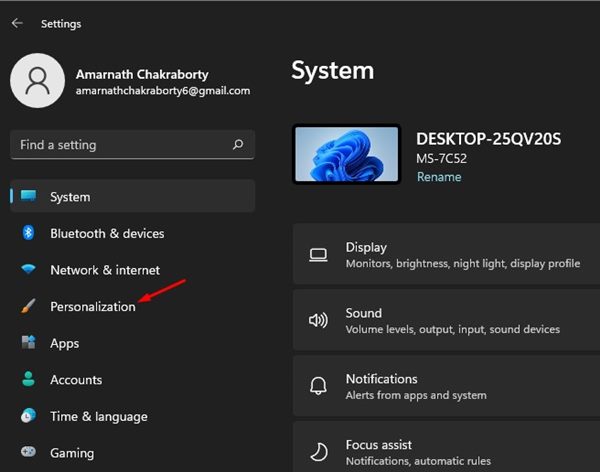
2. On the Settings page, click on the Personalization option as shown below.
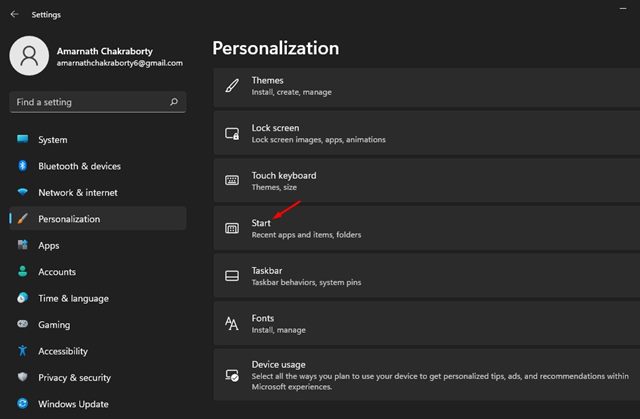
3. On the right pane, click on the Start option as shown below.
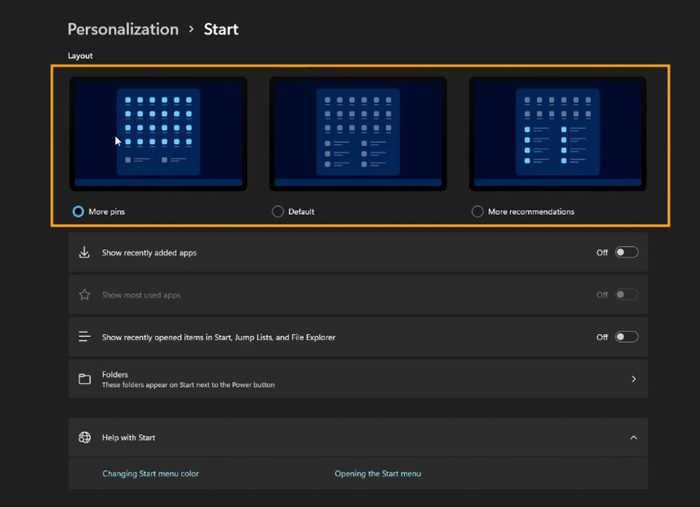
4. You will now find three options in the Layout section. You need to select the More pins option to show more pinned tiles.
That’s it! You are done. After making the changes, restart your Windows 11 computer to apply the more pinned tiles option.
Show More Pinned Tiles via Registry
In this method, we will edit the registry file to show more pinned tiles on Windows 11 start menu. Here’s what you need to do.
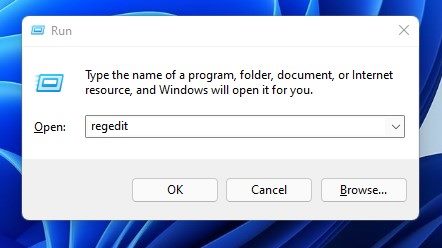
1. First of all, press the Windows Key + R button on your keyboard. Then, on the RUN dialog box, enter regedit and hit the Enter button.
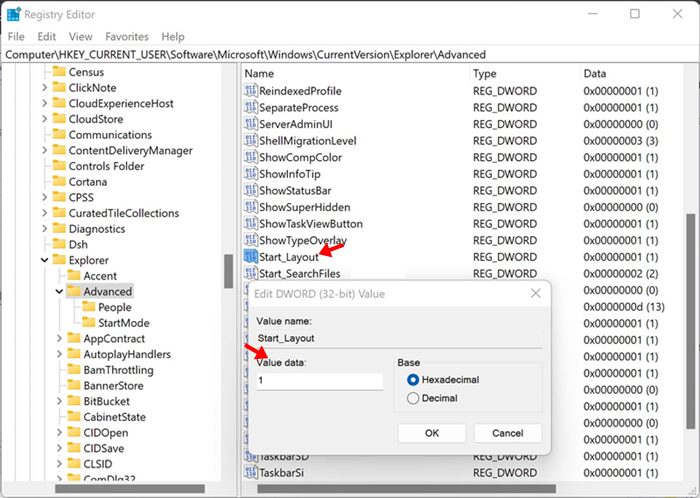
2. This will open the Registry Editor. You need to navigate to the following path:
HKEY_CURRENT_USER\Software\Microsoft\Windows\CurrentVersion\Explorer\Advanced
3. On the right pane, double click on the Start_Layout key.
4. Set the Value data to ‘1’ to show more pinned tiles. Other available options are:
0: Sets the default option
1: Shows more pinned tiles
2: Shows More Recommendations
5. After making the changes, click on the Ok button and restart your PC.
It’s pretty easy to show more pinned tiles on Windows 11 Start Menu. However, your PC needs to be running on Windows 11 Insider Preview Build 22509 to show more tiles. I hope this article helped you! Please share it with your friends also. If you have any doubts related to this, let us know in the comment box below.


