Well, viewing installed apps on Windows 10 is an easy process. You just need to open the Control Panel and look for the installed apps. The same thing can be done by accessing the Program folder on the Windows installation drive.
Certain programs can’t be uninstalled via the Control Panel. At that time, you can use the CMD or Powershell to force-remove an application. For example, you can’t uninstall Microsoft Store apps from the Control Panel. To remove the store apps, you need to find the package name and force-uninstall it via Powershell.
View Installed Programs in Windows 10 via Powershell
So, if you are looking for ways to view installed apps on Windows 10 via Powershell, then you have landed on the right webpage. In this article, we are going to share a detailed guide on how to view installed apps with PowerShell on Windows 10 computers.
1. View Installed Apps Using Powershell
In this method, we are going to view all installed apps via Powershell. To view a list of all installed apps with Powershell, follow some of the simple steps given below.
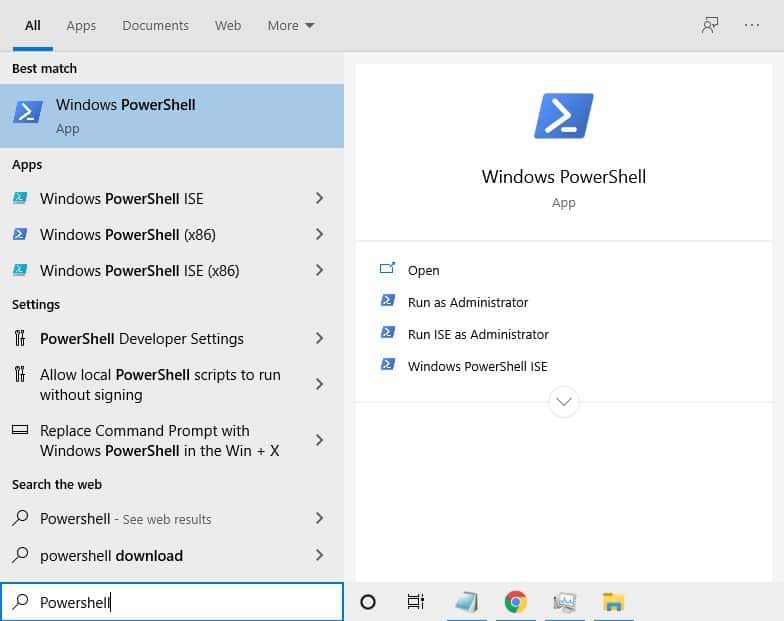
Step 1. First of all, click on the start button and search for Powershell.
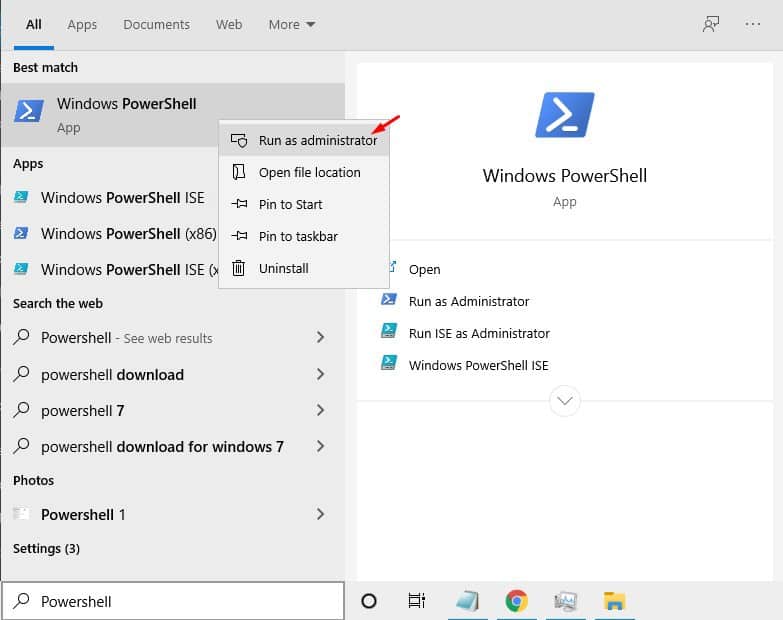
Step 2. Right-click on the Powershell and select ‘Run as administrator’
Step 3. On the Powershell Window, enter the following command –
Get-AppxPackage –AllUsers | Select Name, PackageFullName
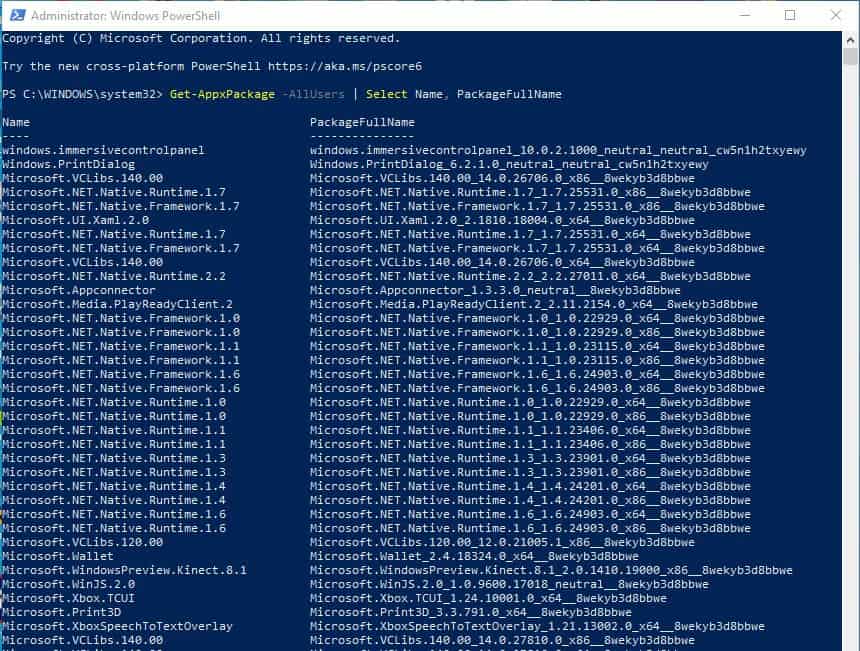
Once done, the Powershell will display the list of all Microsoft Store apps installed on your device.
2. Search for Particular App using Powershell
If the list is too long, and you can’t find the package name of your preferred app, then you need to follow this method. In this method, we are going to force Powershell to search for a particular installed app.
Step 1. First of all, open Windows search and search for ‘Powershell’
Step 2. Right-click on the Powershell and select ‘Run as administrator’
Step 3. On the Powershell Window, type in the given command –
Get-AppxPackage –Name *PARTIAL-APP-NAME*
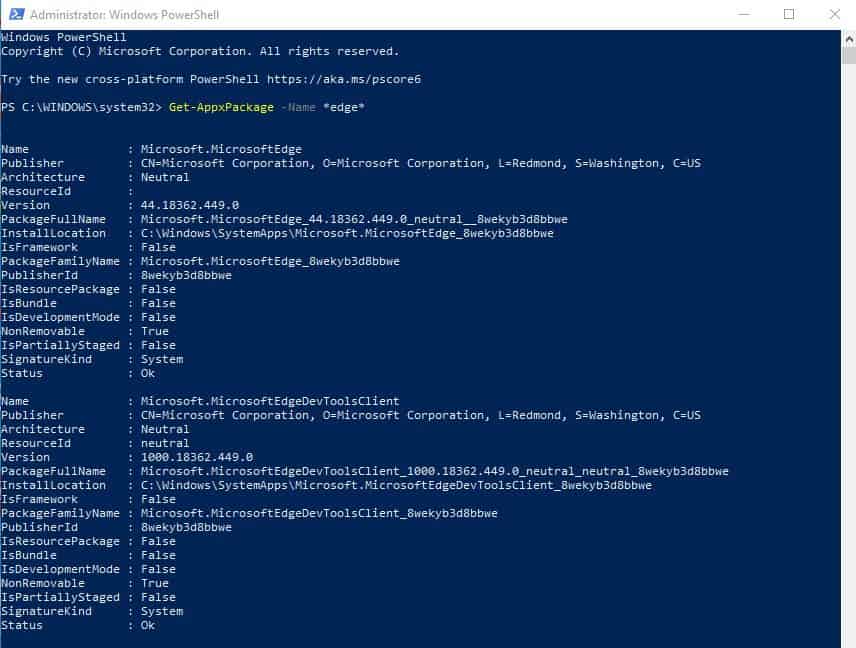
Note: Replace the *PARTIAL-APP-NAME* with the partial name of the app you want to check. The final results would look like – Get-AppxPackage –Name *edge*
Once done, Powershell will generate a list of apps that contains the part of the name you have given. It will tell you the actual name, architecture, Version, Package name, Publisher ID, etc.
So, this article is all about how to view installed apps with Powershell on Windows 10. You can further use this information to remove the app via CMD or Powershell itself. I hope this article helped you! Please share it with your friends also.


