If you are a Windows 11 user and your PC is going to sleep randomly, continue reading the guide. Below, we have shared some easy methods to help you prevent the Windows 11 PC from going to sleep randomly.
1. Update your Windows 11

It’s likely a bug forcing Windows 11 to enter sleep mode. You can eliminate such bugs by updating your operating system.
It’s pretty easy to install pending updates on Windows 11. Head to Settings > Windows Update > Check for Updates to do so. Windows 11 will automatically scan for available updates and install them.
2. Change the Power Plan Settings
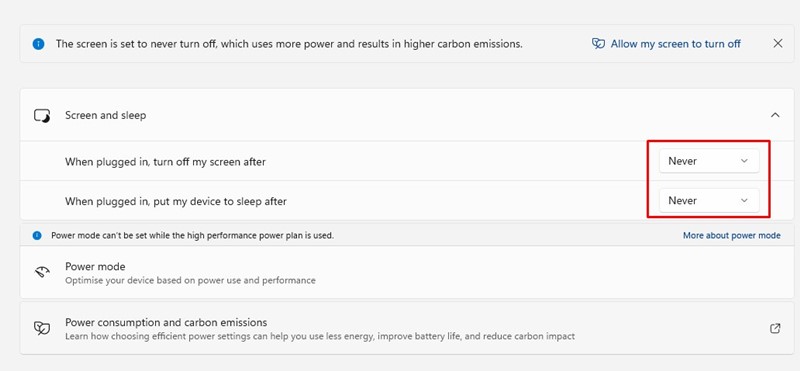
Incorrect Screen and sleep settings are the prominent reasons for the Windows 11 going to sleep automatically issue. You can easily fix this by changing the Power Plan Settings.
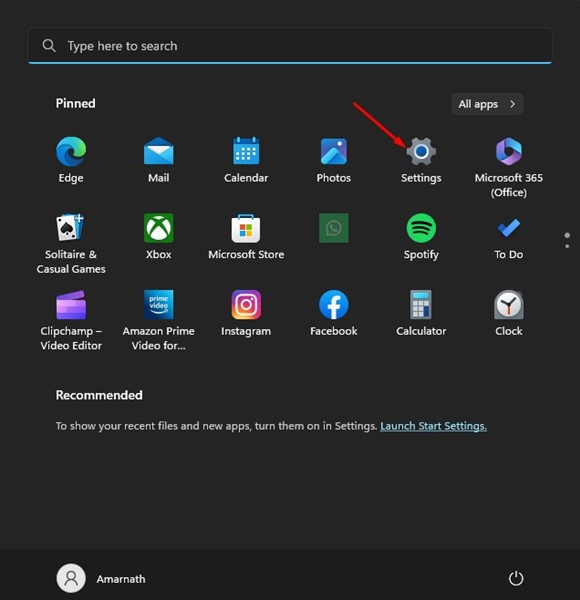
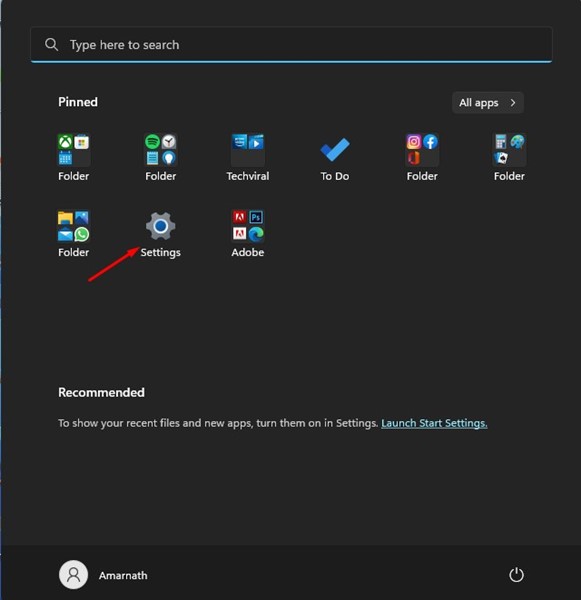
1. Click the Windows 11 Start button and select Settings.
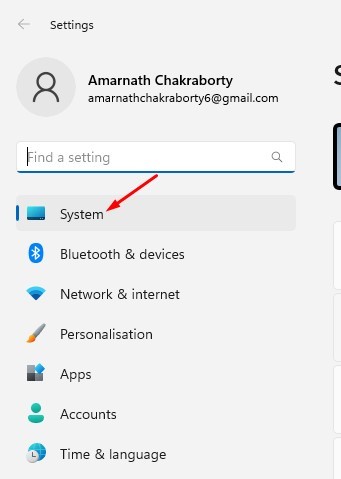
2. Switch to the System tab.
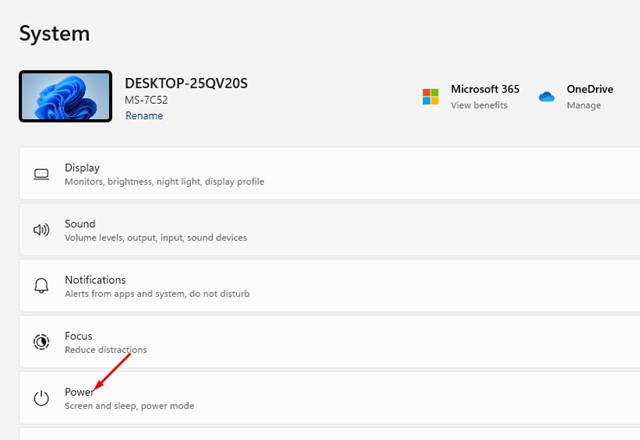
3. Click on Power.
4. Expand the Screen and sleep.
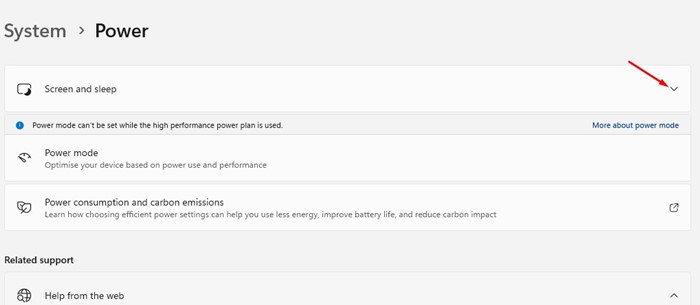
5. On the ‘When Plugged in, turn off my screen after’ and ‘When plugged in, put my device to sleep after’ drop-downs, select Never
3. Run the Power Troubleshooter on Windows 11
Windows 11 PC entering sleep mode automatically or many other power options problems can easily be resolved by running the Power Troubleshooter.
1. Click the Windows 11 Start button and select Settings.
2. Click on the System.
3. Select Troubleshoot.

4. On the Troubleshoot screen, click on the Other troubleshooters.
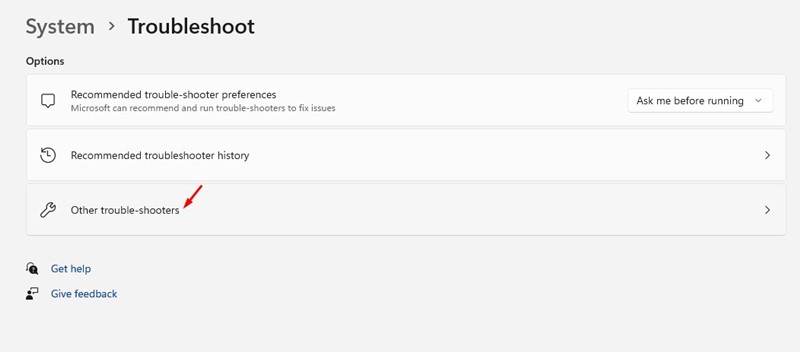
5. Click the Run button next to the Power.

4. Update your Graphics Driver
While graphics drivers are not directly linked with the Power options, updating them may help.
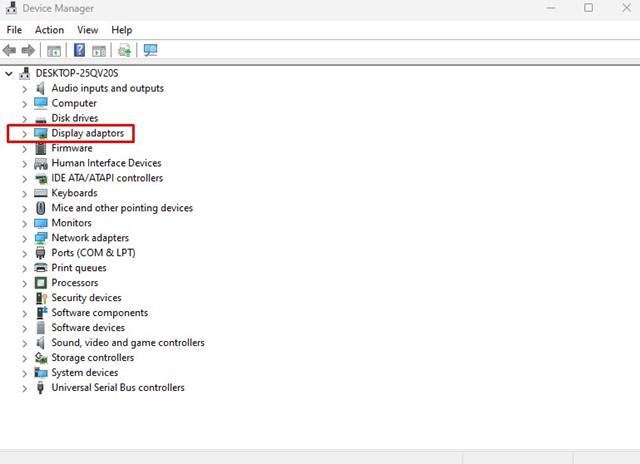
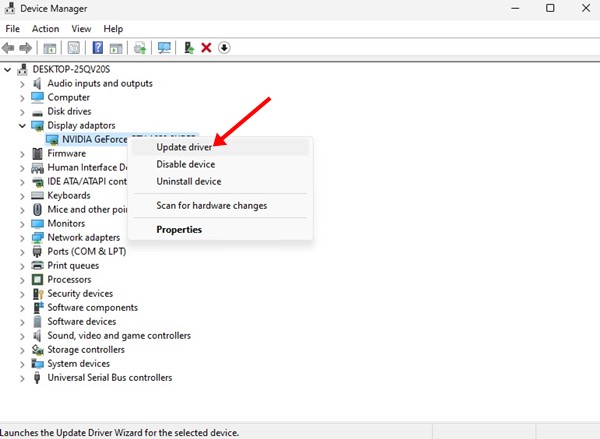
1. Click on Windows search and type in Device Manager.
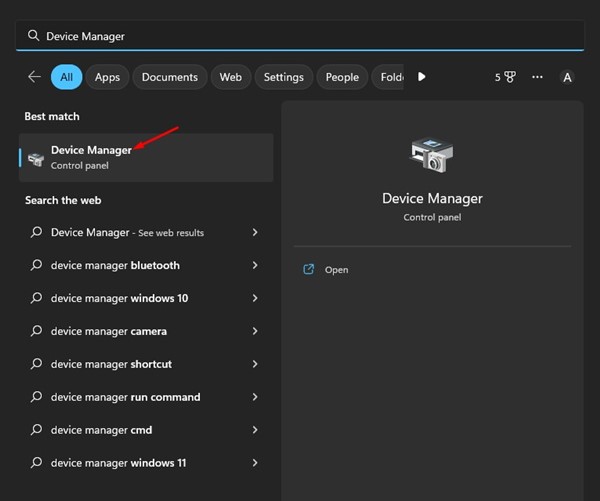
2. Expand the Display Adapters.
3. Right-click on your graphics adapter and select Update driver.
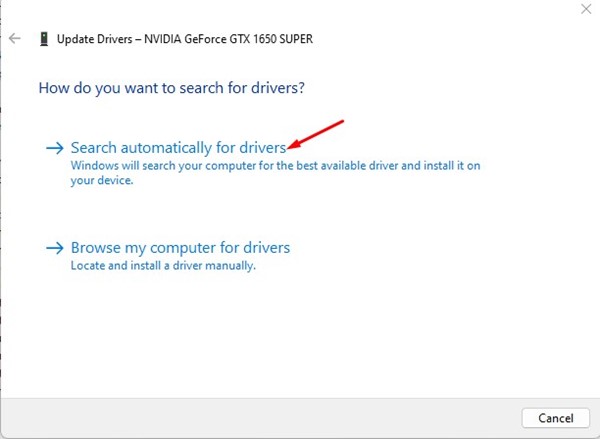
4. On the prompt that appears, select Search automatically for drivers
5. Change the Screen Saver Settings on Windows 11
Many Windows 11 users on the Microsoft Forum have claimed to have solved the problem of their Windows 11 PCs randomly going to sleep. To check whether the problem has been resolved, you can try changing the screen saver settings on Windows 11.
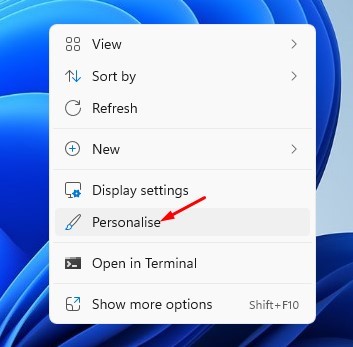
- Right-click on your desktop and select Personalize.
2. On the Personalization settings, click on the Screen saver.
3. This will open the Screen saver settings, click on the drop-down underneath Screen saver and select None.

4. After making the changes, click the Apply button, then on Ok.
6. Disable Hibernation on Windows 11
Hibernation allows users to take a quick break from their work. It basically puts your PC into sleep mode, but when you resume it, all your work is restored automatically.
Since it’s one of the power options, you can try disabling it to see if it fixes the Windows 11 PC’s randomly going to sleep issue.
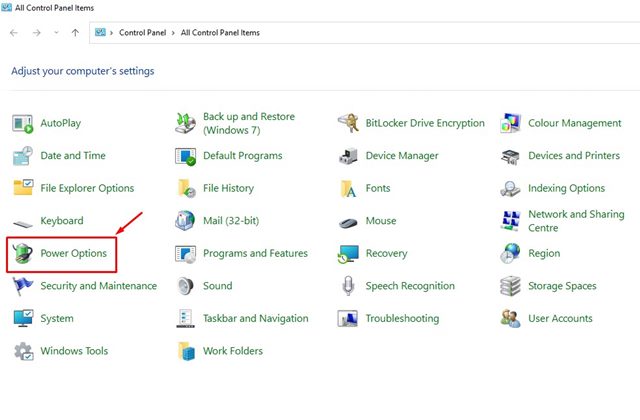
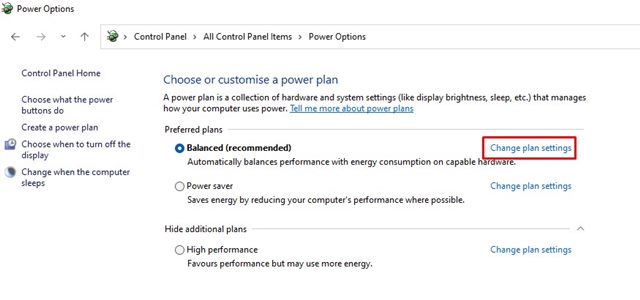
1. Open the Control Panel on your PC and click on Power Options.
2. Click on the Change plan settings link beside your active plan on the Power options.
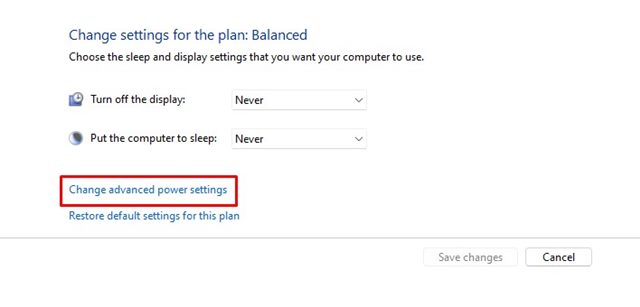
3. Click Change advanced power settings.
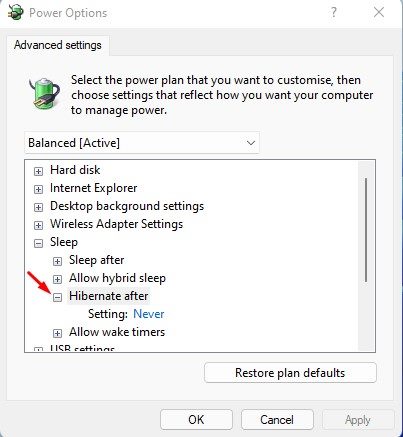
4. Find and expand the Hibernate after.
5. Click on Settings (Minutes): and select Never. You must set Never for both On Battery and Plugged in.
7. Prevent Sleep Mode from the Windows Registry
If you’re comfortable handling the Registry, you can make some changes in it to fix the problem.
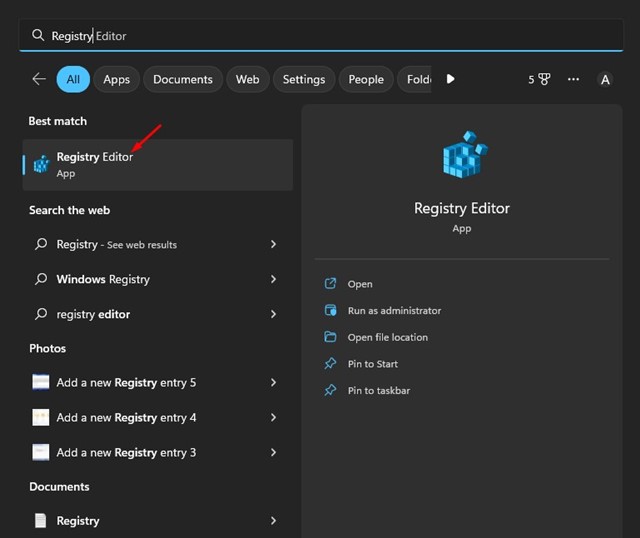
1. Open Registry Editor from the Windows Search.
2. Navigate to the following path:
Computer\HKEY_LOCAL_MACHINE\SYSTEM\CurrentControlSet\Control\Power\PowerSettings\238c9fa8-0aad-41ed-83f4-97be242c8f20\7bc4a2f9-d8fc-4469-b07b-33eb785aaca0
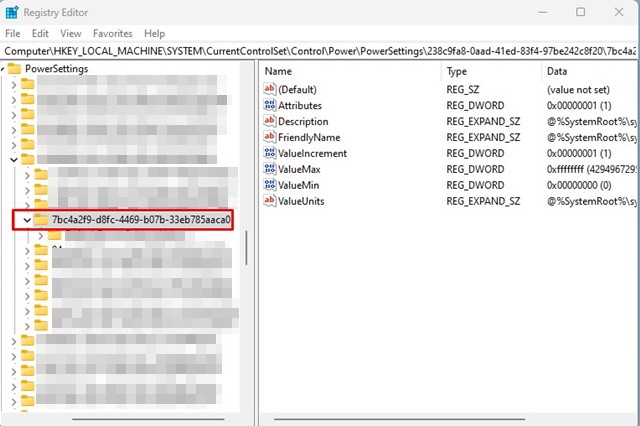
3. On the right side, find and double-click on the Attributes REG_DWORD key.
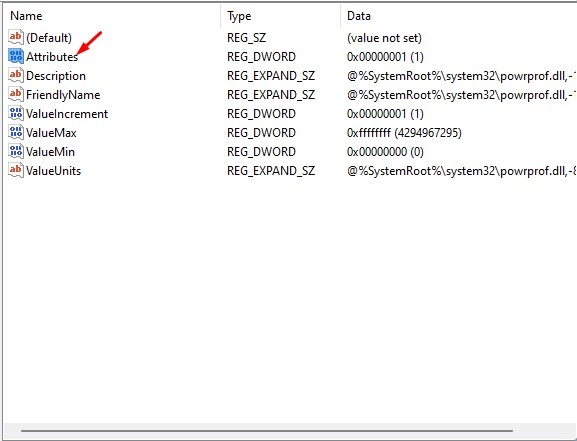
4. In the value data field, enter 2 and click on the OK button.

5. After making the changes, close the Registry Editor and restart your Windows 11 PC.
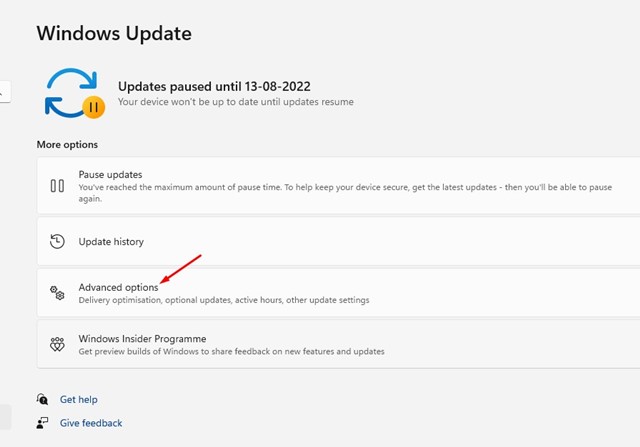
8. Reset Windows 11
Resetting the PC to factory settings is the ultimate solution for various problems. So, if nothing has worked in your favor until now, you can try your luck at resetting your Windows 11 PC.
1. Open the Settings app on your Windows 11 computer.
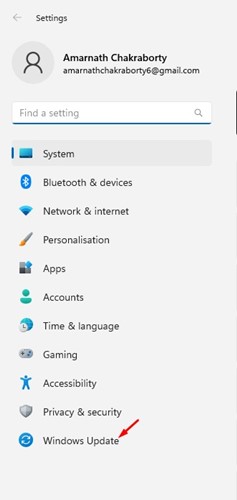
2. Switch to the Windows Update.
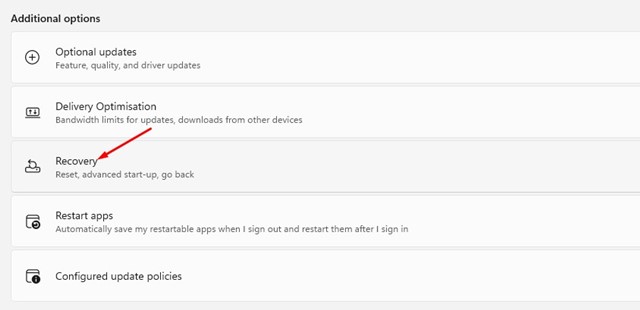
3. Scroll down and click on Advanced options.
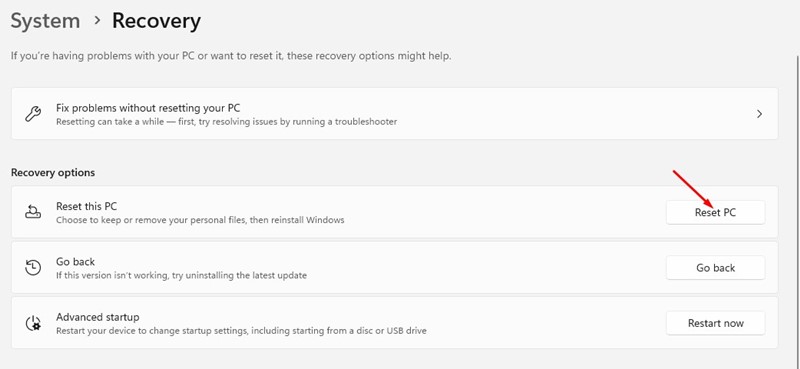
4. Scroll down to the Additional options and click Recovery.
5. Click on the Reset PC.
6. On the prompt that appears, select Keep my files.
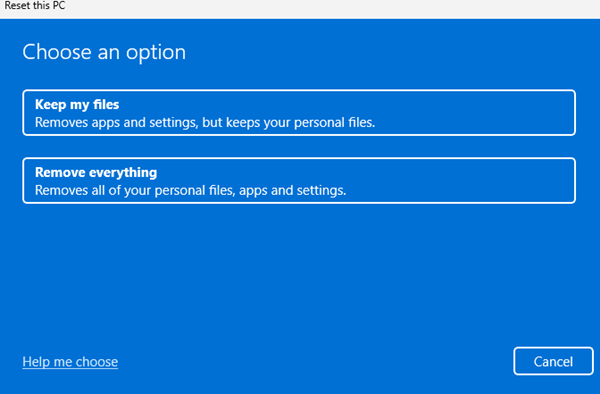
7. On the next prompt, select Local Reinstall.

9. Check for Faulty Hardware
Faulty SMPS, graphics card ports, etc., were often the main problems for PCs entering sleep mode. When the SMPS overheats or stops, your computer will turn off automatically. The same goes for graphics cards.
If your PC has both an integrated and a dedicated graphics card, when the dedicated graphics card overheats, it automatically disables itself to prevent damage.
This process sometimes puts your computer into Power Saving or Sleep mode. So, make sure to rule out hardware-related issues. The best you can do is to take your PC to a technician and have them check it. You also need to check the Power Supply (SMPS).
These are some simple fixes for a Windows 11 PC going to sleep randomly. If you need more help fixing Windows 11 Sleep mode problems, let us know in the comments.


