You can easily mount or unmount ISO files on a virtual drive in Windows 11. Here are the four best ways to mount ISO image files.
1. Mount the ISO file in Windows 11 with a double-click
You don’t need to set up the ISO mounter to work. You can double-click the ISO file, which will immediately mount it and open it.
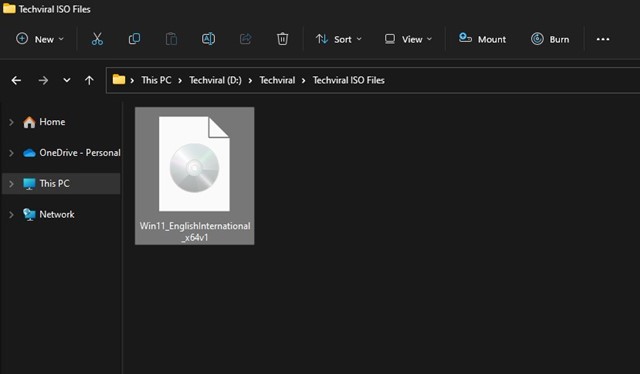
You must open File Explorer and locate the folder with the ISO image. Double-click on the .iso file to mount it on a virtual drive.
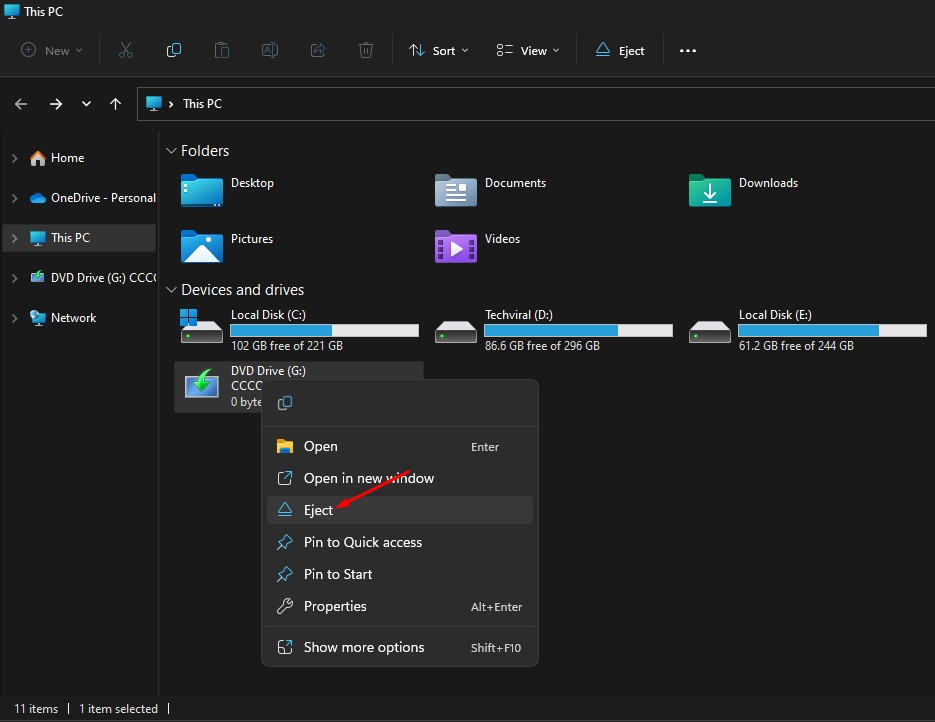
If you want to unmount the ISO image, right-click on the newly mounted virtual drive and select Eject.
2. Mount the ISO file in Windows 11 via the Context Menu
If the double-click method didn’t work for you, you could mount the ISO file via the Context menu.
1. Press the Windows key + E button on your keyboard. This will open the File Explorer on your PC.
2. Navigate to the disc image file you want to mount.
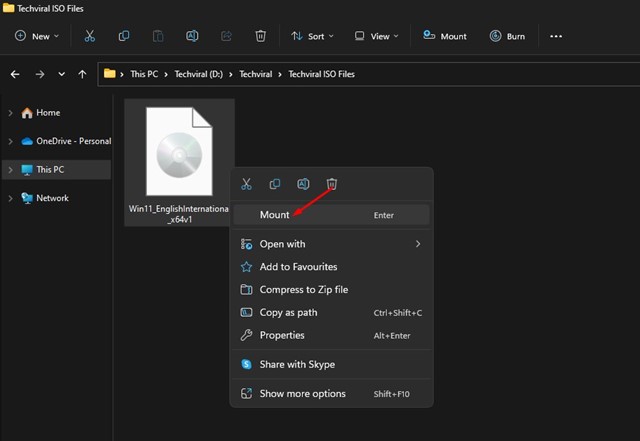
3. Right-click on the .iso image file and select Mount. This will mount the ISO file in a virtual drive. You will find it in your File Explorer.
4. Right-click on the newly mounted virtual drive and select Eject.
3. Mount ISO files using Windows PowerShell
You can also utilize Windows PowerShell to mount ISO files if you want.
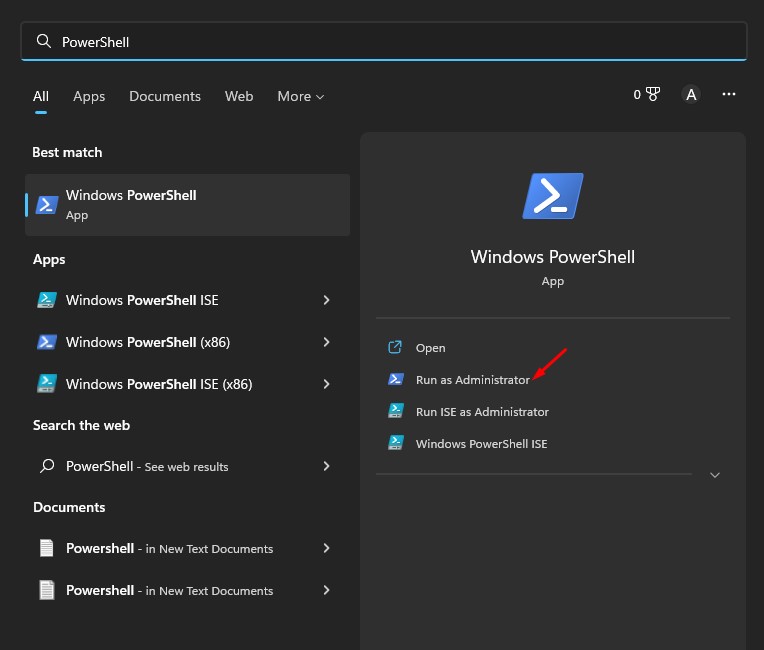
1. Click on the Windows 11 search and type PowerShell. Right-click on PowerShell and select Run as administrator.
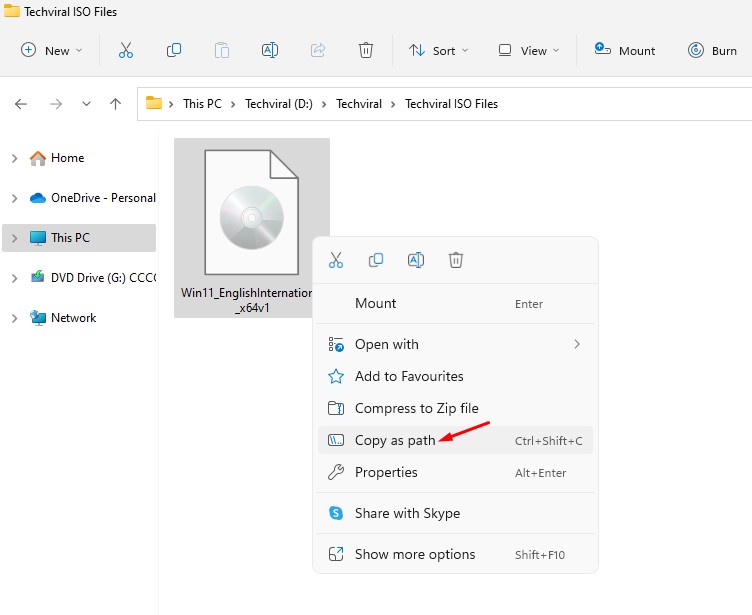
2. Now minimize PowerShell and navigate to the folder where you have stored the ISO File. Right-click on the ISO file and select Copy as Path.
3. Maximize the PowerShell and execute the command given below, and press Enter:
Mount-DiskImage -ImagePath "CompletePathToISO.iso"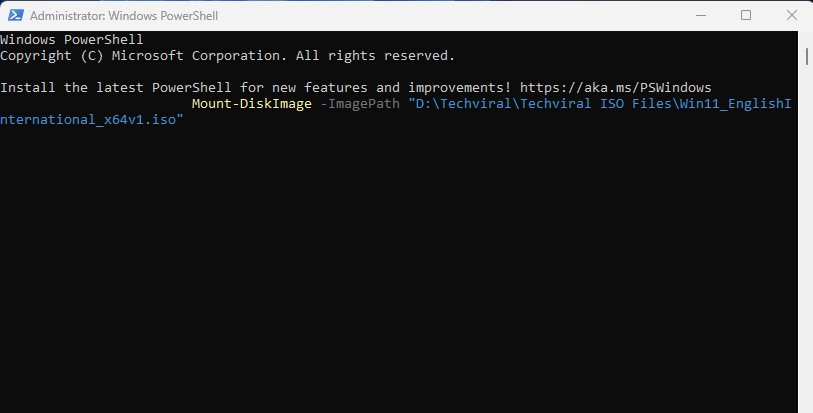
Important: Replace CompletePathToISO with the actual path of the ISO file.
4. This will immediately mount the ISO file on your Windows 11 File Explorer.
5. If you want to eject or Unmount the ISO image, execute the command:
Dismount-DiskImage -ImagePath "CompletePathToISO.iso"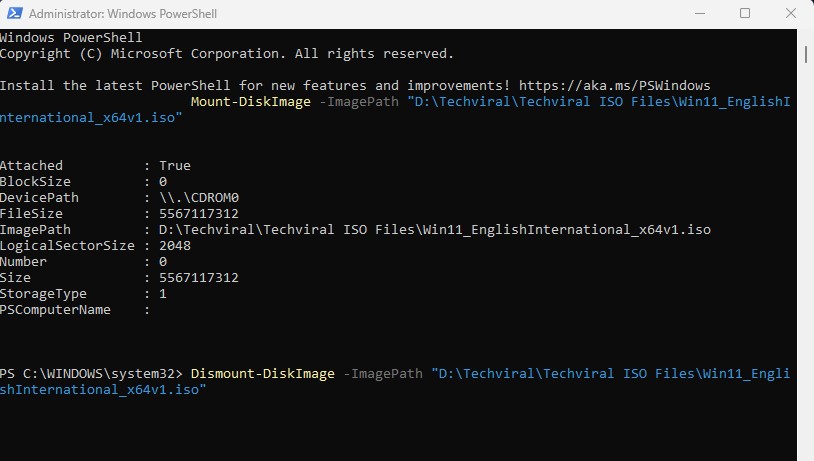
Important: Replace the CompletePathToISO with the actual path of the ISO file.
Also read: Windows 11 ISO Free Download Full Version
4. Use ISO Mounter to mount ISO images in Windows 11
ISO Mounters are third-party softwares that allows you to open and read iOS Files. We have already shared a list of the best ISO Mounters for Windows; make sure to go through that post to discover all available options.
Other than the default options, you can use a third-party ISO mounter to mount your ISO image on Windows 11. So, these are the best ways to mount ISO image files on a Windows 11 computer.


