If you are using Windows, you can configure Windows Hello to protect your Chrome passwords. Below, we have shared the steps to protect your Chrome passwords with Windows Hello. Let’s get started.
You will need a Windows Hello Compatible Device!
To protect your Chrome passwords with Windows Hello, you should have a Windows Hello compatible device. If your device doesn’t support this technology, there’s no point in following the steps, as you can’t protect your Chrome passwords with this feature.
How to Configure Windows Hello?
Before you protect your Chrome passwords with Windows Hello, you need to configure Windows Hello on your compatible device. Here’s what you need to do.
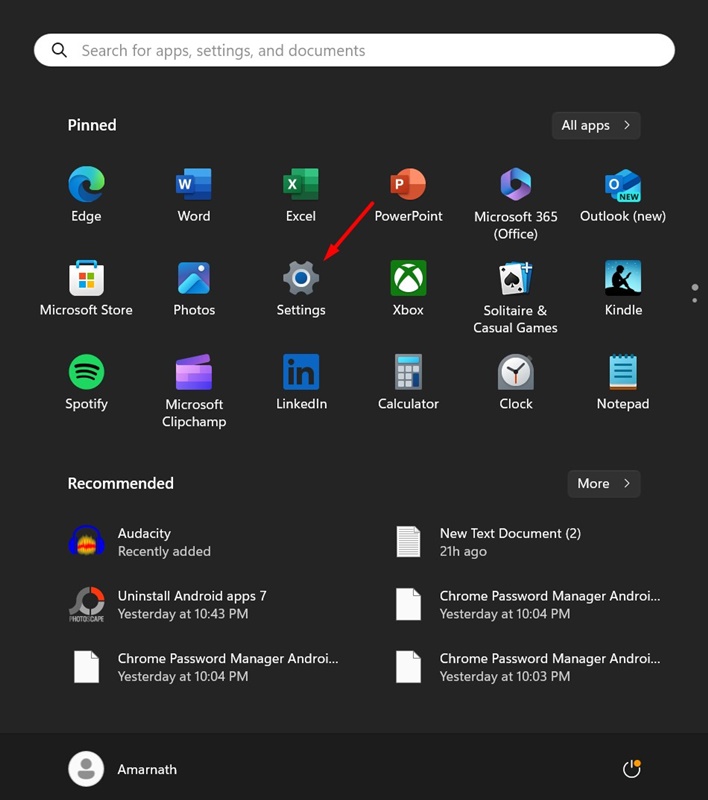
1. Click on the Windows Start button and select Settings.
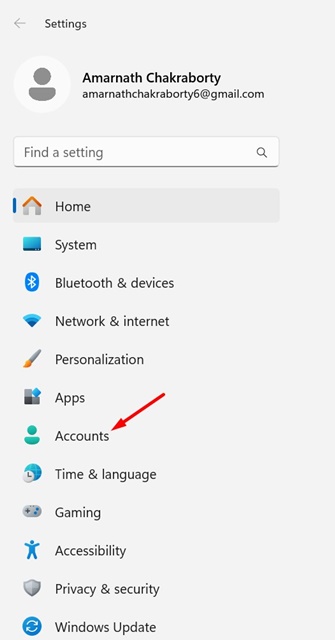
2. When the Settings app opens, switch to Accounts.
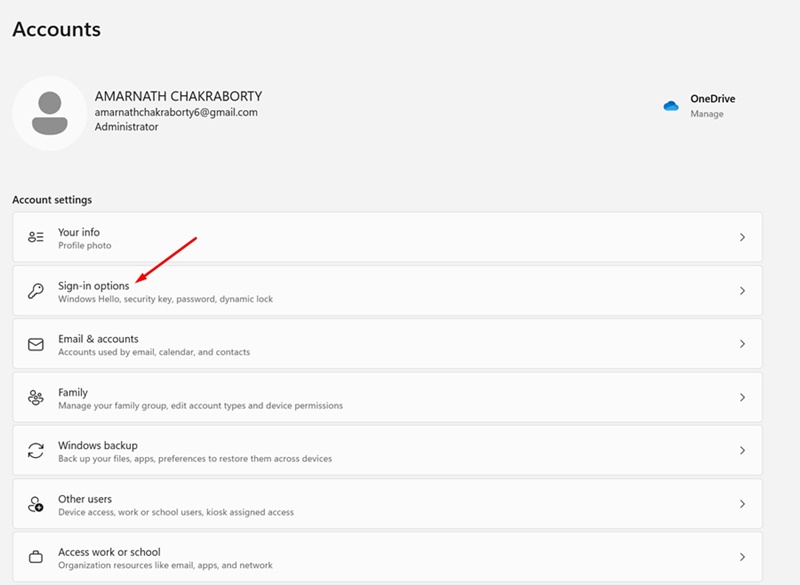
3. On the right side, click Sign-in Options.
4. In Windows Hello settings, you need to set either facial recognition, fingerprint, or PIN as the sign-in method.
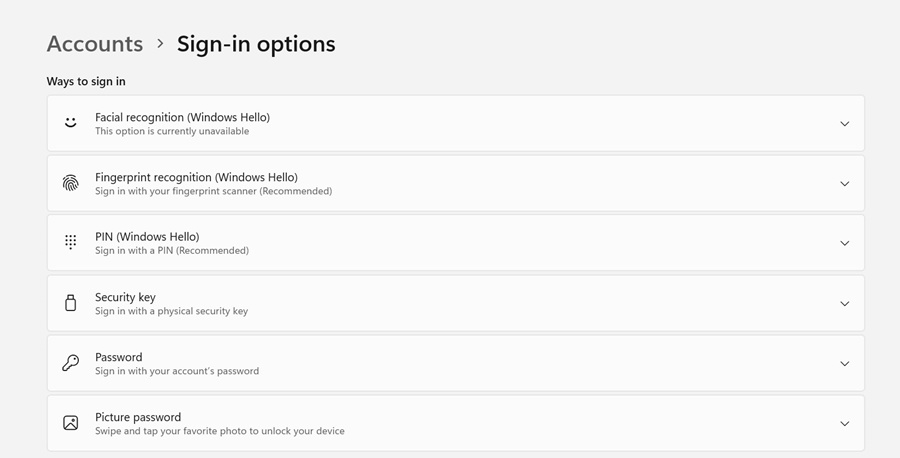
You just need to select the appropriate sign-in option and follow the on-screen instructions to finish the setup.
How to Protect Your Chrome Passwords with Windows Hello
After configuring Windows Hello on your compatible device, here’s how you can protect your Chrome passwords.
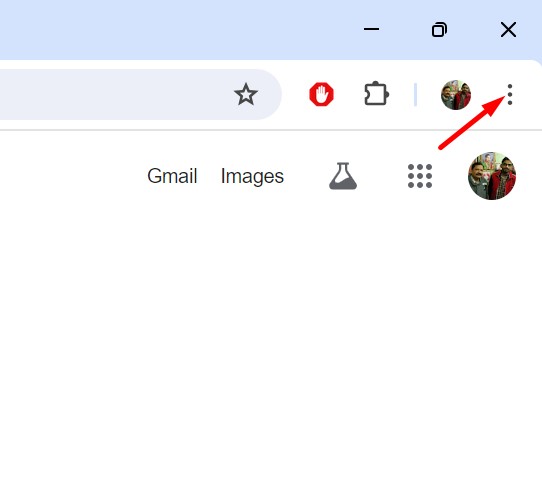
1. Launch the Google Chrome browser on your computer.
2. When the Chrome browser opens, click on the three dots (menu icon) at the top right corner of the screen.
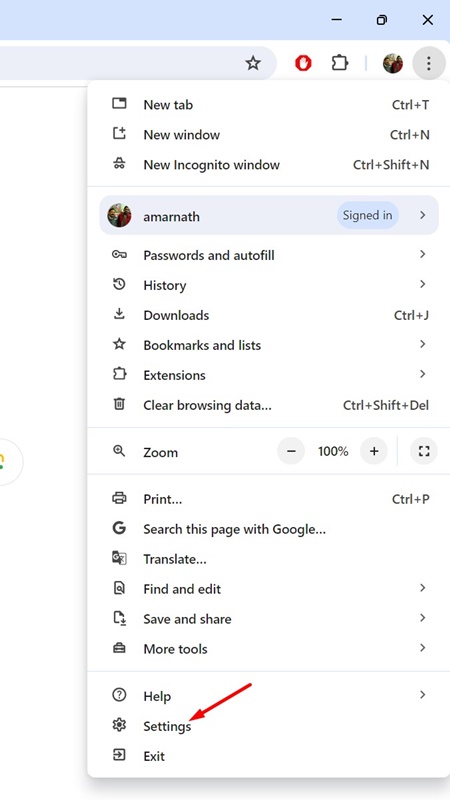
3. On the Chrome menu, select Settings.
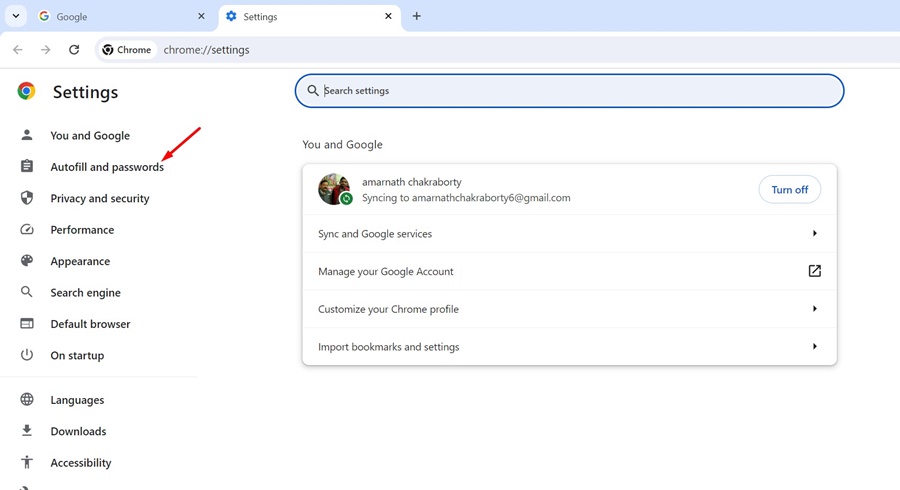
4. On the Settings screen, click Autofill and passwords.
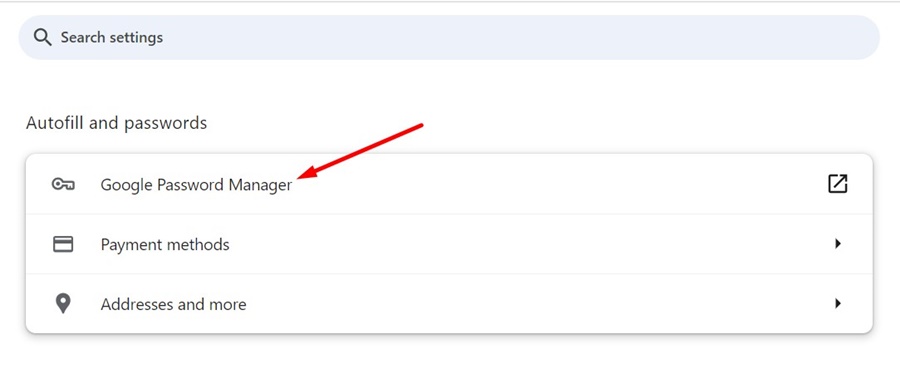
5. On the right side, click Google Password Manager.
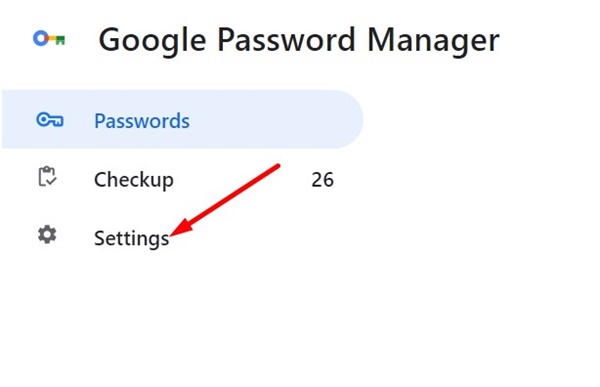
6. On the Password Manager screen, switch to Settings.
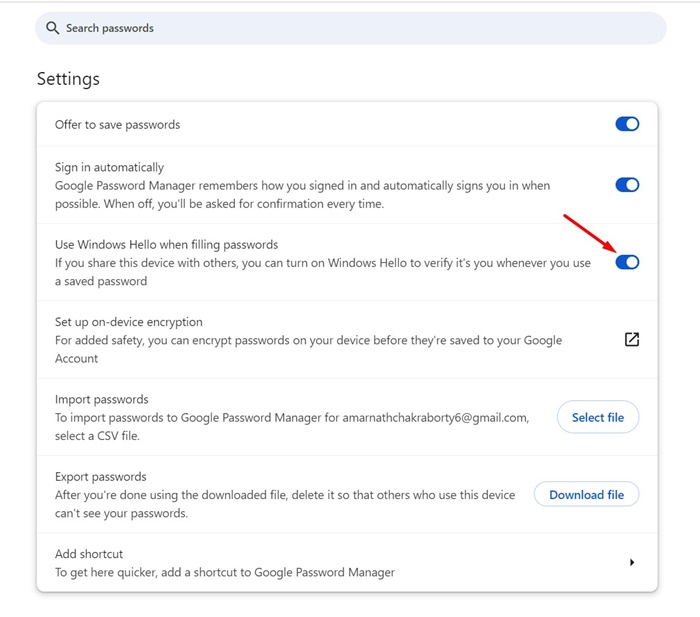
7. On the right side, enable the toggle for ‘Use Windows Hello when filling passwords’.
From now on, whenever you access the Google Password Manager, you will require biometric authentication or a PIN to view the saved login credentials.
How to Turn Off Windows Hello Password Requirements on Chrome
If you’ve enabled Windows Hello protection to fill passwords, you will be asked to enter the Windows Hello PIN or use the biometric every time you want to access or fill in passwords.
This could be annoying if you’re in a hurry and don’t want to authenticate yourself. So, for this reason, it’s best to know how to turn off the feature as well.
1. Launch the Google Chrome browser on your computer.
2. Click on the three dots at the top right of the screen.
3. On the Chrome menu, select Settings.
4. Switch to the Autofill and passwords.
5. Click on Google Password Manager.
6. Switch to the Settings tab.
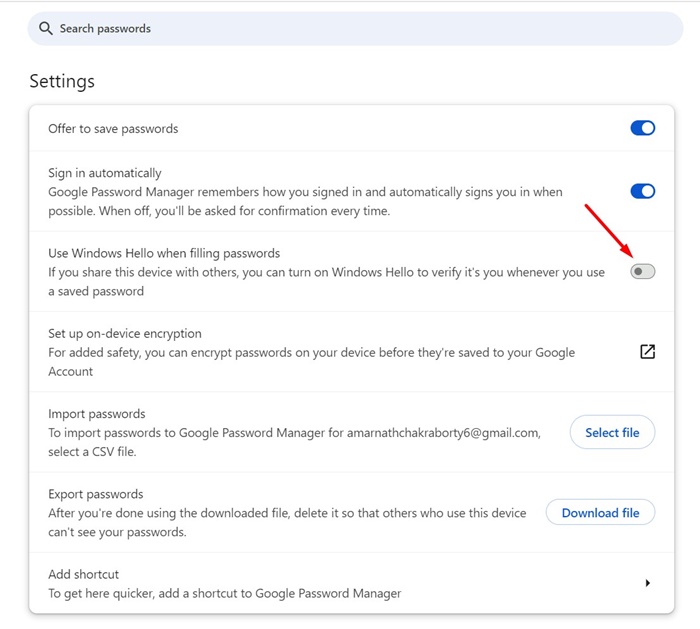
7. On the right side, turn off the toggle for ‘Use Windows Hello when filling passwords’.
This will turn off the feature that requires you to use Windows Hello when filling in passwords in the Google Chrome browser.
These are some simple steps to protect your Google Chrome passwords with Windows Hello. If you need more help on this topic, let us know in the comments.


