Windows is indeed the most widely used desktop operating system right now, but it is not without its flaws. Bugs and glitches are pretty common on this platform, and users sometimes face problems while running specific programs.
Apps & Games can misbehave on the operating system for various reasons: malware issues, corrupted or missing files, system errors, etc. Whatever might be the reason, you can quickly repair apps in Windows 11.
Windows 11 operating system allows users to repair apps and programs if they are not running correctly. When you repair an app, its settings, configurations, and other data are refreshed. In most cases, the apps start working after a repair.
So, if a specific app/program is not running correctly on Windows 11, you should go for the repair function instead of reinstalling it. Hence, in this article, we will share a step-by-step guide on how to repair apps and programs in Windows 11. Let’s check out.
Also Read: 5 Best Live Wallpaper Apps for Windows 11
Steps to Repair Apps and Programs in Windows 11
Important: You won’t see the repair, change, or modify options for all apps and programs installed on your Windows 11.
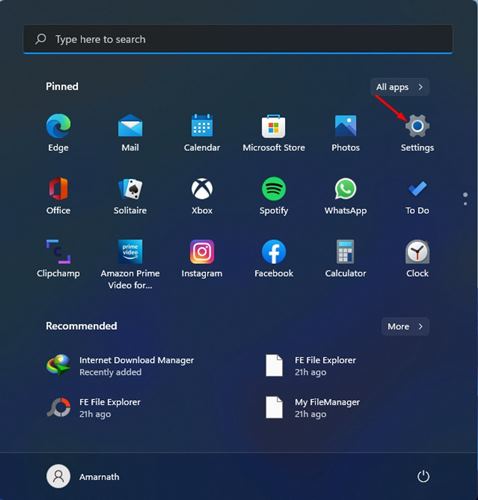
1. First of all, click on the Windows 11 start button and select Settings.
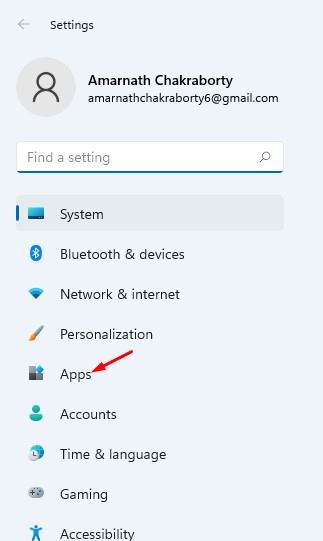
2. On the Settings page, click on the Apps option.
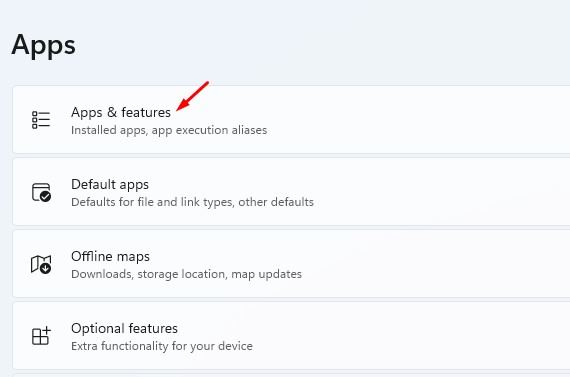
3. On the right pane, click on the Apps & features option as shown below.
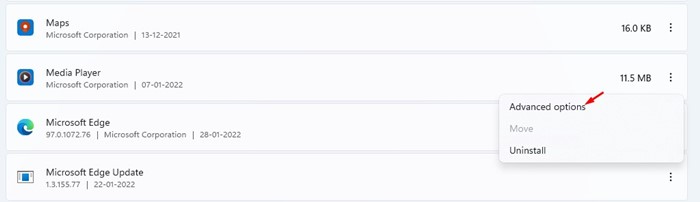
4. Now scroll down and find the app that you want to repair. You need to click on the three dots beside the app name.

5. Next, click on the Advanced options link under the app name.
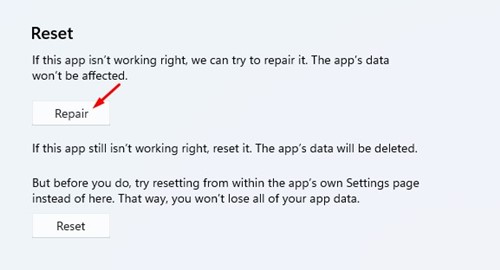
6. On the next screen, click on the Repair option.
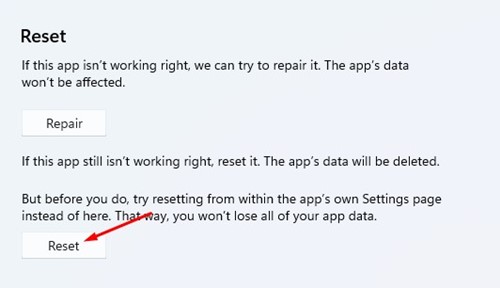
7. If the app is still not fixed, you need to click on the Reset option, as shown below.
That’s it! You are done. This is how you can repair apps from the Settings app.
How to Repair Apps and programs via Control Panel
Just like the Settings app, you can rely on the Control panel to repair apps on Windows 11. Here’s what you need to do.
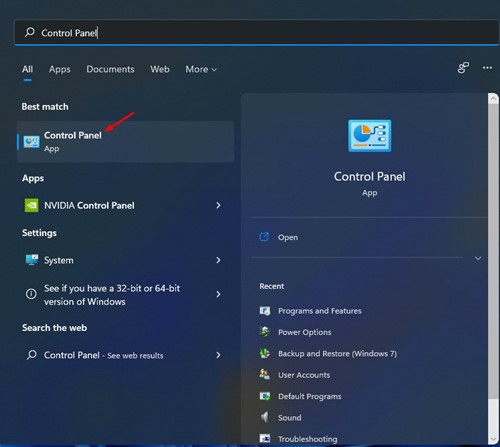
1. First of all, open the Windows 11 search and type in Control Panel. Open Control Panel from the list.
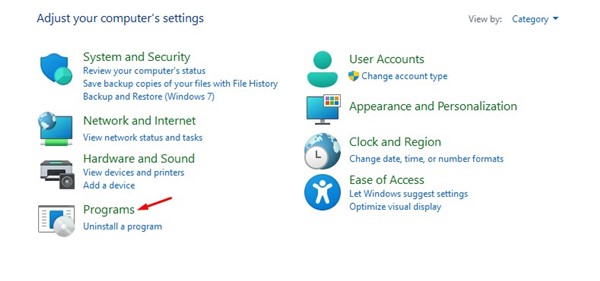
2. On the Control Panel Window, click on the Programs option.
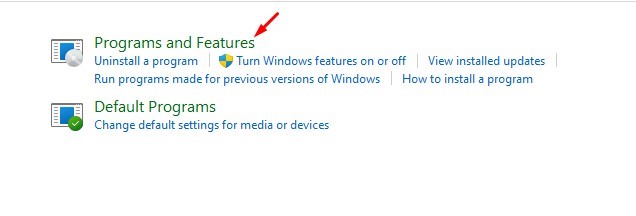
3. On the Programs page, click on Programs and Features.
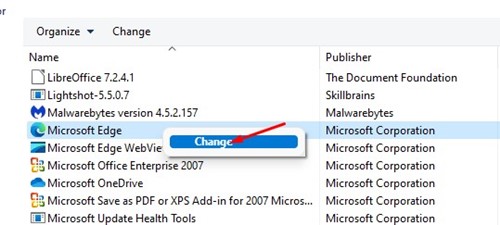
4. Now right click on the program you want to repair and select ‘Repair’. If the Repair option is not available, click on the ‘Change‘ option.
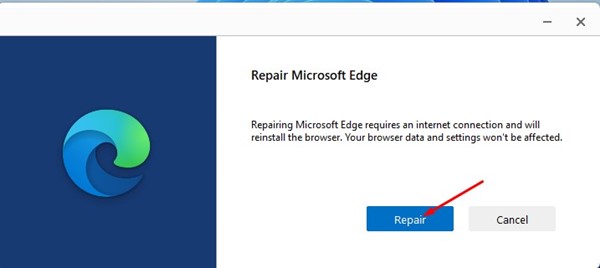
5. On the next screen, click on the Repair option. Then, you need to follow the on-screen instruction to complete the repair process.
Repairing apps and programs in Windows 11 is pretty straightforward. We have shared the two best methods to get any program repaired in no time. I hope this article helped you! Please share it with your friends also. If you have any doubts related to this, let us know in the comment box below.


