The good thing about Windows 10 is that it provides users with regular intervals. When you get bored with the operating system, Microsoft releases a new update. If you don’t know, Microsoft also has a beta channel for insiders that allows users to test the experimental features of the operating system. After passing the testing phase, the features get released to the stable build.
The problem with Dev, Beta, and Release preview channel builds is that they are usually full of bugs. Most often or not, users face issues while using the operating system. What’s worst is that it’s not easy to get out of the Insider program once new builds start shipping.
Microsoft provides a ten-day time frame to roll back to the previous update. If that period is gone, there’s not easy to uninstall the problematic update. So, if you are also experiencing issues with Windows 10 updates, you need to find and remove the problematic update. Or else, you can roll back to an older build.
So, in this article, we will share the best method to roll back Windows updates. The process is a little complicated, but it works. So, let’s check out.
Also Read: How to Rollback Windows Updates After 10-Day Limit
How to Rollback Windows Update (Including Windows Insider Builds)
In this method, we will use the Windows Settings app to roll back major Windows updates, including the Windows Insider build updates. Let’s check out.
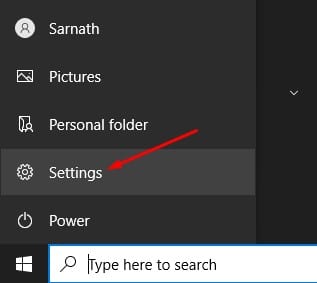
1. First of all, click on the Start menu and then click on the Settings option.
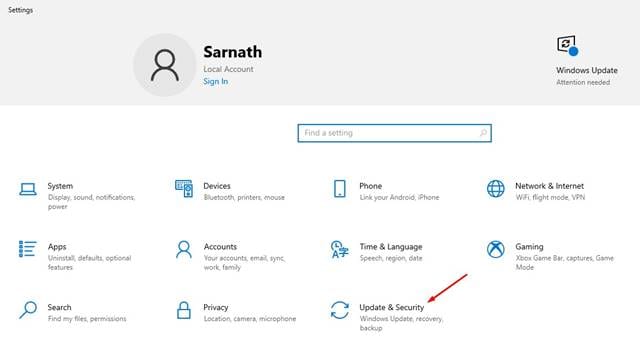
2. On the Settings page, click on the Update & Security option.
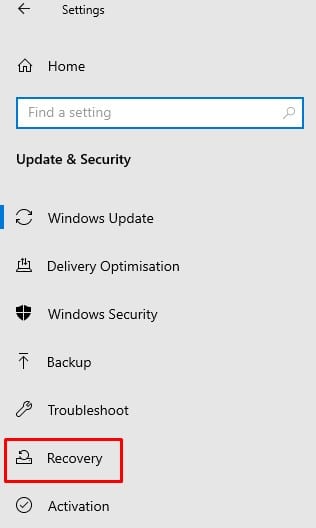
3. Click on the Recovery option on the Update & Security Page.
4. Now, under the Go back to the previous version, click the Get Started button.
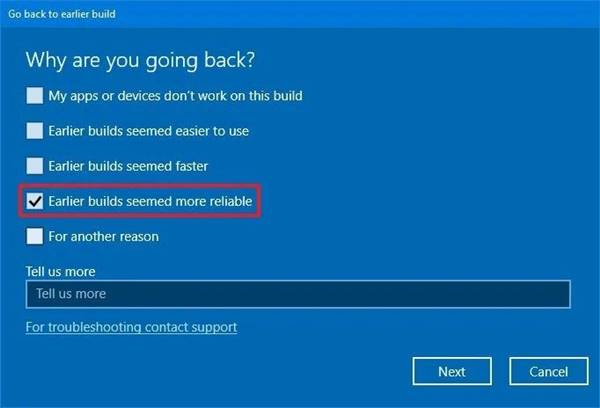
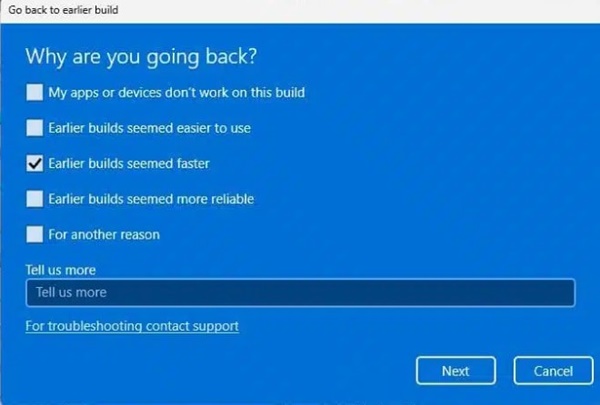
5. On the next pop-up, select the reason for rollback and click the Next button.
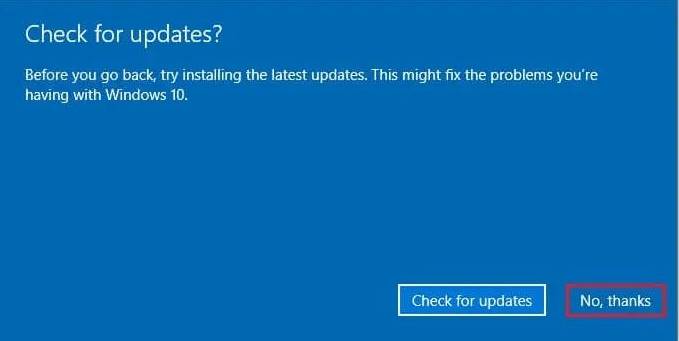
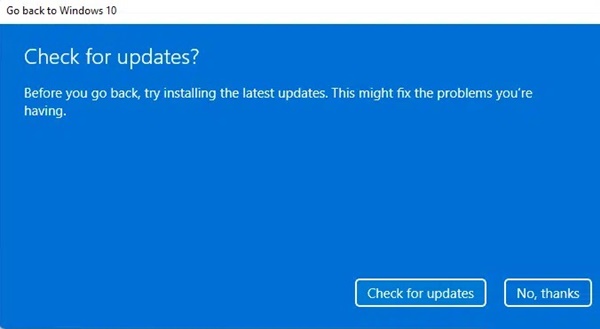
6. On the Check for Updates pop-up, select the No Thanks option.
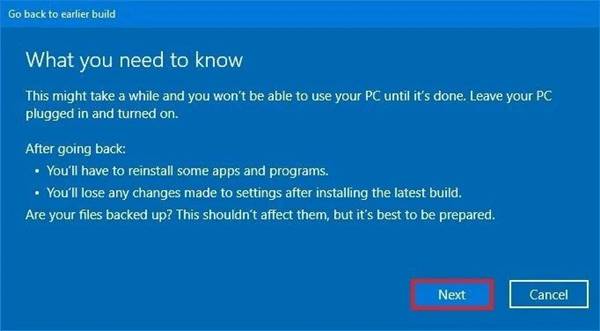
7. On the next screen, click on the Next button.
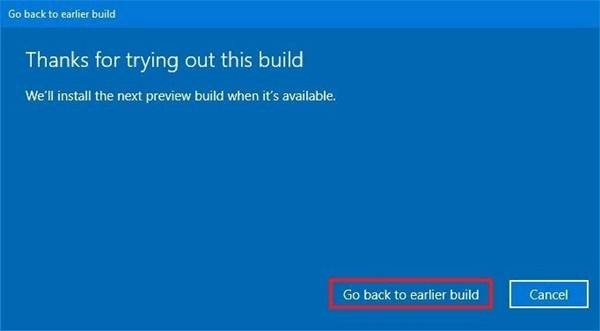
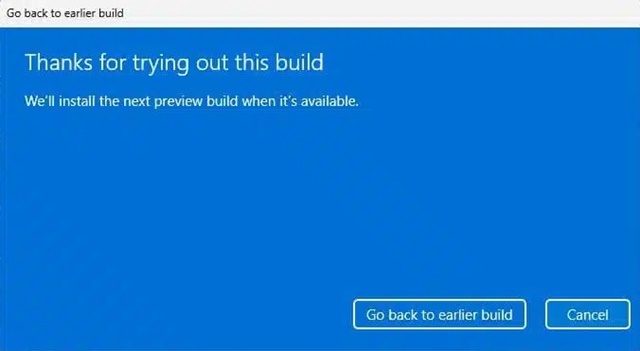
8. On the Final screen, click on the Go back to earlier build option.
9. Windows 10 will reboot now and will start the rollback process. Depending on your Processor & RAM, the processor might take a few minutes to complete.
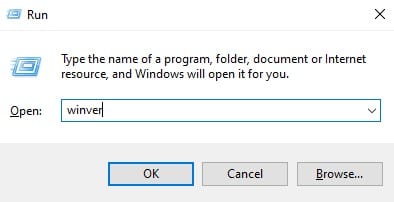
10. Once the PC boots up, press Windows Key + R button to open the Run dialog box. On the Run dialog box, enter ‘winver‘ and hit the Enter button. This will show you the current version of Windows, including the build you are using.
That’s it! You are done. Please remember that this method will only work within the 10-day time frame that Microsoft offers for rollback. If the ten day period has passed, you can’t roll back to the previous version through this method.
Rollback Windows Updates (Windows 11)
If you use Windows 11, follow these steps to roll back Windows updates. Here’s how to roll back Windows 11 updates in easy steps.
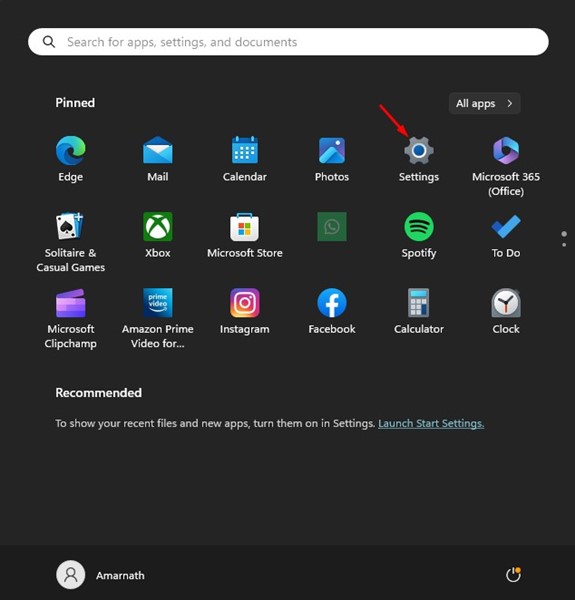
1. Click on the Windows 11 Start button and select Settings.
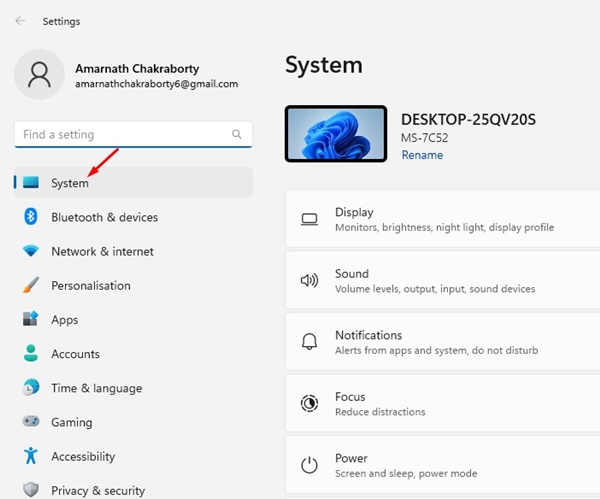
2. When the Settings app opens, switch to the System tab.
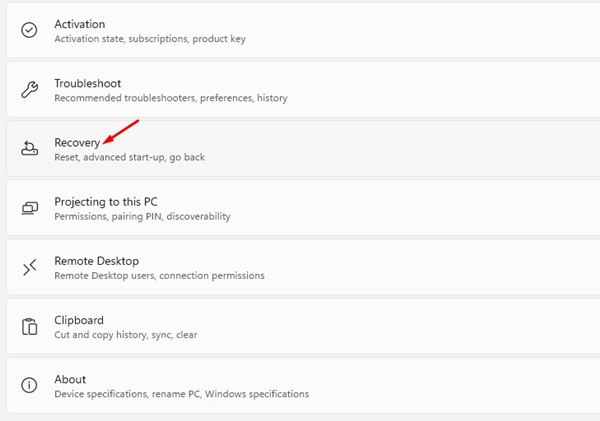
3. On the right side, scroll down and click on Recovery.
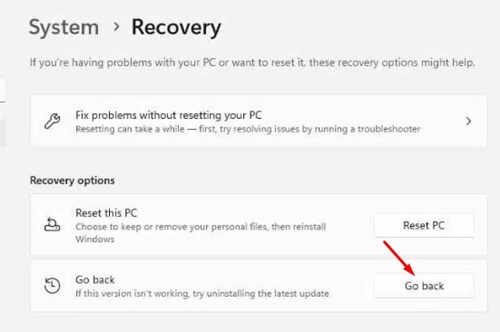
4. Under the Recovery options section, click the Go Back button.
5. Now, on the Why are you going back Window, select the reason and click Next.
6. Now, Windows 11 will ask you to check for new updates. Click on the No, thanks button.
7. Reach the final screen and select Go back to earlier build button.
That’s it! This is how you can roll back Windows updates on your Windows 11 computer.
So, this article is all about How to Rollback major Windows 10 updates in 2021. I hope this article helped you! Please share it with your friends also. If you have any doubts, let us know in the comment box below.


