While using a computer, it’s very much possible for us to get carried away with our work and forget to do important things. If you are using Windows 11, you can use the Clock app to set the alarm for your most important tasks.
The new Clock app of Windows 11 provides many useful features besides setting alarms. You can use it to boost your focus by playing Spotify music, setting repetitive alarms, creating a to-do list, and more.
We have shared many articles on the new clock app of Windows 11. And today, we will be discussing how to set alarms & timers in the new Windows 11 operating system. Hence, if you’re interested in setting alarms & timers on Windows 11 PC, you’ve landed on the right page.
Below, we have shared a step-by-step guide on how to set alarms & timers on the new Windows 11 PC. The steps were going to be very easy; follow them as we have mentioned. Here’s what you need to do.
1) Set the Alarm in Windows 11
You can use the new Clock app of Windows 11 to set Alarms. Here’s how to set Alarms on Windows 11 PC.
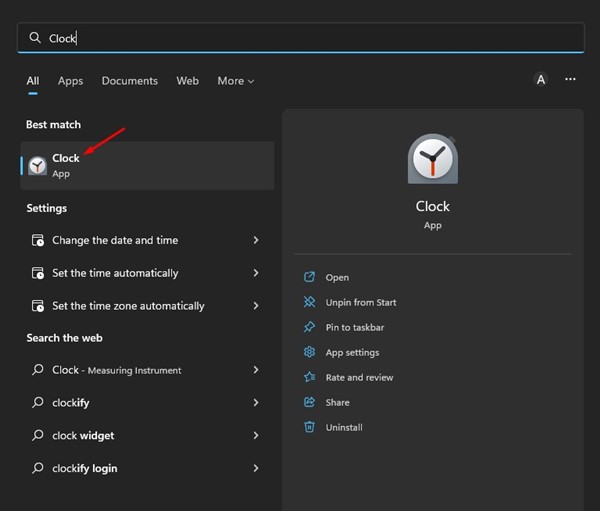
1. First, click the Windows 11 Search and type in ‘Clock‘. Next, open the Clock app from the list of matching results.
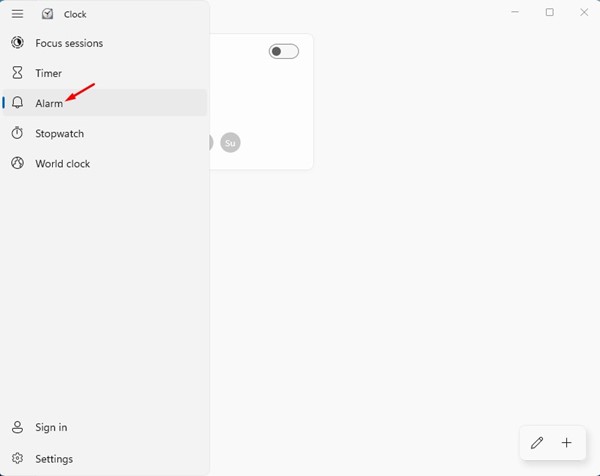
2. Now, you will see the main interface of the Clock app. To set the alarm, click on the Alarm icon in the left sidebar.
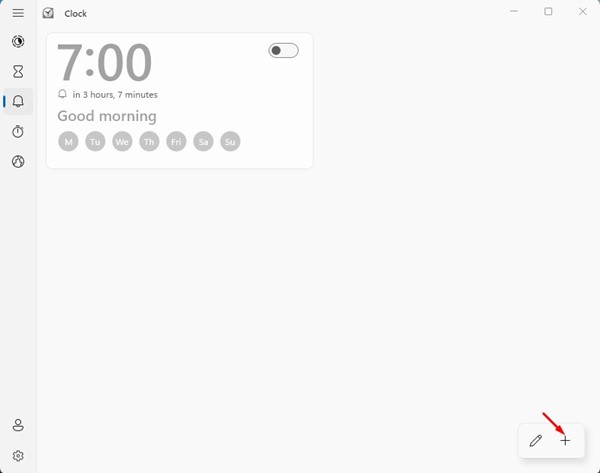
3. On the Alarm screen, click on the (+) button at the bottom right corner of the screen.
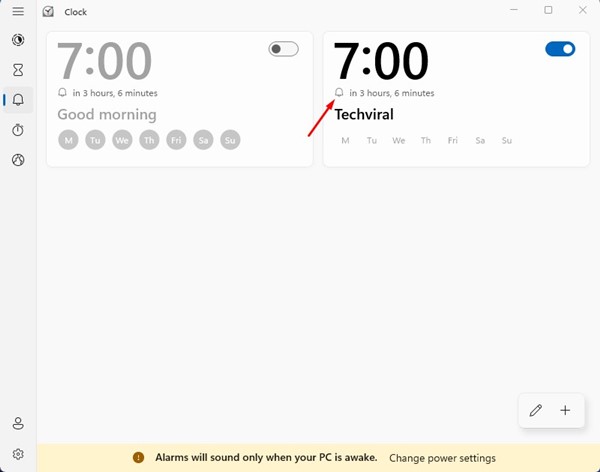
4. On the Add new Alarm screen, enter the Alarm time, name, set the alarm tune, and snooze time.
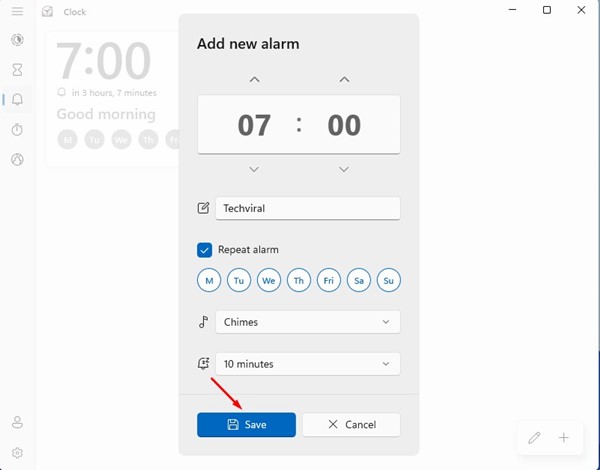
5. Once done, click on the Save button.
6. The new alarm will be shown on the Alarm screen. You need to enable the toggle beside the alarm to enable the alarm.
That’s it! This is how you can set an Alarm on the new Windows 11 computer.
2) How to Set Timers in Windows 11
To set Timers in Windows 11, you must use the same Clock app. Here’s how you can set timers in Windows 11 operating system.
1. First, click on the Windows 11 search and type in Clock. Next, open the Clock app from the list of matching results.
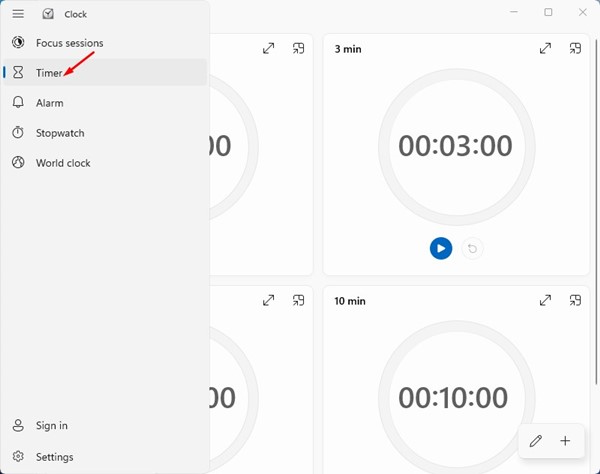
2. On the Clock app, click on the Timer icon in the left sidebar.
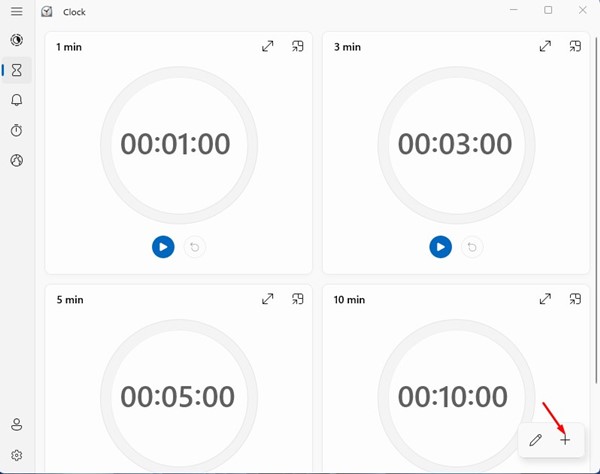
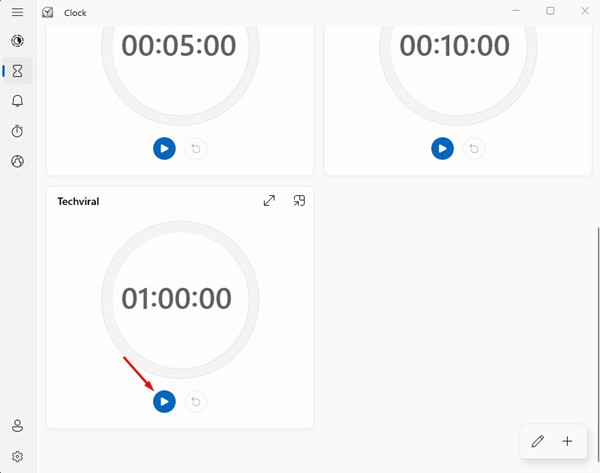
3. On the Timer screen, you will find a few pre-built Timer sets. If you want to create your timer, click on the (+) button at the bottom-right corner.
4. Set the time and timer name on the Add new timer prompt. Once done, click on the save button.
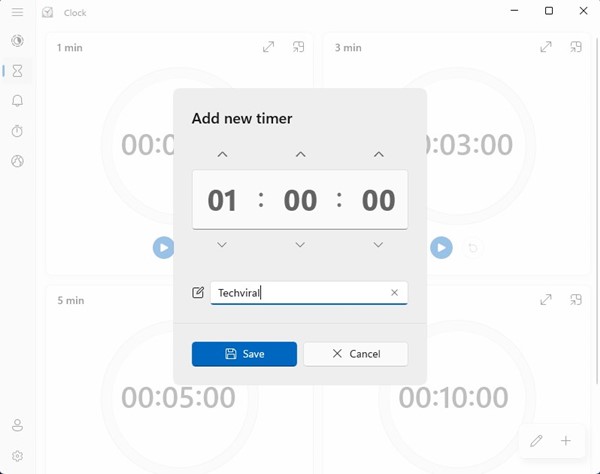
5. On the timer screen, click on the Start button underneath the timer to start it.
That’s it! This is how you can set timers in the new Clock app of Windows 11.
Also read: How to Fix Windows 11 Not Updating Time & Showing Wrong Time
So, these are some of the simple steps to set alarms & timers in the new Windows 11 operating system. Some third-party apps for the same purpose are available on the web, but you don’t need one. If you need more help in setting alarms & timers in Windows 11, let us know in the comments below.


