There are almost hundreds of screenshot programs available for Windows 10. Most of the screenshot utilities for Windows 10 are available for free. You can use those third-party programs to capture a selected area or an entire webpage.
However, the problem with third-party screenshot utilities is that they don’t include the mouse cursor in the screenshots. As soon as you capture the screen, the mouse cursor is gone.
Even the built-in Snipping tool and Print Scr function don’t include the mouse cursor in the screenshots. However, while guiding someone through a screenshot, sometimes you may want to have the mouse cursors.
Also read: Best Screen Recording Software For Windows 10/11
Capture Screenshot With Mouse Cursor On Windows 10/11
Fortunately, there are quite a few ways to capture a screenshot with a mouse cursor in Windows 10. Here we have listed the two best methods to capture a screenshot with a visible Mouse cursor on Windows 10. Let’s check out.
Using Steps Recorder
Well, Steps Recorder is a built-in utility of the Windows operating system. It takes a screenshot of the steps, and even better, it includes the mouse cursor in these screenshots.
It’s a video recorder that records your steps. So, you have to compromise with the image quality.
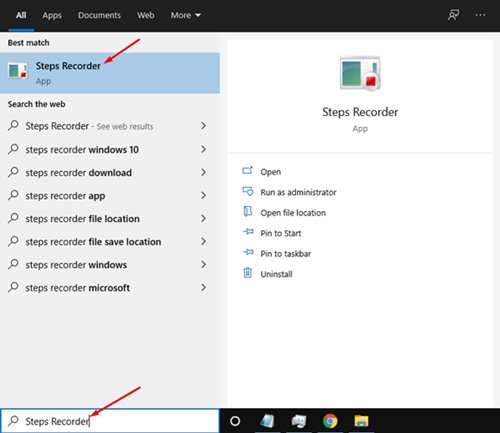
1. First, open the Windows 10 start menu and search for Steps Recorder. Next, open Steps Recorder from the list.
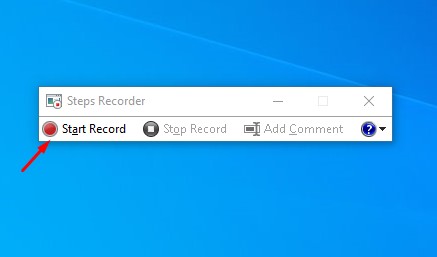
2. The Steps Recorder will open. Click the Start Record button to start the steps recorder.
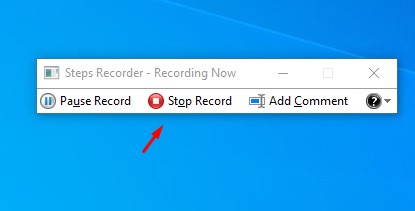
3. To stop the Steps Recorder, click the Stop Record button.
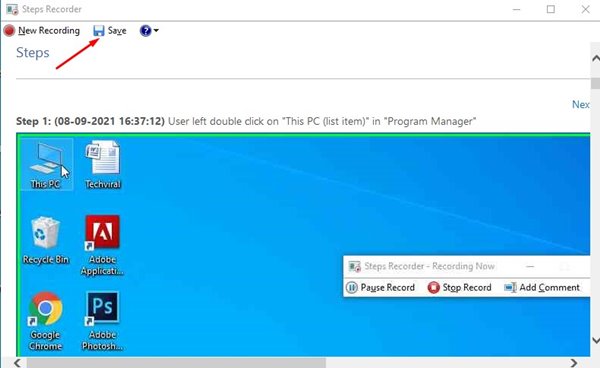
4. Once done, Steps Recorder will show you all the recorder steps.
5. To save the screenshot, you must right-click on the image and select the Save Picture option.
This is how you can capture the mouse cursor in Windows 10. The screenshots will have green borders. You can crop out the border using any photo editing application. That’s it! You are done.
Using IrfanView
IrfanView is a third-party screen capture program for Windows operating system. With IrfanView, you can easily capture screenshots with a visible mouse cursor.
For that, you need to download IrfanView on your system. Once downloaded, install the program and open it on your PC. Next, head to the Options > Capture/Screenshot. On the Capture setup, enable the Include mouse cursor option.
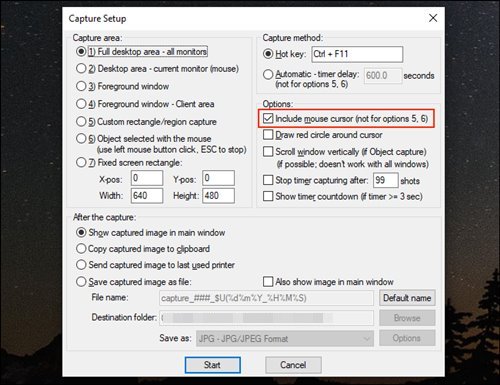
You can use IrfanView to capture a screenshot with a Visible Mouse Cursor. Once done, click the Start button to capture a screenshot with a mouse cursor. That’s it! You are done.
So, this guide is all about taking a screenshot with a visible mouse cursor in Windows 10. I hope this article helped you! Please share it with your friends also. If you have any doubts about this, let us know in the comment box below.


