There are plenty of ways to deal with storage issues on Windows 10. You can either delete the duplicate files, clean the junk/leftover files and what’s not. However, do you know that you can ease those cleaning processes?
If you are running the latest Windows 10, you can utilize the Storage Sense feature to clean junk files automatically. Not only junk files, but you can also configure storage sense to clean your recycle bin in a set time.
Also Read: How to Schedule a Shutdown in Windows 10 PC
Steps to Automatically Clean Windows of Unused Files
Hence, in this article, we will list down some of the best ways to automatically clean Windows of unused files. The methods shared below were easy to implement. Let’s check out.
1. Using Storage Sense
Well, Storage Sense is a built-in feature of Windows 10 that lets you free up storage space. Here’s how to configure and use the Storage Sense feature.
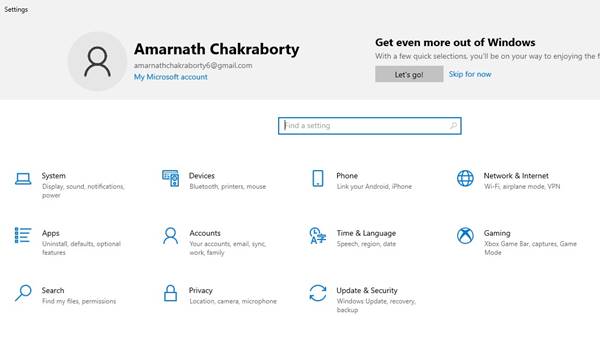
Step 1. First of all, press Windows Key + I button to open the Settings app.
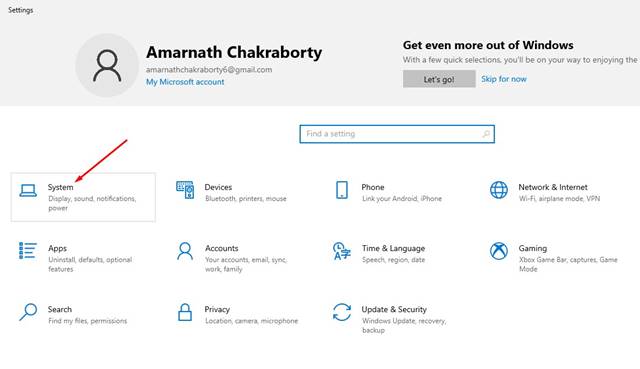
Step 2. On the Settings app, click on the System option as shown below.
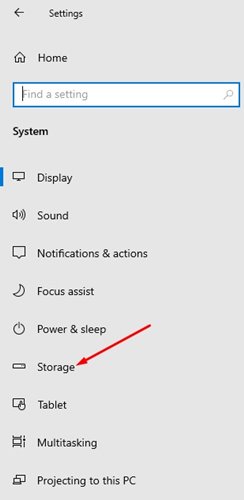
Step 3. On the left pane, click on the Storage option.
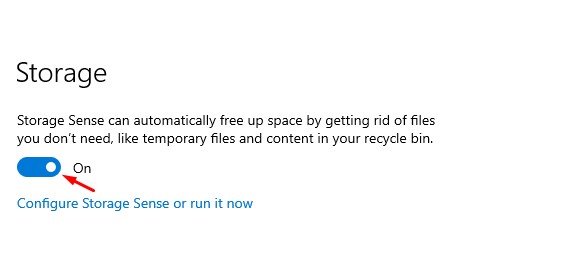
Step 4. Enable the Storage Sense feature as shown in the screenshot. Next, click on the Configure Storage Sense or run it now link.
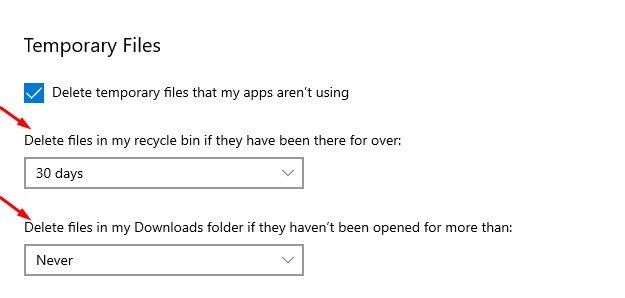
Step 5. Now enable the option – Delete temporary files that my apps aren’t using.
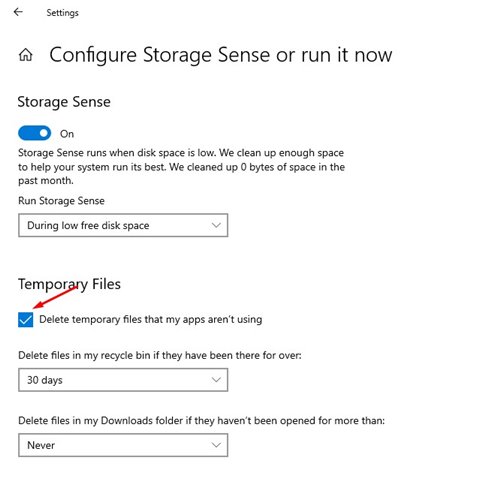
Step 6. Now select the number of days you want recycle bin to store your deleted files.
Step 7. If you are running sort of storage, click on the Clean now option on the Free up Space now section.
That’s it! You are done. This is how you can configure Storage sense on Windows 10.
2. Using Notepad
There are many tools available on the internet that can clean all the junk files stored on the Windows operating system for you. However, you can also use notepad to clean all junk files, eliminating a third-party tool. So let’s know how to use Notepad to clean junk files in Windows.
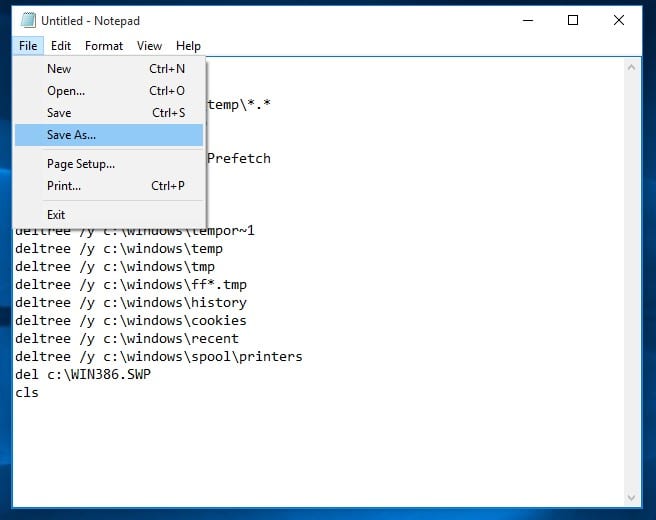
Step 1. First of all, restart your Windows computer and then open Notepad on your computer and paste the following code.
@echo off
color 4a
del /s /f /q c:\windows\temp\*.*
rd /s /q c:\windows\temp
md c:\windows\temp
del /s /f /q C:\WINDOWS\Prefetch
del /s /f /q %temp%\*.*
rd /s /q %temp%
md %temp%
deltree /y c:\windows\tempor~1
deltree /y c:\windows\temp
deltree /y c:\windows\tmp
deltree /y c:\windows\ff*.tmp
deltree /y c:\windows\history
deltree /y c:\windows\cookies
deltree /y c:\windows\recent
deltree /y c:\windows\spool\printers
del c:\WIN386.SWP
cls
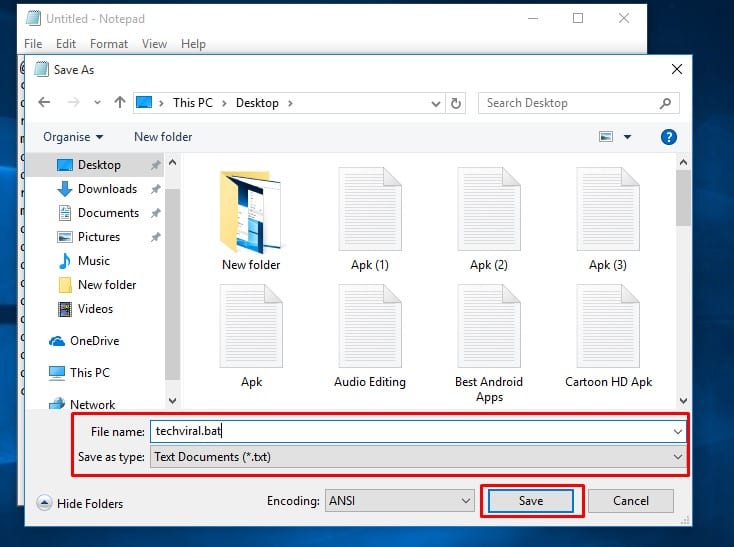
Step 2. In the next step, you need to save the notepad file on your desktop. For that, click on ‘File’ and then select Save as. Save the notepad file as techviral.bat
Step 3. Now you will see a new batch file on your desktop computer. You need to double-click on it to clean the junk file.
Well, the batch file clears all the junk files that are left by the apps. This trick will also help to improve the speed of your Windows 10 operating system.
3. Using CCleaner
CCleaner is one of the best and leading PC Optimization tools available for the Windows operating system. The great thing about CCleaner is that it effectively scans and cleans unwanted programs, temporary files, junk files from your computer. Here’s how you can use CCleaner on Windows 10.
Step 1. First of all, visit this link to download & install CCleaner on Windows 10 computer.
Step 2. Once downloaded, open the app and then click on ‘Cleaner’. Now select ‘Windows’ and then click on ‘Analyze’

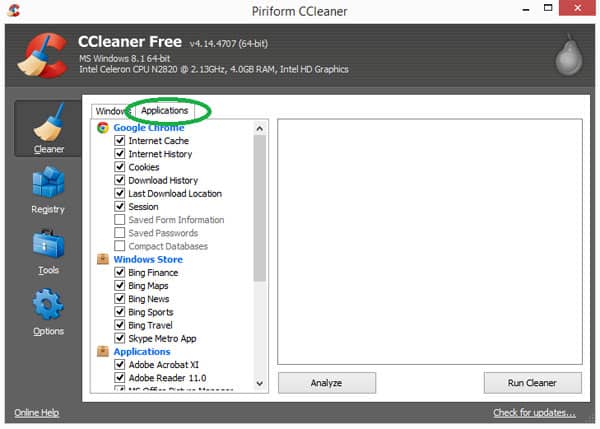
Step 3. Now, if you want to clean up the app data, click on the Applications tab and click on Analyze.
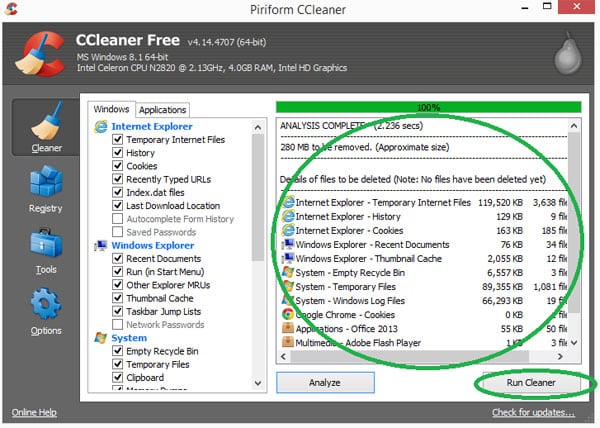
Step 4. Once done, CCleaner will scan for the selected files. Once done, it will list all files that can be deleted. Then, just click on the Run Cleaner option to clean those unused files.
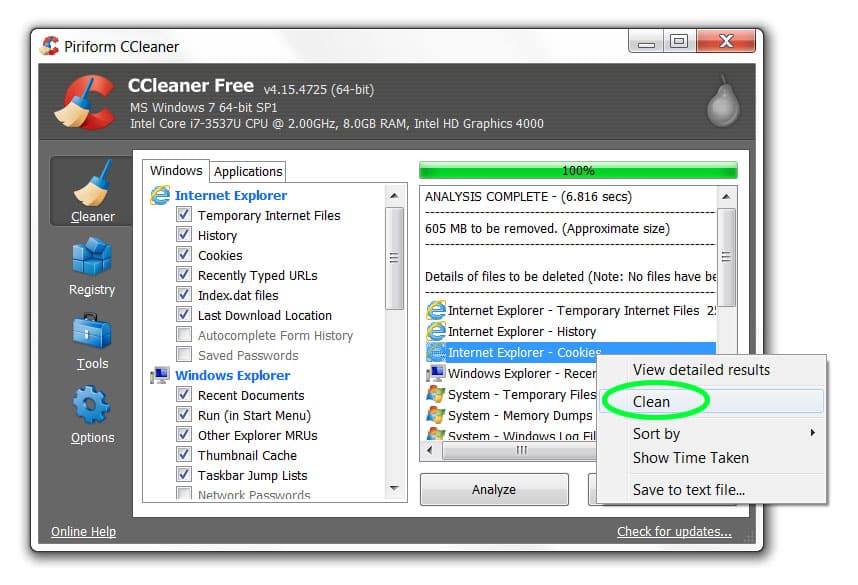
Step 5. If you want to remove individual items, then right-click on the file and select Clean.
That’s it; you are done! This is how you can use CCleaner on your Windows 10 operating system to automatically clean Windows of unused files.
So, this article is all about how to clean Windows of unused files automatically. I hope this article helped you! Please share it with your friends also. If you have any doubts related to this, let us know in the comment box below.


